Painted Yellow Dresser Makeover
This post may contain affiliate links, meaning I make a small commission on qualifying purchases.


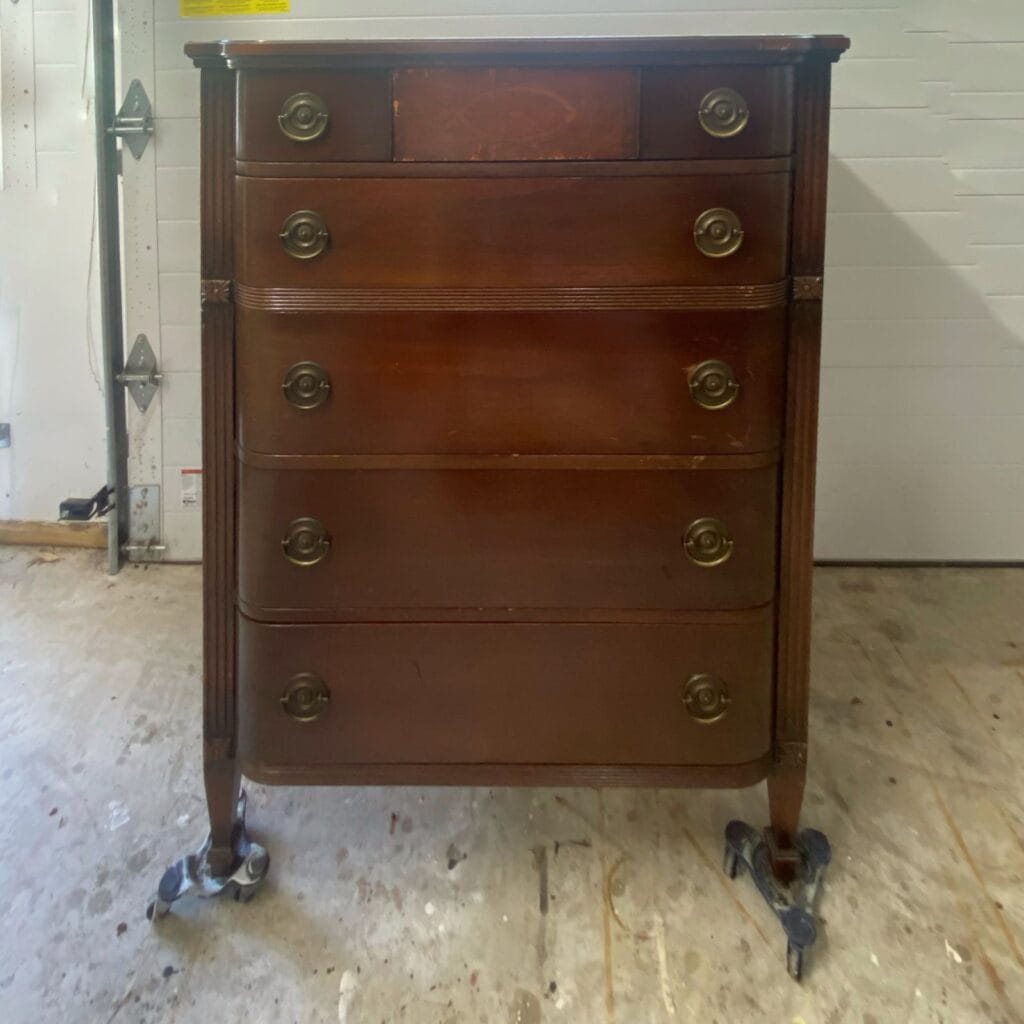
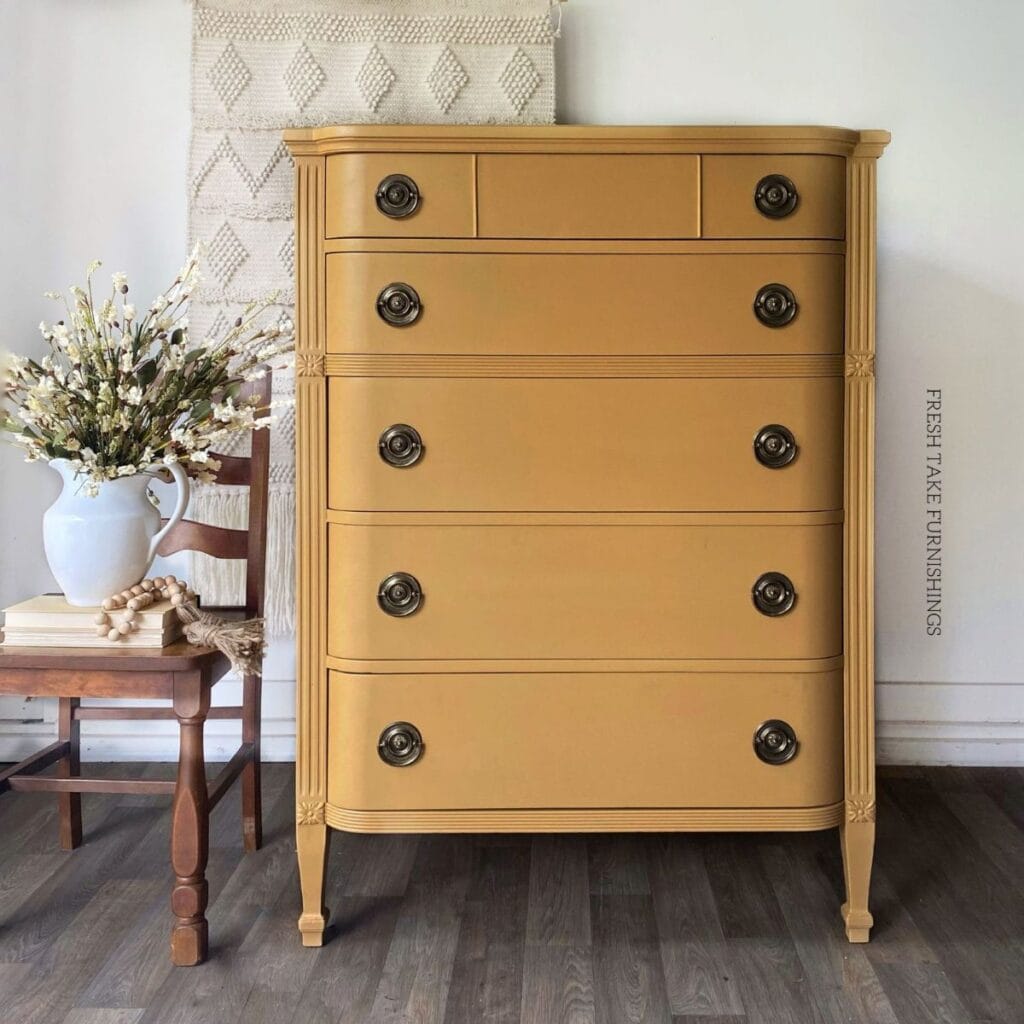
Whenever I see these vintage dressers with Hepplewhite hardware, I always scoop them up! They are my favorite style to refinish, and I just love that they look great in any color. For this one, I decided I wanted to do something fun and chose a beautiful yellow paint color.
In these quick guides, I walk through the steps and products I used for a particular makeover. Interested in learning more about a particular step or process? For more information, please refer to the links at the bottom of this post, where I provide detailed tutorials on these steps.
A note on product links
This post contains Amazon affiliate links, meaning I get a small commission on qualifying purchases, at no cost to you.
Would you like to save this?
Makeover Steps:
- Cleaning. I cleaned the exterior of the piece with a degreaser, using these ScotchBrite pads to really scrub off any dirt and grime, then wiped back with a microfiber cloth. I then clean the inside, bottom, and back with a mixture of water and Dawn dish soap.
- Repair work. This piece only needed some minor filling on the top drawer and top. I used All Purpose Bondo for the larger sections and Bondo Glazing and Spot Putty for the smaller dings and scratches. These plastic spreaders are my favorite for applying both of these products.
- Scuff sanding. I scuff sanded the entire piece with 220 grit sandpaper using my SurfPrep sander. However, you don’t need a fancy sander to do this step! Hand sanding works fine – you aren’t trying to remove the finish, just scuff up the existing finish to help with primer and paint adhesion.
- Prime. This dresser is mahogany veneer, which is very prone to bleeding through water-based paints and products. I used a shellac-based primer, BIN, to prime and seal this piece, doing 3 coats and letting the primer cure overnight before painting.
- Paint. I painted this dresser in the fun color Golden Hour by Melange Paints. It is a beautiful muted golden yellow!
- Topcoat. I sealed this piece with one of my favorite topcoats, wax finish varnish by Polyvine. I find this to be the easiest waterbased topcoat to apply if you are using a brush. I has a good work time and doesn’t appear cloudy (even on darker colors). I use this brush to apply. The combo of these products gives me a smooth and reliable finish.
- Update hardware. I wanted to keep this beautiful vintage brass hardware, so I cleaned it by boiling it in a 50/50 mixture of vinegar and water for 10 minutes, then scrubbed with 0000 grade steel wool and Bar Keepers Friend. This gave a really bright brass finish, so I used a combination of Rub n’ Buff shades (Ebony and European Gold) to give them a more vintage feel.
Want to learn more about each step? Check out the links below:
- Prepare Furniture for Paint: Cleaning and Sanding
- How to Fix Furniture: Common Repairs Before Painting
- Priming Furniture: Everything You Need to Know
- Hand Painted Furniture: How to Get A Flawless Finish With a Brush
- How to Seal Painted Furniture: Protecting With a Top Coat
New to furniture painting?
Get my FREE Beginner’s Guide to Painting Furniture! This guide walks through the steps of a furniture painting makeover and includes a downloadable project planner and supply checklist.