Painted Writing Desk Makeover
This post may contain affiliate links, meaning I make a small commission on qualifying purchases.

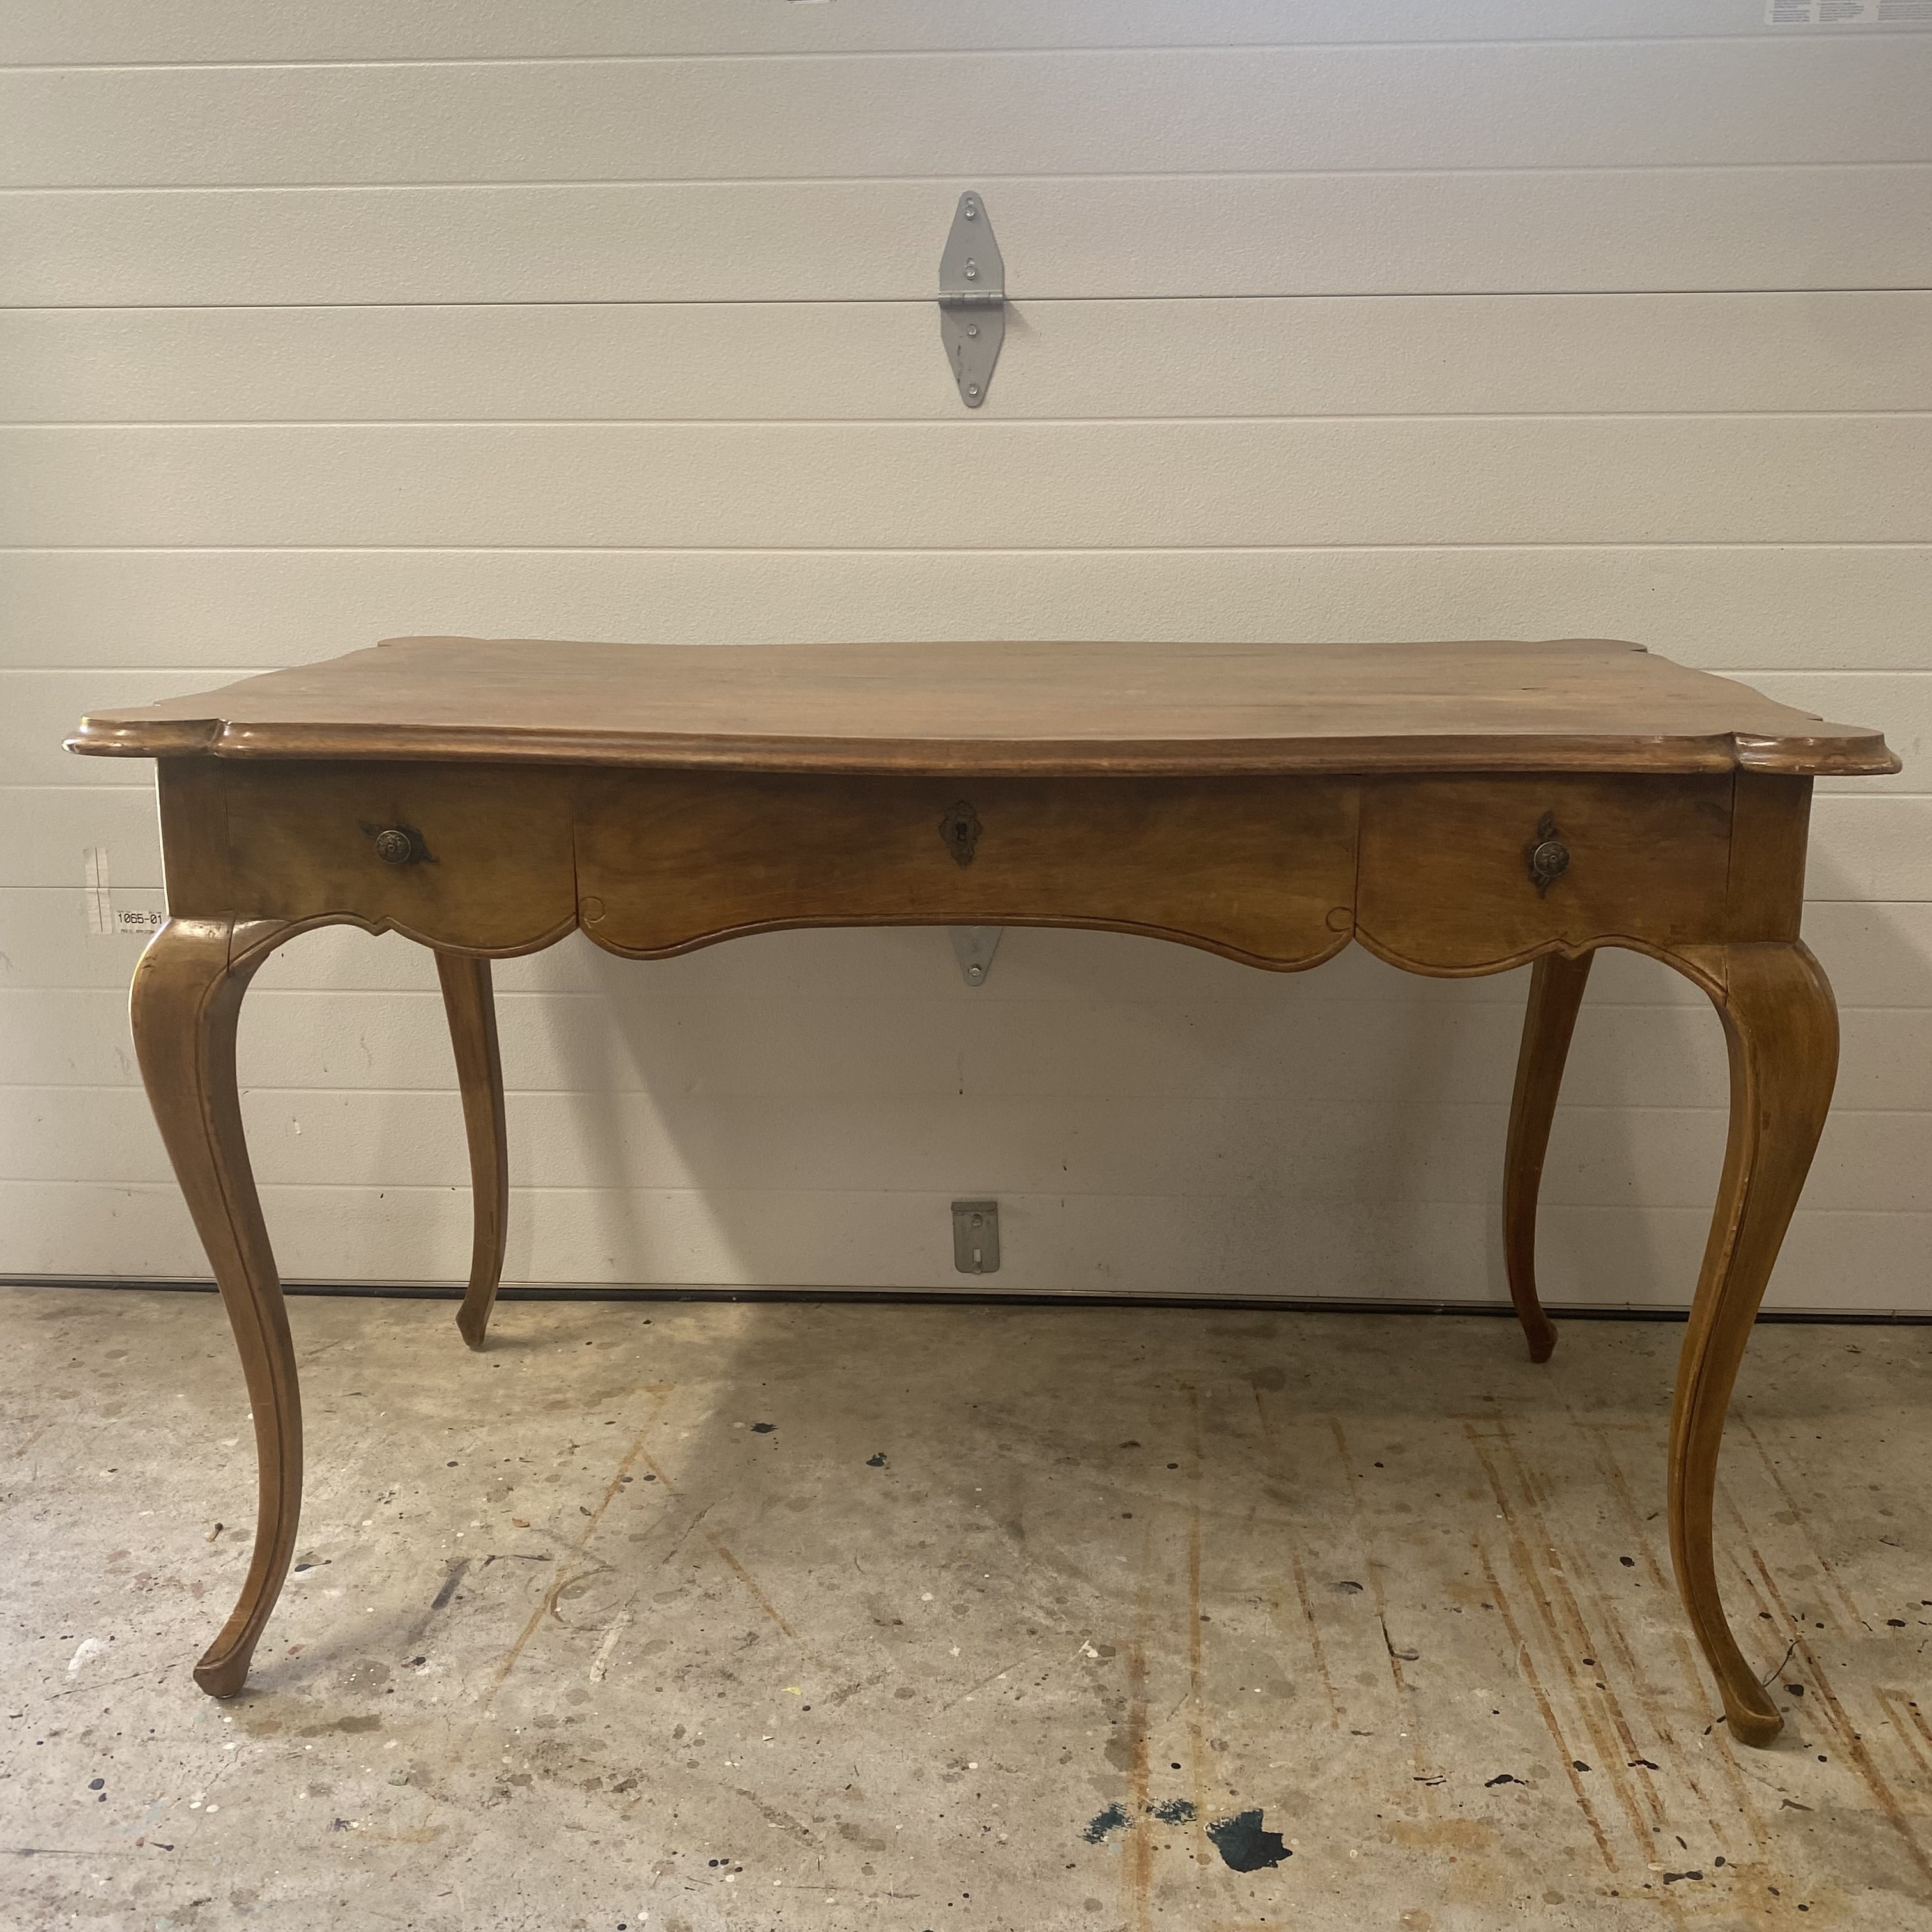
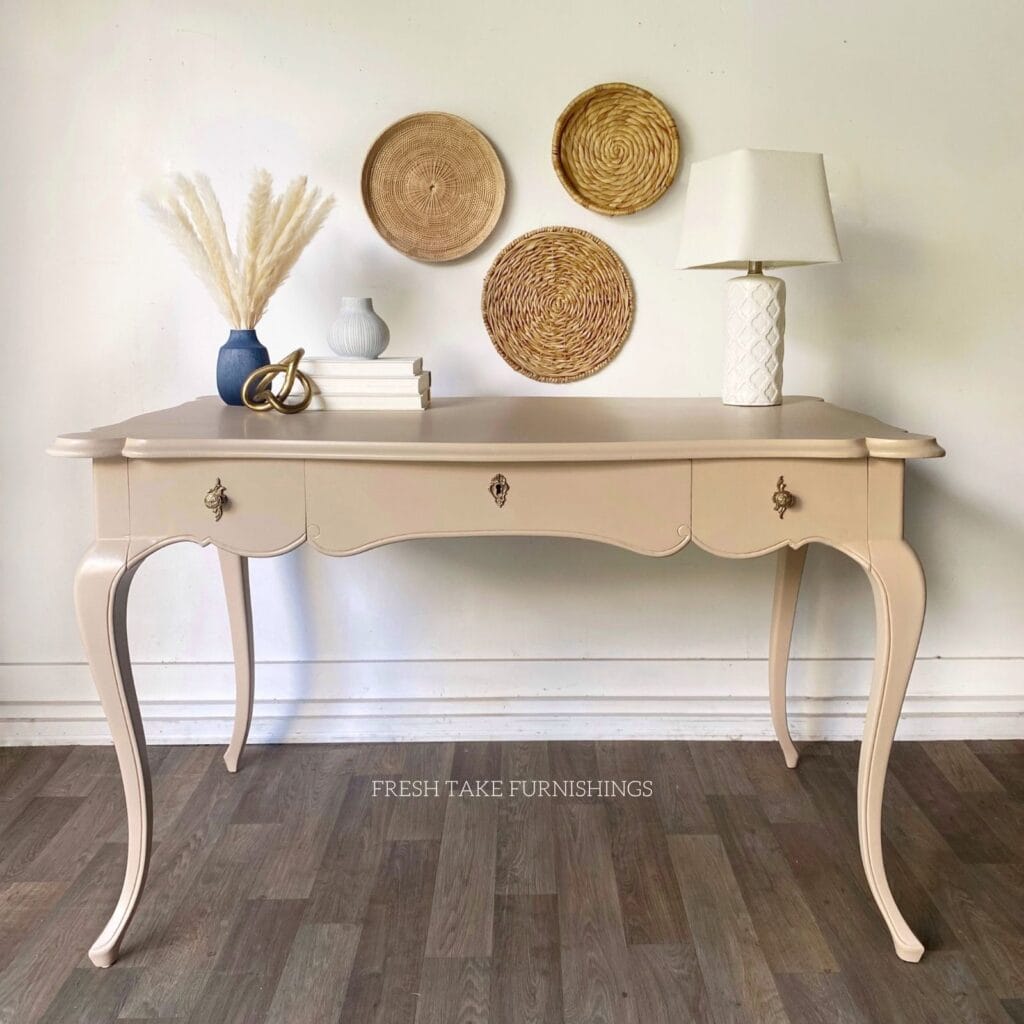
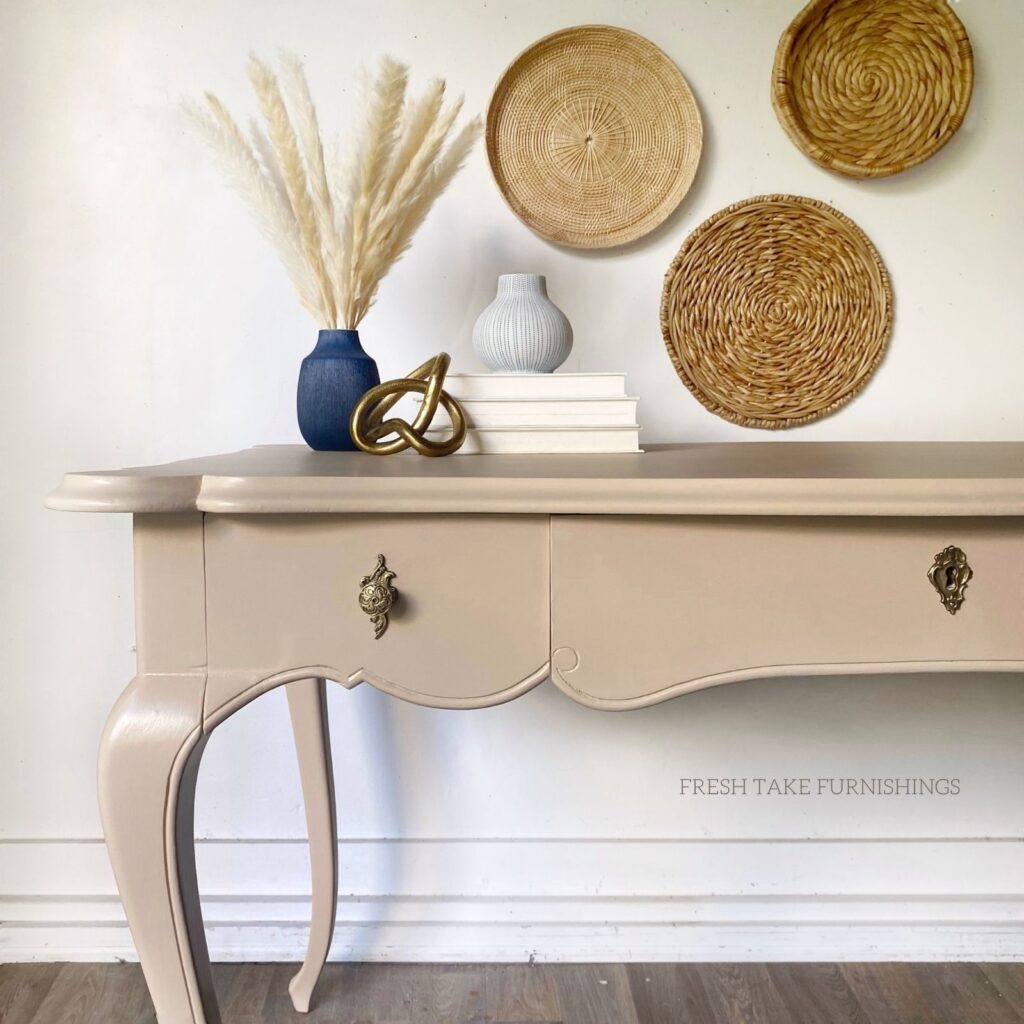
I was lucky enough to have a friend reach out who had a neighbor moving and looking to get rid of some furniture. And when I saw this writing desk, I loved the size and style! The top was in bad shape, but I knew with some veneer repairs and paint, I could give it a fresh new look. I ended up loving the finished desk so much that it now resides in my primary bedroom.
In these quick guides, I walk through the steps and products I used for a particular makeover. Interested in learning more about a step or process? Please refer to the links at the bottom of this post, where I provide detailed tutorials on these steps.
A note on product links
This post contains Amazon affiliate links, meaning I get a small commission on qualifying purchases, at no cost to you.
Would you like to save this?
Makeover Steps:
- Cleaning. I cleaned the exterior of the piece with a degreaser, using these ScotchBrite pads to scrub off any dirt and grime, then wiped it back with a microfiber cloth. Then I’ll wipe back the piece again with water and a clean microfiber cloth.
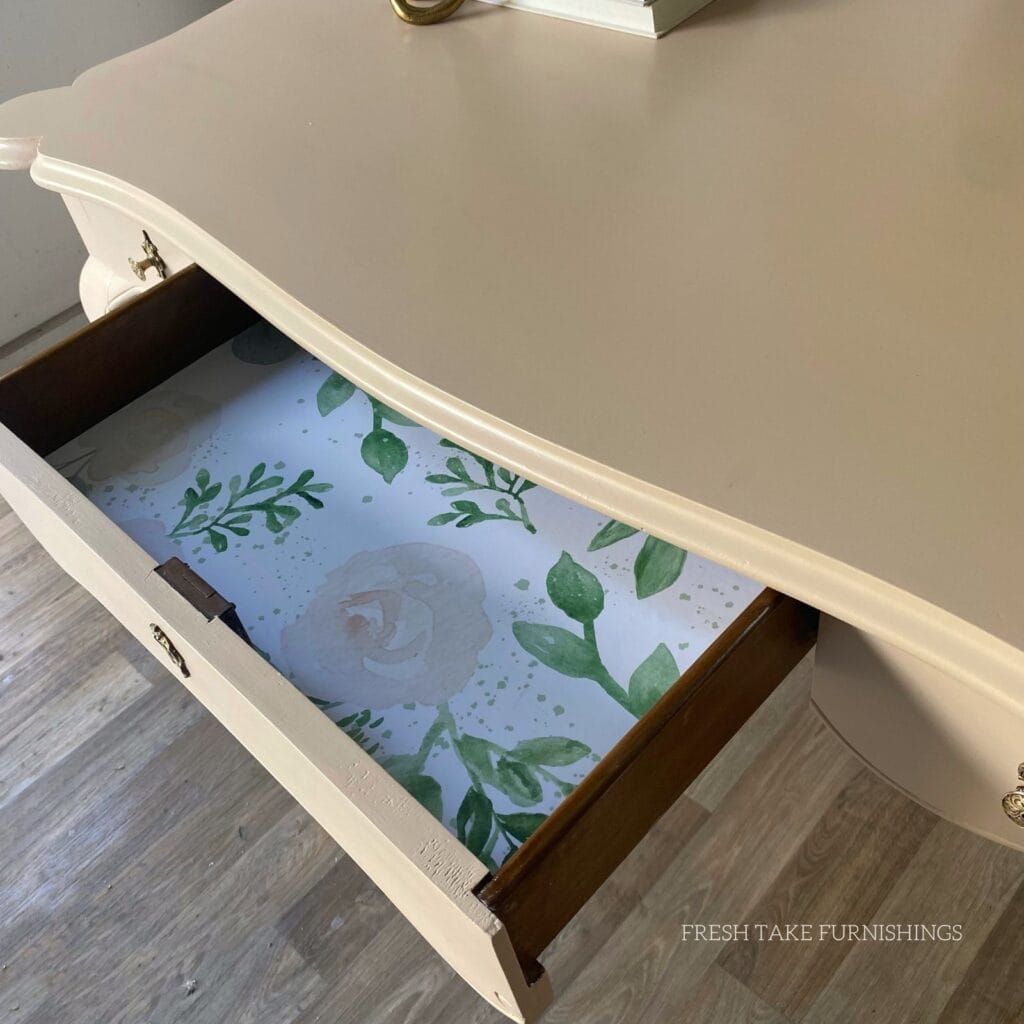
- Repair work. The biggest issue with this piece was the failing veneer on the top. I chipped off as much as I could using this multipurpose tool until the areas looked like this:
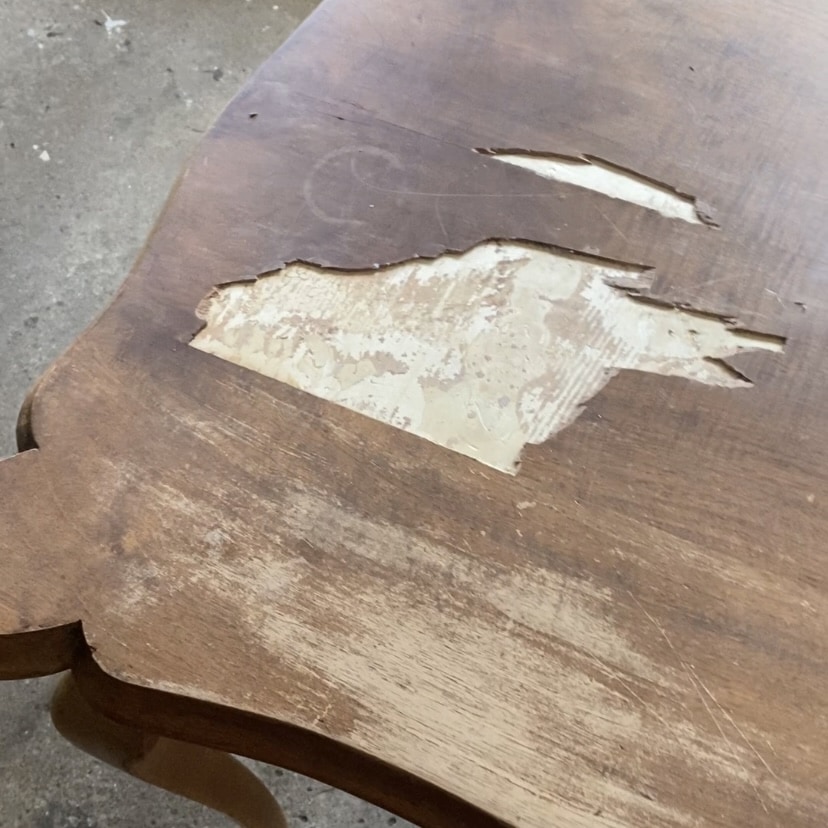
- Then I mixed up the two-part All Purpose Bondo and filled these areas, working quickly in sections before the Bondo dried. These plastic spreaders are my favorite for applying Bondo. Once dry, I sanded the areas smooth and repeated this process to completely fill any missing spots. More details on Bondo can be found in this post.
- Scuff sanding. I scuff-sanded the entire piece with 220 grit sandpaper using my SurfPrep sander. However, you don’t need a fancy sander to do this step! Hand sanding works fine – you aren’t trying to remove the finish, just scuff up the existing finish to help with primer and paint adhesion.
- Prime. Because I was going with a light paint color, I wanted to use a white primer I used aMelange Paints Stain Blocking Primer, to prime and seal this piece, doing 2 coats and letting the primer cure overnight before painting. This primer will also help prevent any bleed-through of tannins or stains into your final finish.
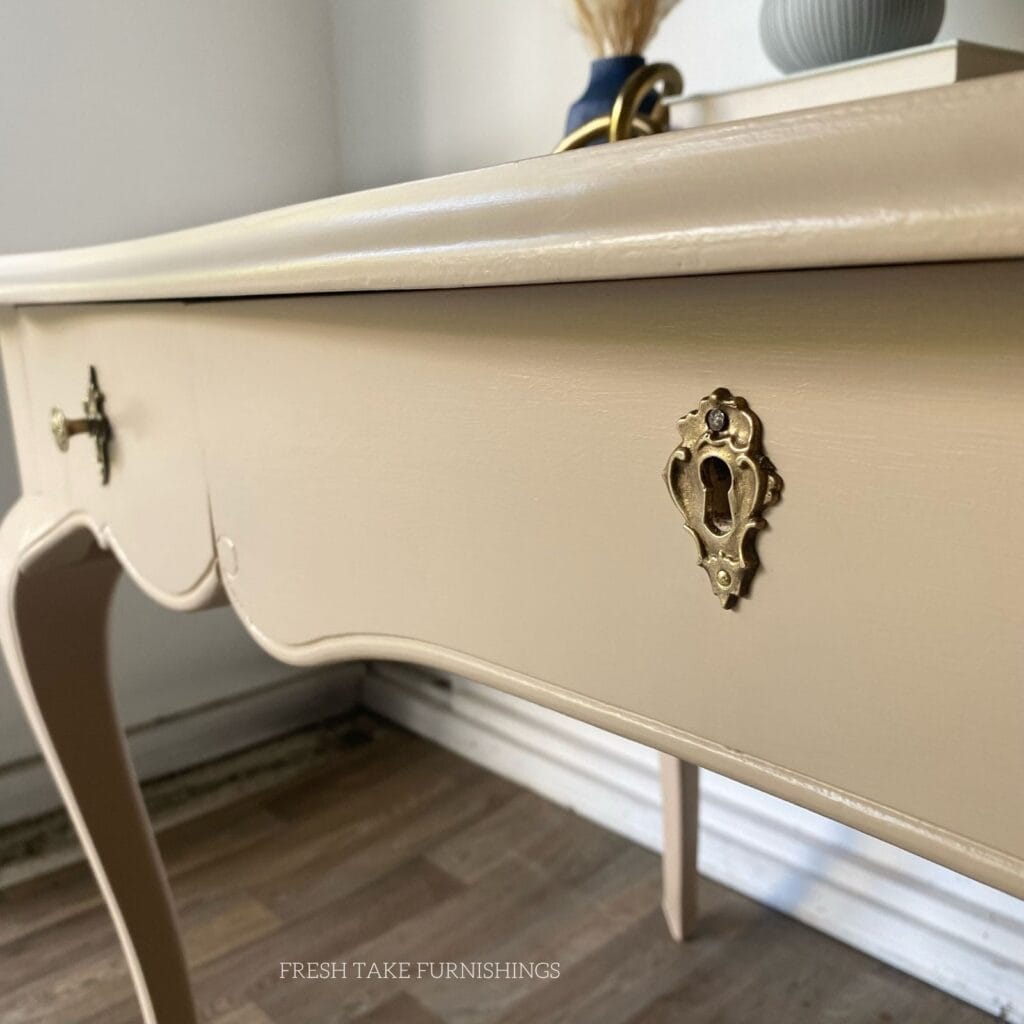
- Paint. I painted this dresser in the color Ginger Apricot by Melange Paints (a discontinued color).
- Topcoat. I sealed this piece with one of my favorite topcoats, General Finished High Performance Top Coat in flat. I find this the easiest water-based topcoat to apply if you use a brush. It has a good work time and doesn’t appear cloudy (even on darker colors). I use this brush to apply. The combo of these products gives me a smooth and reliable finish.
- Update hardware. I wanted to keep this beautiful vintage brass hardware, so I cleaned it by boiling it in a 50/50 mixture of vinegar and water for 10 minutes, then scrubbed it with 0000 grade steel wool and Brasso.

More detailed articles on the Steps taken in this Makeover:
New to furniture painting?
Get my FREE Beginner’s Guide to Painting Furniture! This guide walks through the steps of a furniture painting makeover and includes a downloadable project planner and supply checklist.