How To Paint Wash Furniture
This post may contain affiliate links, meaning I make a small commission on qualifying purchases.


So what is a paint wash anyway? Simply put, it is diluted paint that adds a semi-transparent layer of color over your wood furniture. It’s perfect for toning down orange or yellow undertones, evening out blotchy wood, or achieving a light, natural finish on furniture. If you want soft color without full coverage, learning how to paint wash is an easy and beginner-friendly solution!
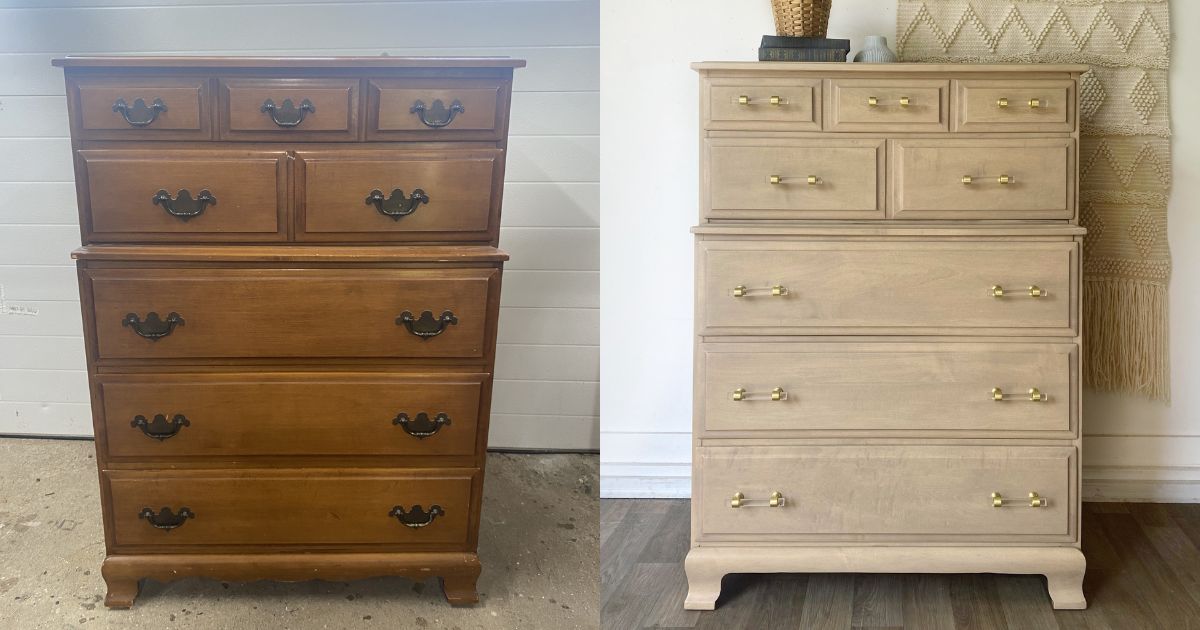
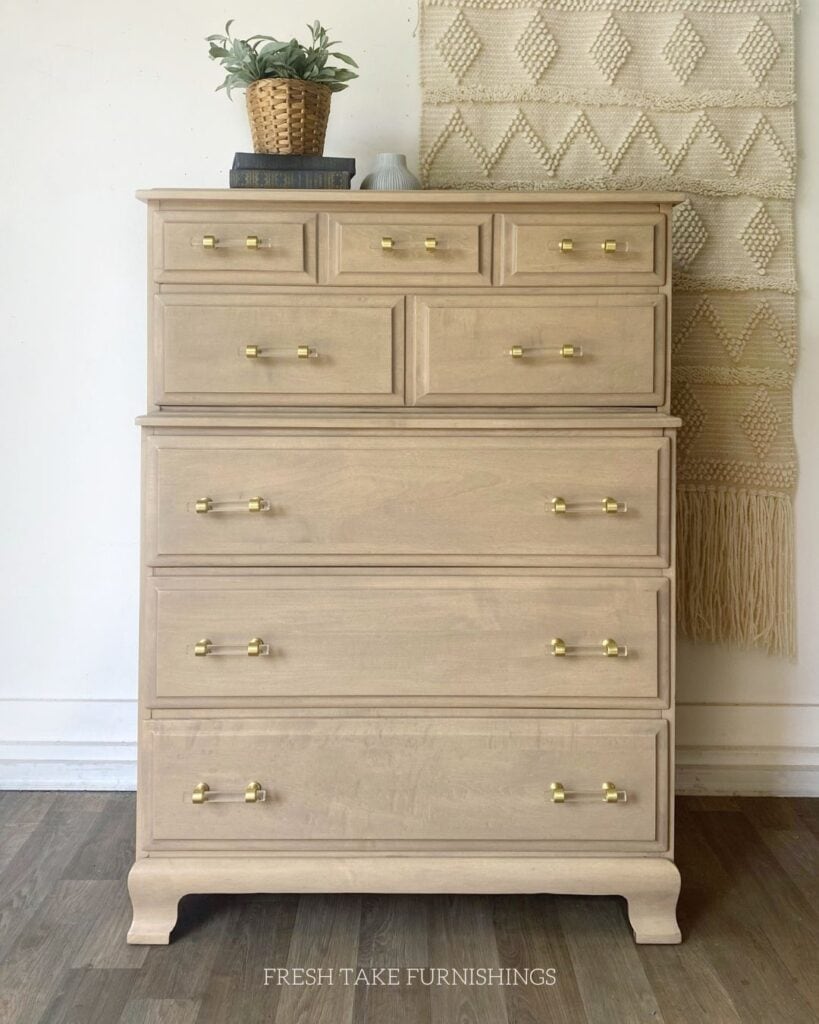
Recently, I had a good friend reach out to me about painting furniture for her daughter. They were vintage maple pieces that had been in their family for years, and were in great condition, but didn’t match the style of her daughter’s bedroom. After coming up with some different ideas, we decided to ditch the solid paint and do a light wood finish using a paint wash.
Key Takeaways: How To Paint Wash Furniture
- A paint wash adds a semi-transparent layer of color to wood furniture, perfect for toning down undertones.
- Proper prep is crucial; removing the existing finish ensures an even application of the paint wash.
- Choose water-based paint like latex or acrylic for the wash; avoid alkyd and urethane paints.
- Mix paint with water, usually at a 1:2 or 1:3 ratio, and apply in sections for best results.
- This technique allows for a light, natural finish when updating vintage furniture.
Summarize & Save This Content
When to Paint Wash
This is a technique I use often! I’ll use it over an entire piece of furniture, on on smaller wood elements such as the top, drawer fronts, or when creating a paint dipped piece of furniture. Here is why I love doing it so much:
- Hide undertones: You want to counter the undertones in your wood (its too green, to yellow, or too pink for example).
- Light finish: Even if you love the raw look of the wood, sealing it with a top coat will darken the finish. Using a paint wash keeps it light.
- Hide imperfections: If your wood is naturally blotchy (hello maple!) a paint wash will mask those imperfections.
- Staining alternative: You can use a dark wash as an alternative to stain. It’s water based and easy cleanup.
Author’s Note
If you are looking to enhance and bring out the beauty of the wood grain, I recommend staining your furniture with an oil based stain. Paint washes cover up, while oil based products enhance.
Prepping Your Furniture
Like most furniture projects, the first part is all about proper prep. In order to do a paint wash, the entire existing finish needs to be removed. This can be achieved by stripping off the finish, sanding away the finish, or a combination of both. If you do not get all of the old finish removed, the paint wash will not cover evenly and it will look blotchy.
For this project, I decided to sand. I started with a carbide scraper (a must have furniture refinishing tool) to remove a significant amount of the finish, then sanded the rest. These were solid maple so I wasn’t concerned with sanding through veneer or anything else. If working on a veneered piece, I recommend using a stripper first.
Once you have removed all of the finish, you’ll need to decide what you think about the tone of the raw wood. If it is darker that you hoping or is a bit blotchy, you can use wood bleach to reduce blotchiness and lighten up the wood. I decided to do this, and then sanded the whole piece smooth again.
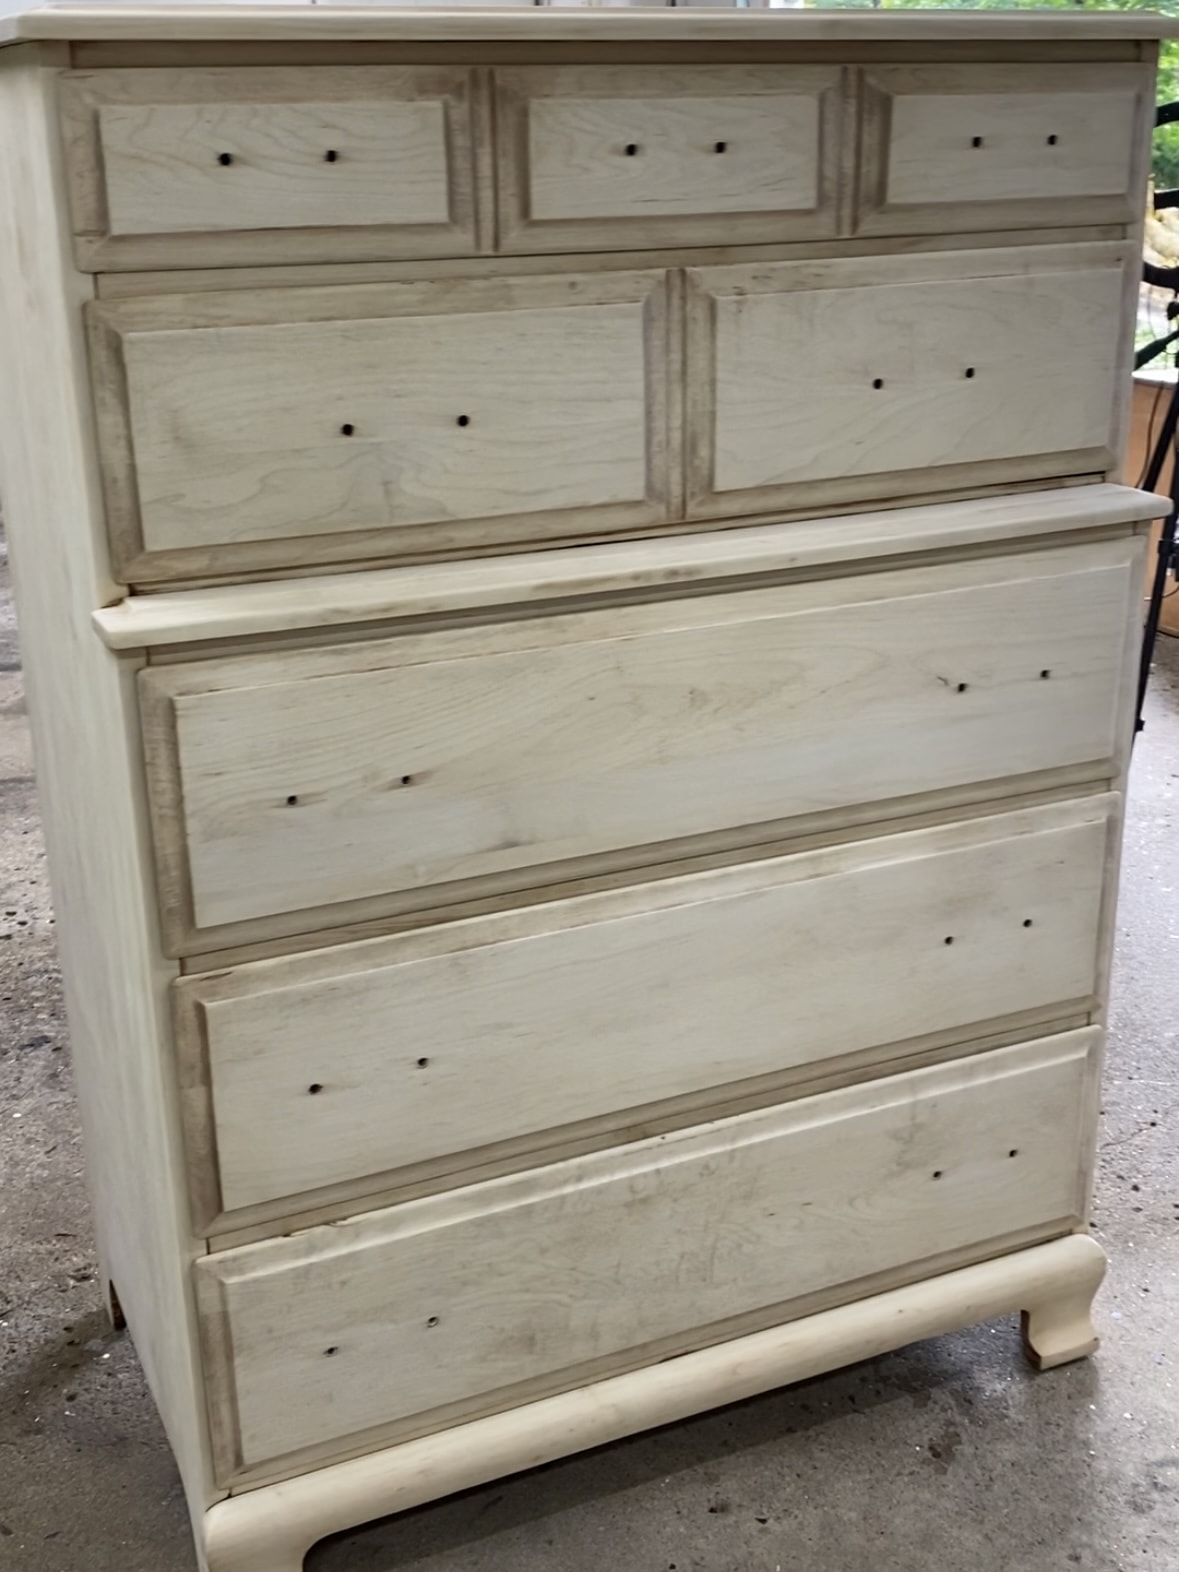
Here is the dresser after it has been stripped and bleached. You can see how blotchy the wood is. This is common for maple, and is one of the reasons a paint wash is a great option for refinishing maple furniture.
Prep Tip
Once you have removed the finish and bleached (if applicable) I recommend one final round of sanding with 220 grit to even everything out before applying the paint wash. Don’t go any higher in grit or you will close up the grain too much and the wash won’t soak in.
Picking A Paint
Picking The Type of Paint
The good news is that the type of paint you use doesn’t really matter that much, as long as it’s water based. I usually try and use leftovers I have on hand! It doesn’t matter if it is a paint that has a top coat or not, you will still need to seal it at the end. The only ones I would recommend avoiding would by alkyd/urethane/enamel paints (these are water based paints with oil based properties).
Picking The Color
You’ve heard the terms white wash, black wash, or maybe even tan wash. These are all types of paint washes in various colors. You can really use any color you like! Paint washes are a great way to get rid of any pink or yellow undertones in your wood. For example, a neutral paint with a hint of green will mask pink undertones. You can also use a dark brown or black as an alternative to traditional furniture staining.
Picking the right color can be a bit of an art and takes practice. I often end up mixing colors together to get the tone I am looking for. Use paint swatches to get an idea of the final color and test the wash in a small area if possible. Like solid paint, it will dry a different color than it is wet.
Would you like to save this?
For this project, I didn’t have any color I was trying to mask and I wanted to keep the finish light and neutral. So I went with a basic greige, the color Stone by Melange Paints.
Color Tip
If you are looking for a “raw wood” finish, pick a color that has the same tone as that raw wood. Adding a paint wash keeps your raw wood from darkening when sealing with a top coat.
Steps For Applying A Paint Wash
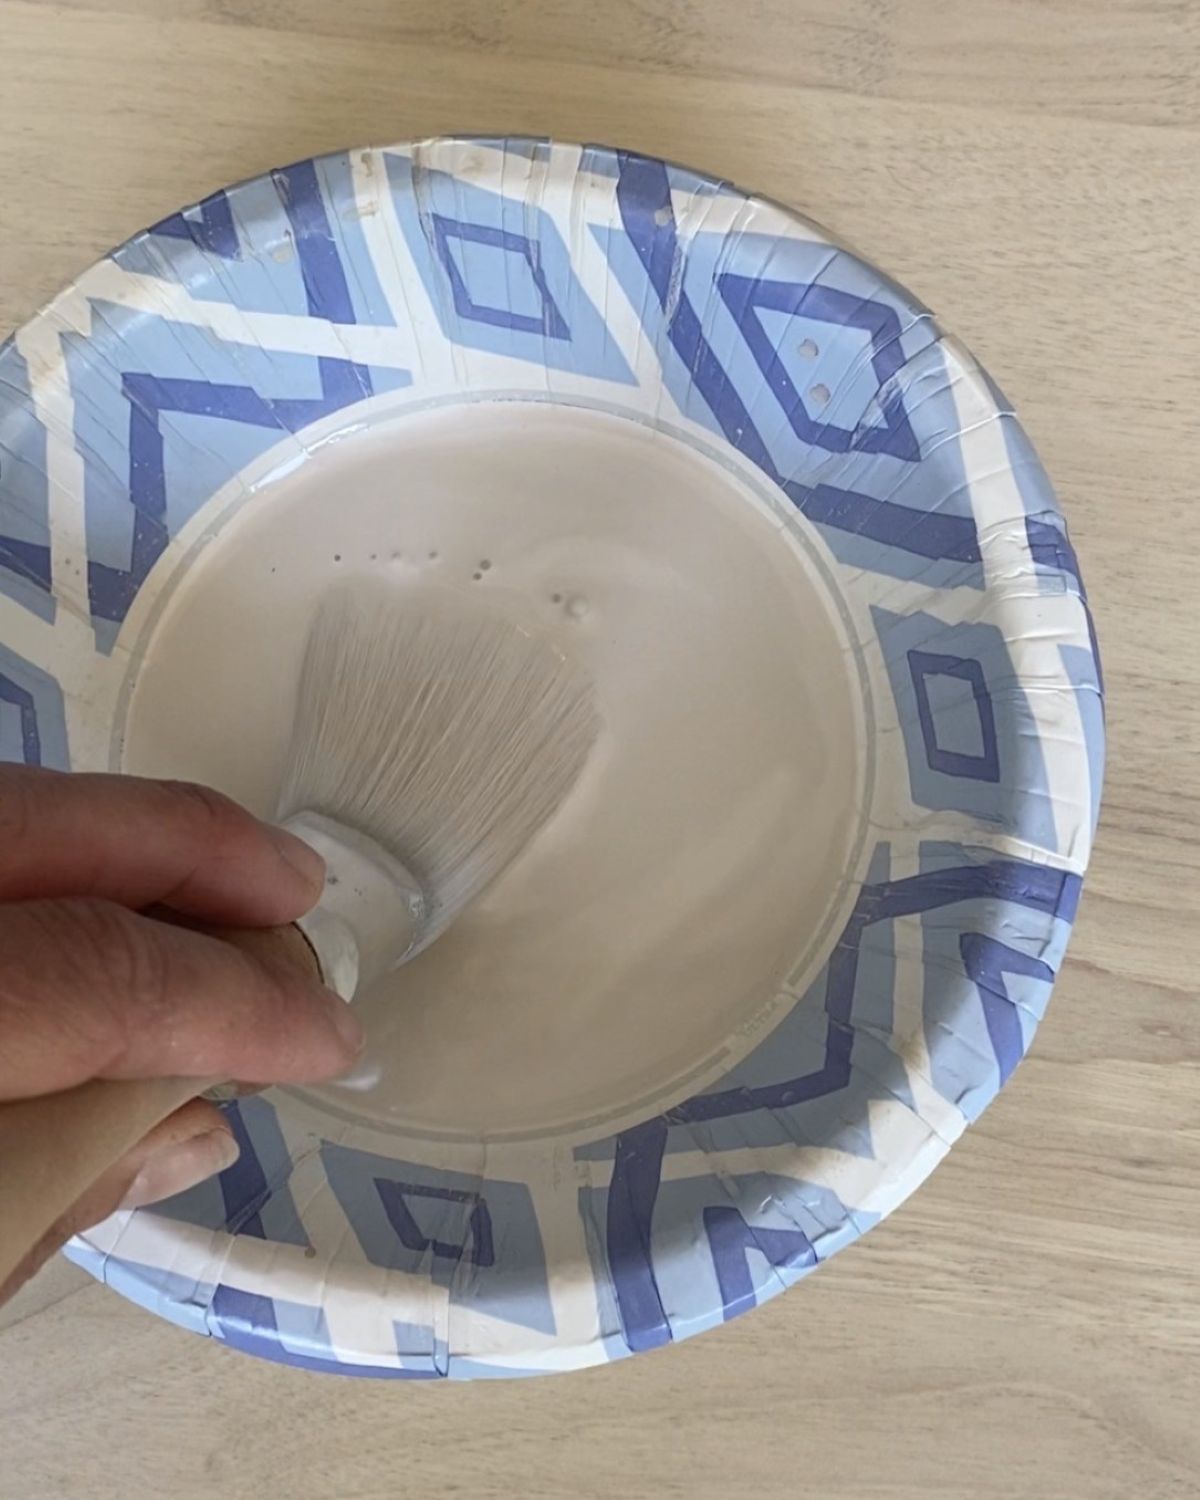
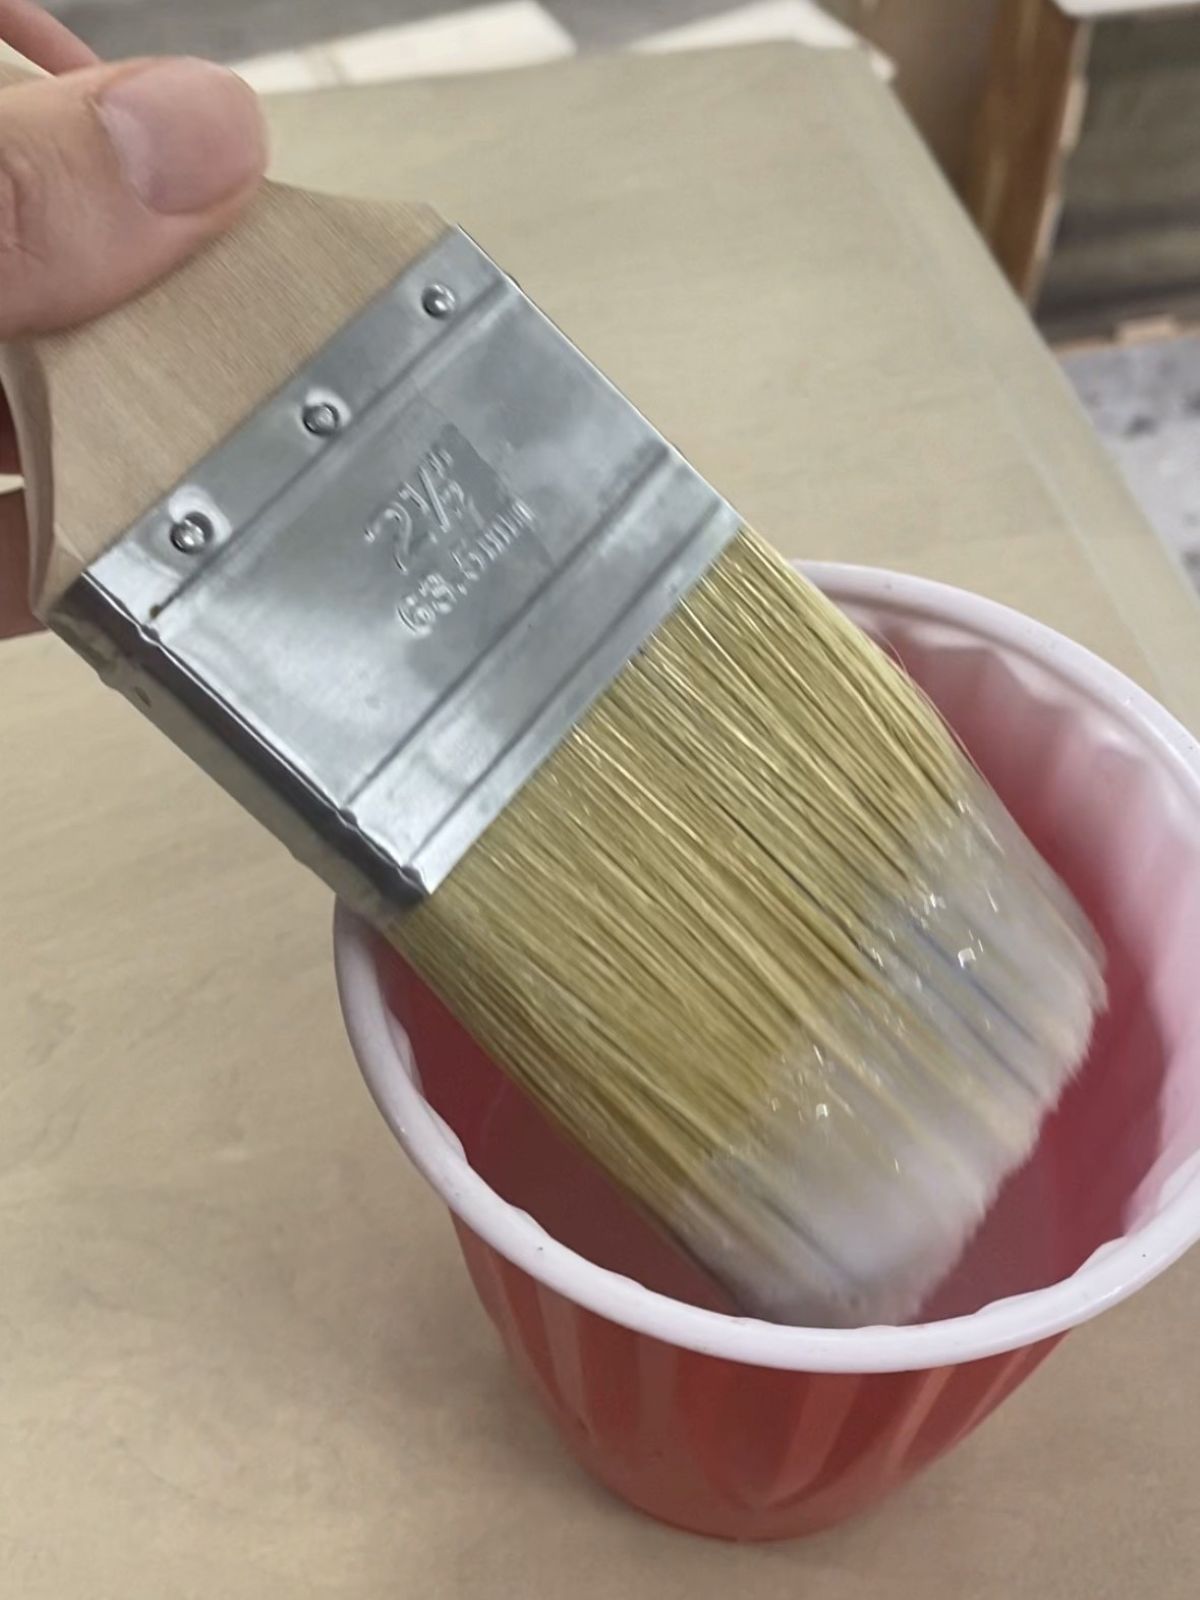
Step 1: Make the paint wash. Mix you paint color of choice with water. I like a 1:2 or 1:3 ratio of paint to water for most projects. Mix them together in a plastic cup or other container, making sure you have enough to coat your entire project.
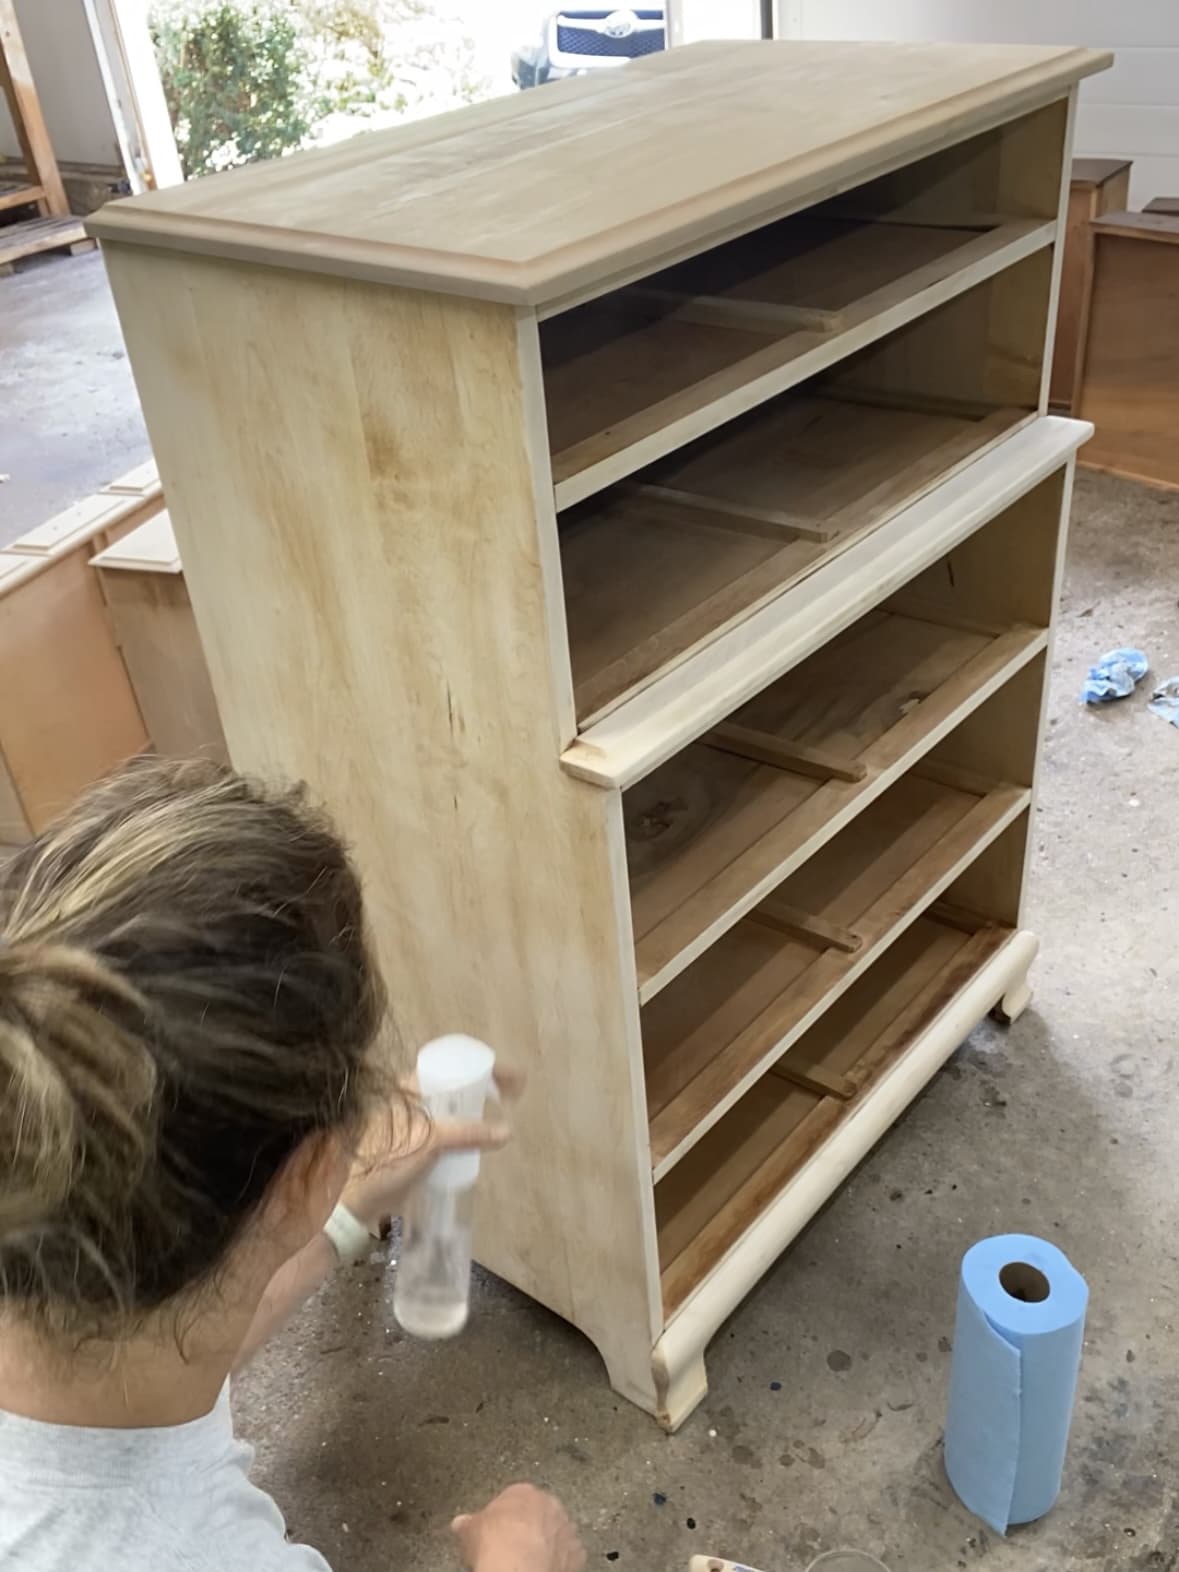
Step 2: Mist the surface. Working in sections, use a mister bottle wet the first section/surface you are working on. You can use painters tape to separate sections if there isn’t a clear cutoff. This step will keep the paint wash from soaking in/drying too quickly.
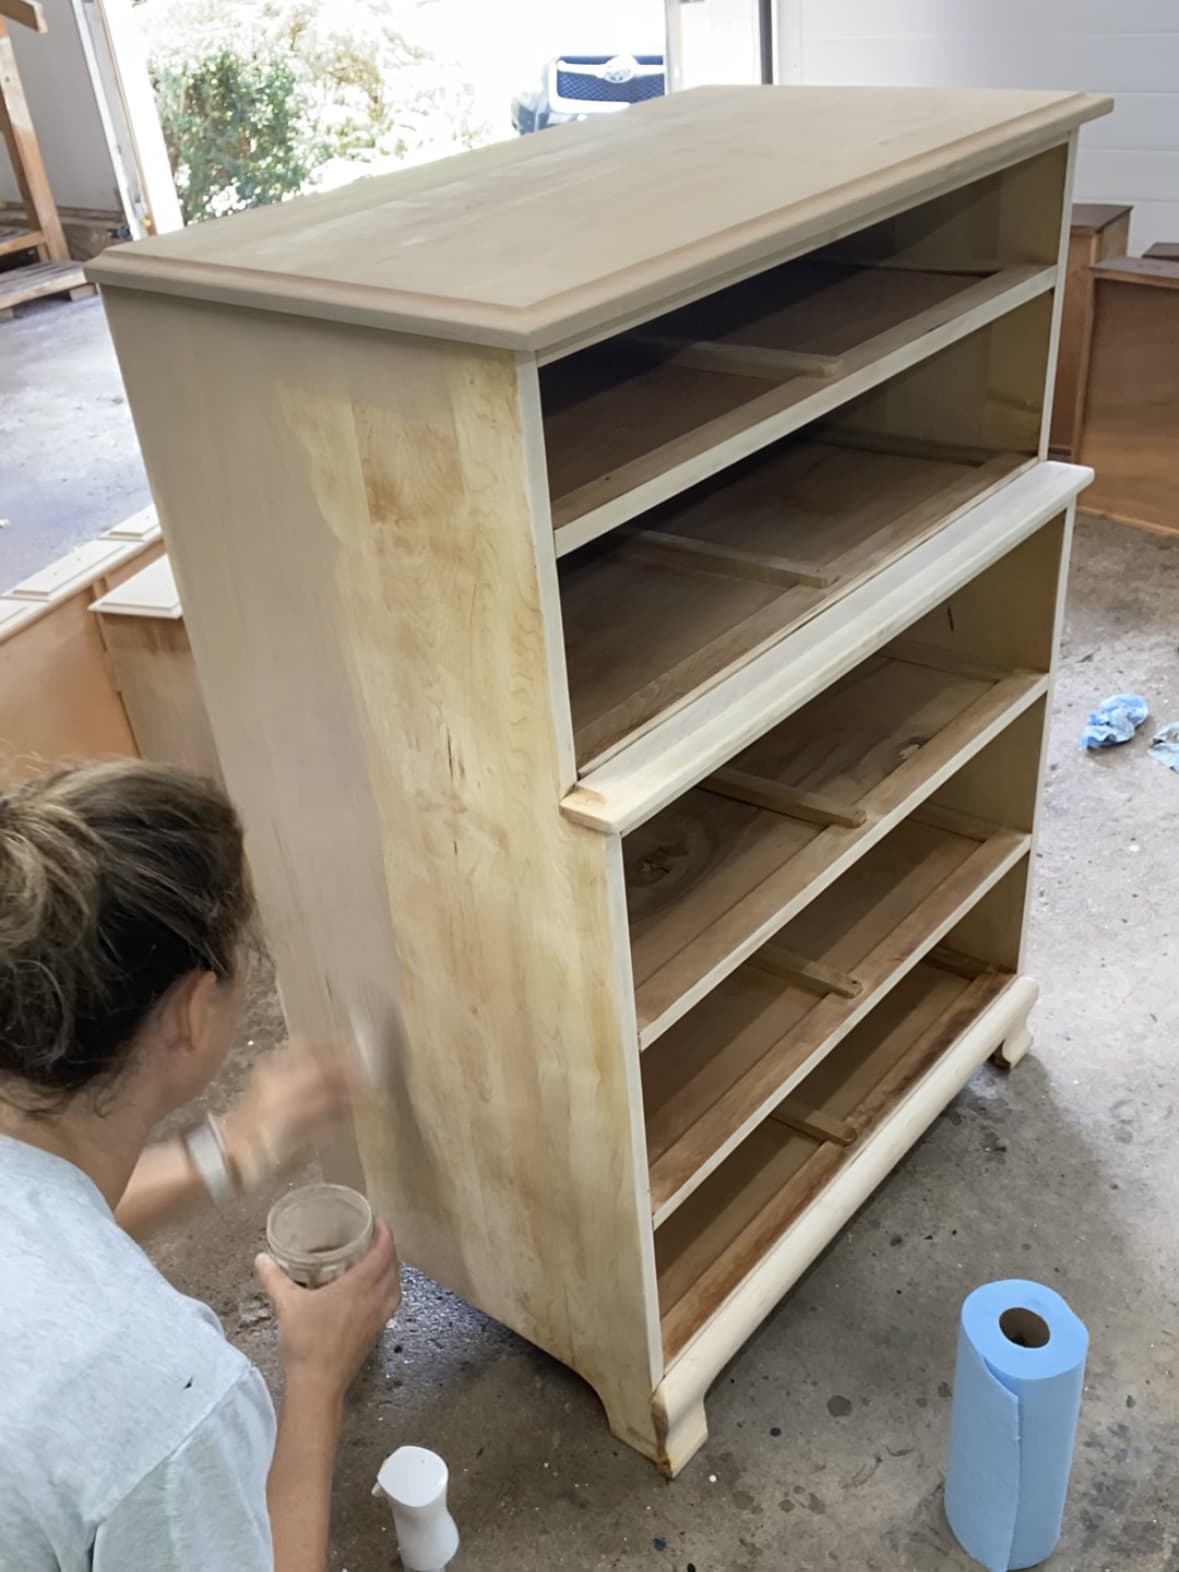
Step 3: Brush on the paint wash. Brush the paint wash over the entire surface.
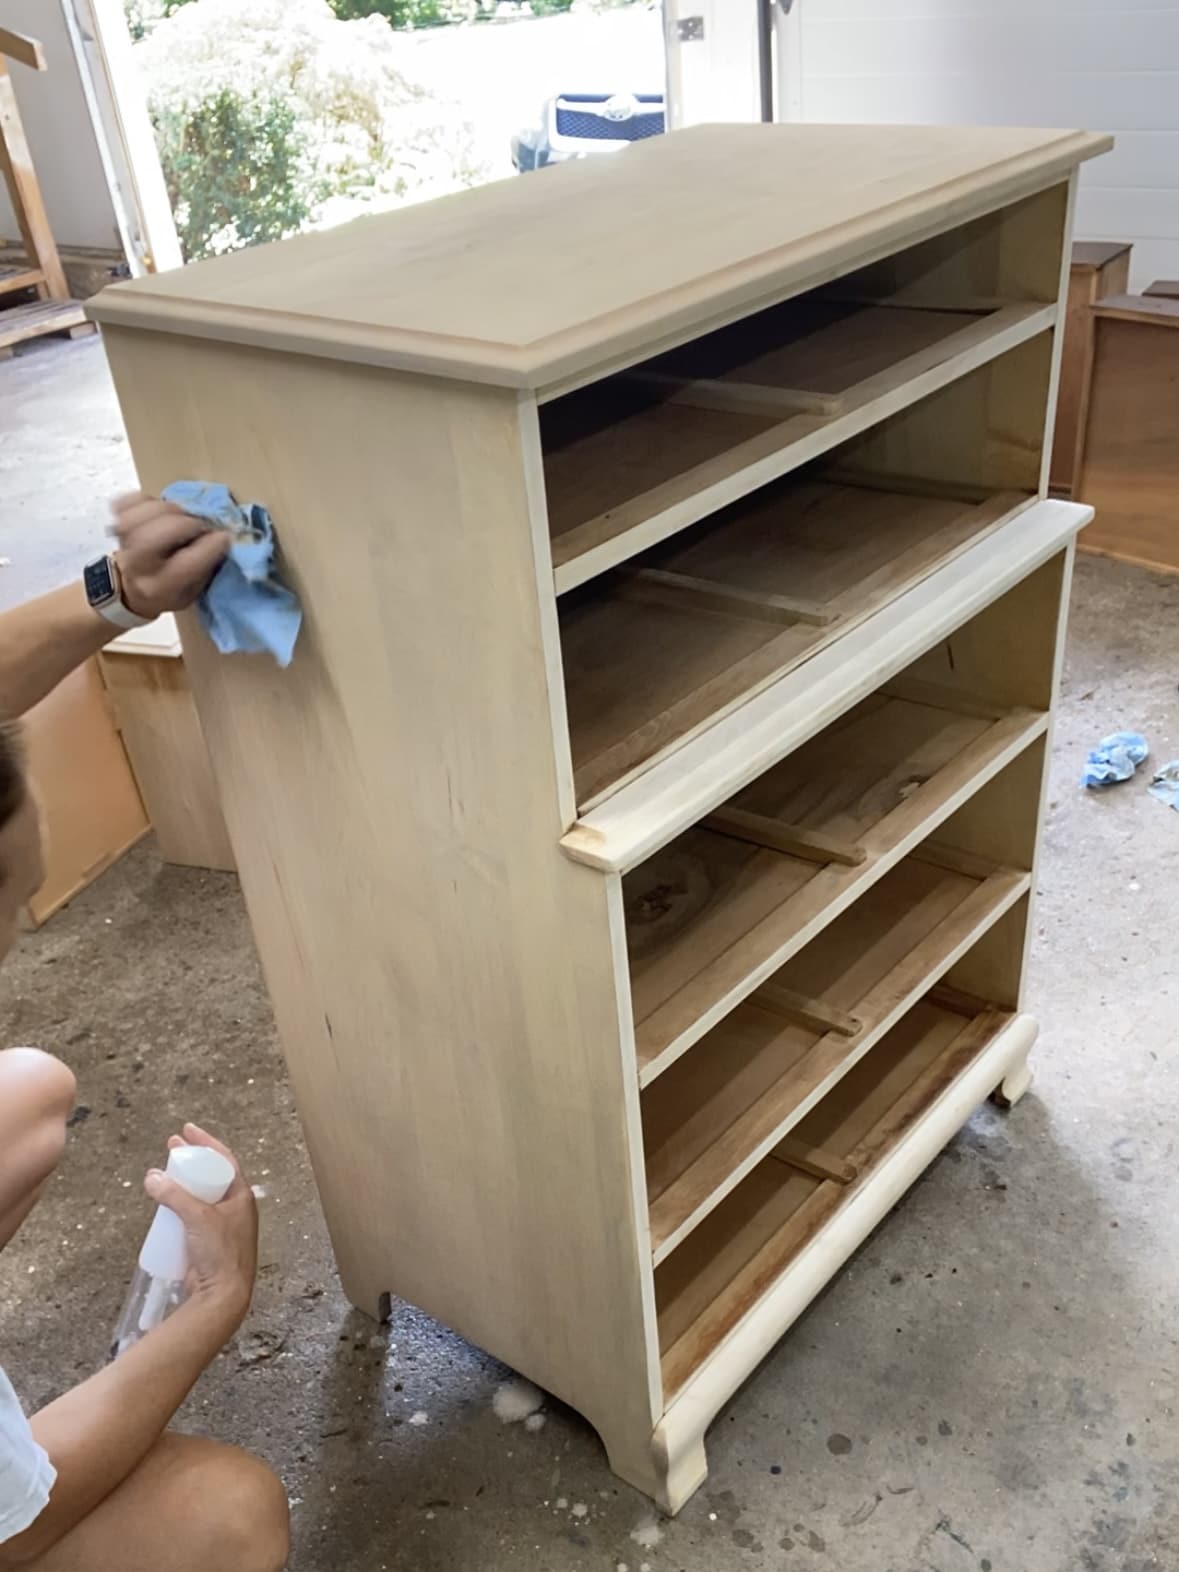
Step 4: Wipe away excess. Working quickly, wipe back any excess using a rag or blue shop towels. It is important not to allow the paint wash to start to dry during this step. Otherwise, you will pull the paint off unevenly with your rags when you are wiping. Keep the mister bottle handy and use it to keep things damp as necessary. Let paint dry for several hours.
Application tip
When applying a paint wash, it is important to work in sections. Use painters tape if necessary to divide sections if there isn’t a natural break. Complete steps 2 through 4 for each surface/section before moving onto step 5 and 6. If the paint wash starts to dry before you’ve wiped it back you will have a mess on your hands!
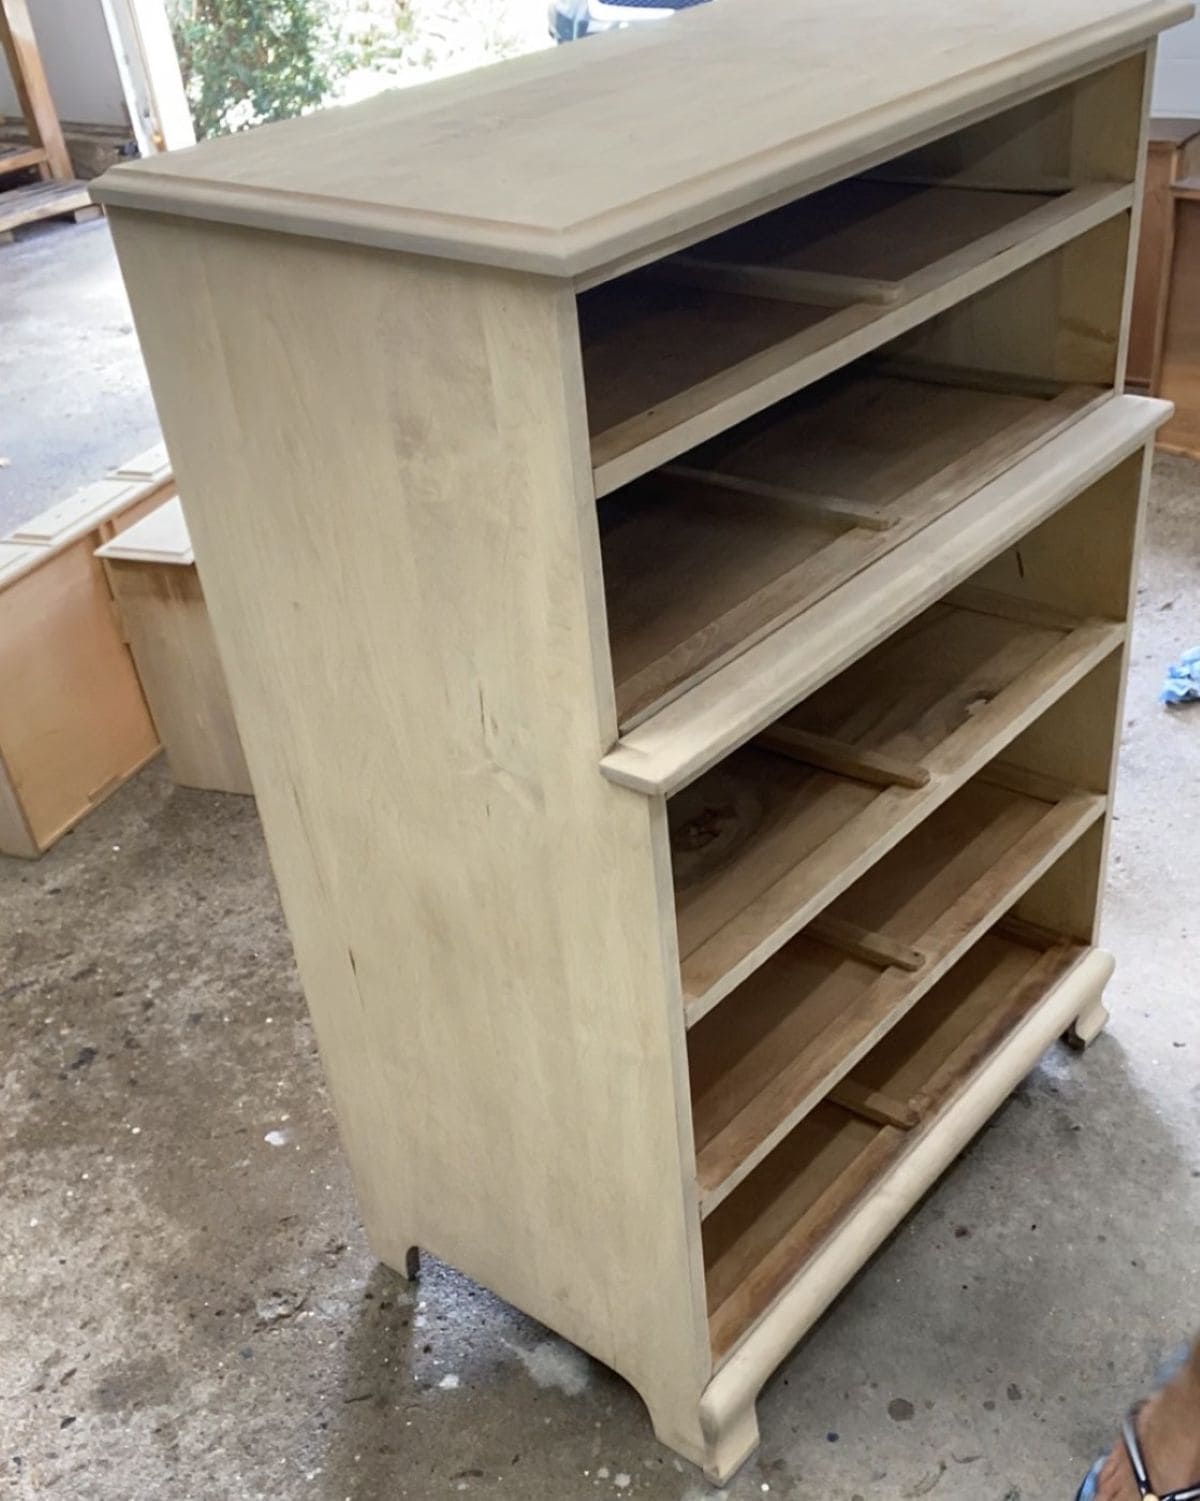
Step 5: Repeat steps 2-4. Once dry, decide if you need to do another coat. If so, repeat steps 2 – 4 until you get the desired finish.
Step 6: Seal with a top coat. Similar to a painted finish, I use a water-based topcoat to seal my paint washed finishes.
Top Coating TIp
It is important to use a water based top coat to seal your paint wash. An oil based topcoat will yellow over time and change the color of the piece. If you are using a paint with topcoat included, you must seal your paint wash! Adding water affects the durability of even the best all-in-one furniture paints. I have an overview of how to seal painted furniture finishes if you are interested in learning more about this step.
Paint Wash FAQs
A paint wash is diluted paint that adds a semi-transparent layer of color over your wood furniture.
Stick to latex, acrylic, mineral, or chalk for best results. Avoid alkyd, urethane, and enamel paints (these are water based paints with oil based properties).
You should your wash back immediately before it starts to dry! If it doesn’t have enough coverage, let it dry completely and do another coat.
A paint wash is made by diluting your paint. Be sure you make enough to coat your entire piece, otherwise you will get uneven coverage with a new batch.
I usually use a 1:3 ratio of paint to water, but if I’m looking for a very light wash I will add more water. Test it in a small area if you can.
Summary
A paint wash is a great way to update vintage furniture and let the natural wood shine through. By diluting paint with water, you can create a custom wash that evens out wood tones and keeps a light, natural look. Whether you want a subtle whitewash, a neutral tan wash, or something more bold, this method is an easy way to transform wood furniture. My client and her daughter are thrilled that a piece of their family history is now a feature in their home, and that’s the most important part!
New to furniture painting?
Get my FREE Beginner’s Guide to Painting Furniture! This guide walks through the steps of a furniture painting makeover and includes a downloadable project planner and supply checklist.