How To Make a Dried Orange Wreath
This post may contain affiliate links, meaning I make a small commission on qualifying purchases.


With the holiday season in full swing, I found myself needing a quick and easy decor DIY. I wanted something simple, natural, and timeless, which led me to the idea of a dried orange wreath. Dried oranges are a beautiful, budget-friendly way to add warmth and texture to holiday decor, and they pair perfectly with both traditional and modern homes.
Summarize & Save This Content
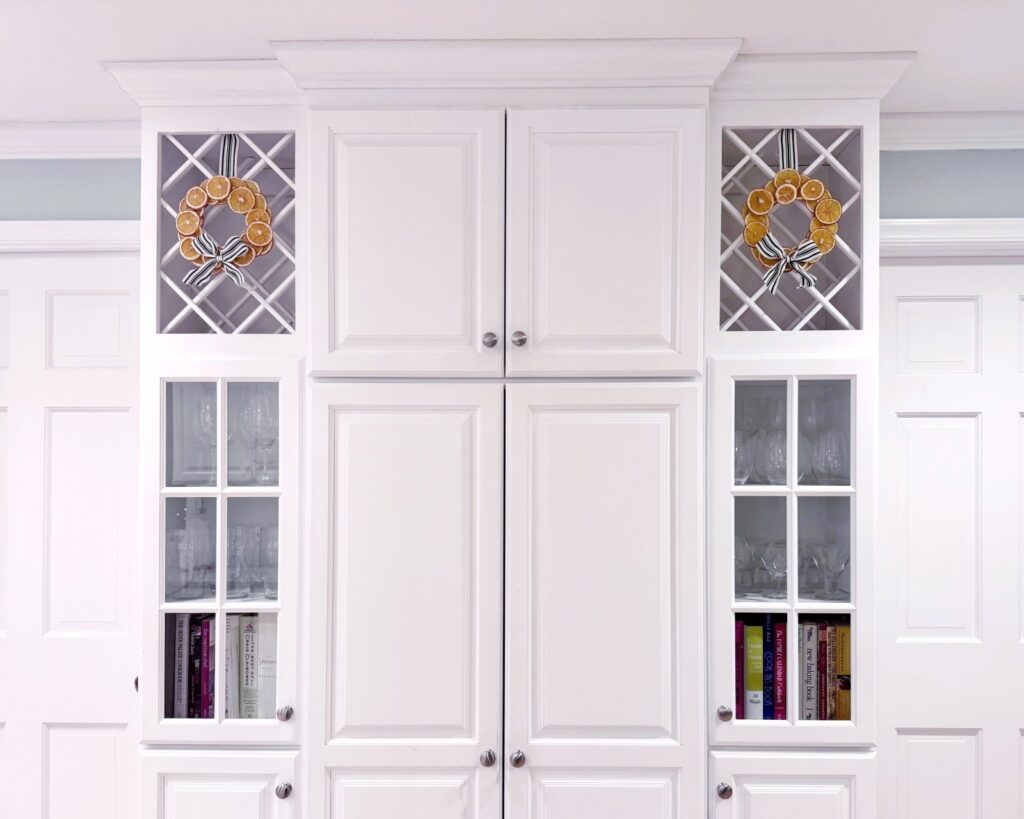
After spotting dried orange garlands at a local floral shop, I knew I could recreate the look myself. However, what I really wanted was a pair of wreaths to hang in the wine rack section of our cabinetry. So I took the idea of dried oranges for decor and applied it to a wreath. And it was so easy! Keep reading for step-by-step instructions to make your own and add a cozy, handmade touch to your holiday home.
How To Make A Dried Orange Wreath
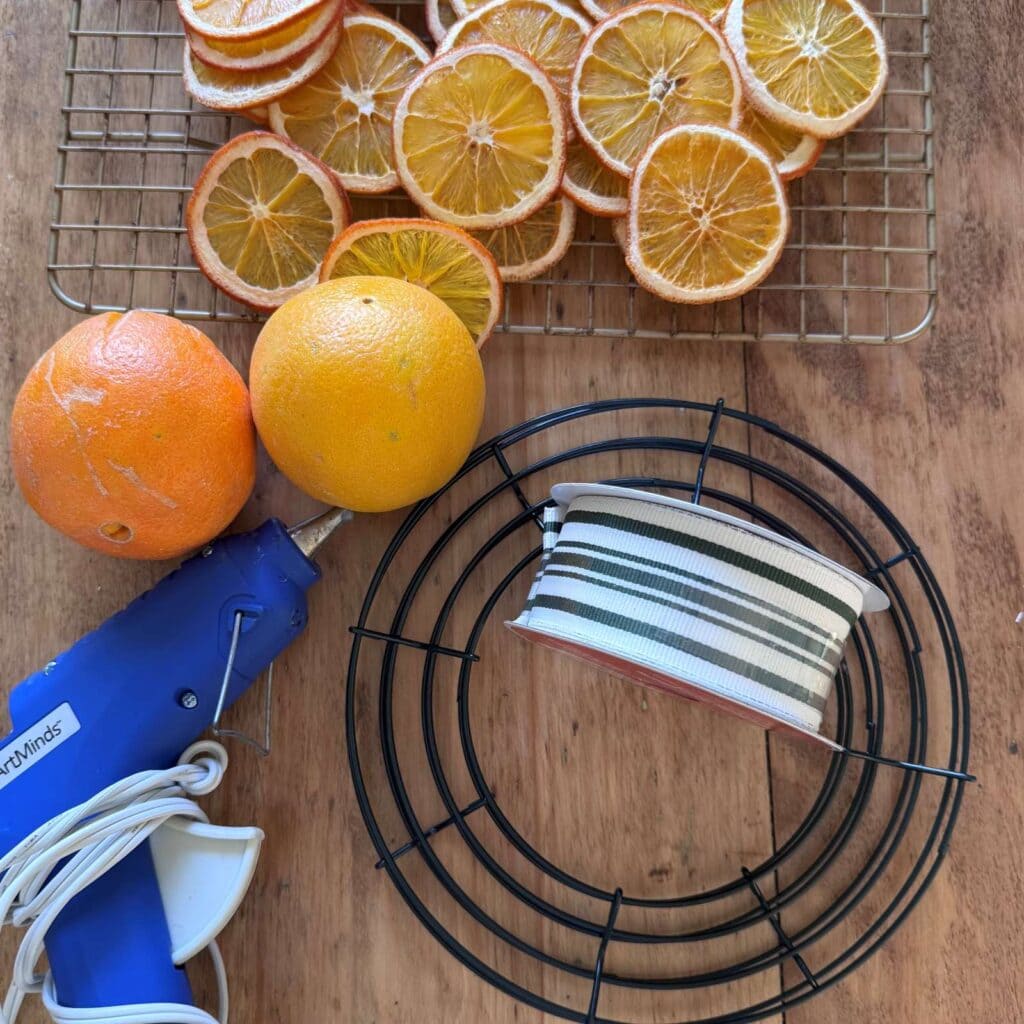
Supplies Needed
Remember when I said easy? I wasn’t kidding! The only things I had to purchase were the wreath frames and some oranges! I had the glue gun, ribbon, baking sheets, and parchment paper already on hand. I used a pair of 8-inch wreath frames I found on Amazon – but use any size you want, depending on your space!
Step 1: Slice and Dry Oranges
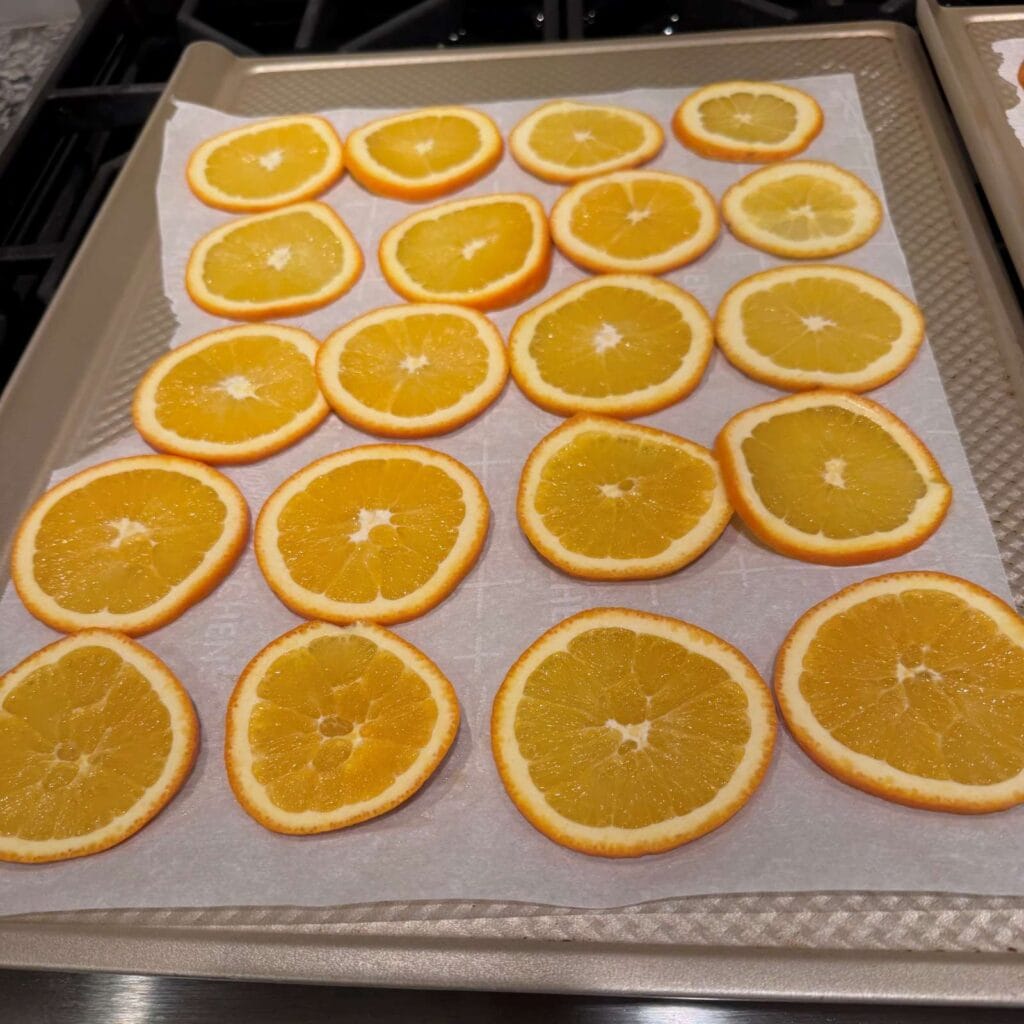

The first step is to dry the oranges. I used about 5-6 oranges to make both 8-inch wreaths. Start by slicing thinly (1/8 to 1/4 inch) using a sharp knife. Place the slices on top of parchment paper and put them in the oven at the lowest temperature your oven allows (mine is 150 degrees Fahrenheit). Check and flip every hour until dry (mine took about 3 hours) for a total of 3 hours. Transfer to a wire baking rack to cool and completely dry. They can still be slightly soft (just not damp).
Tips for Drying Oranges
1. The thinner you slice the oranges, the faster they will dry
2. If you have a mandolin, that makes slicing them much easier (if not, make sure your knife is sharp)
3. Don’t skip the parchment paper; it keeps the oranges from getting too crispy around the edges
4. It’s better to pull them a little early than overbake them. Allow them to finish drying on the rack overnight
5. BONUS: Drying oranges in the oven makes your house smell amazing!!
Step 2: Glue Oranges to Wreath Form
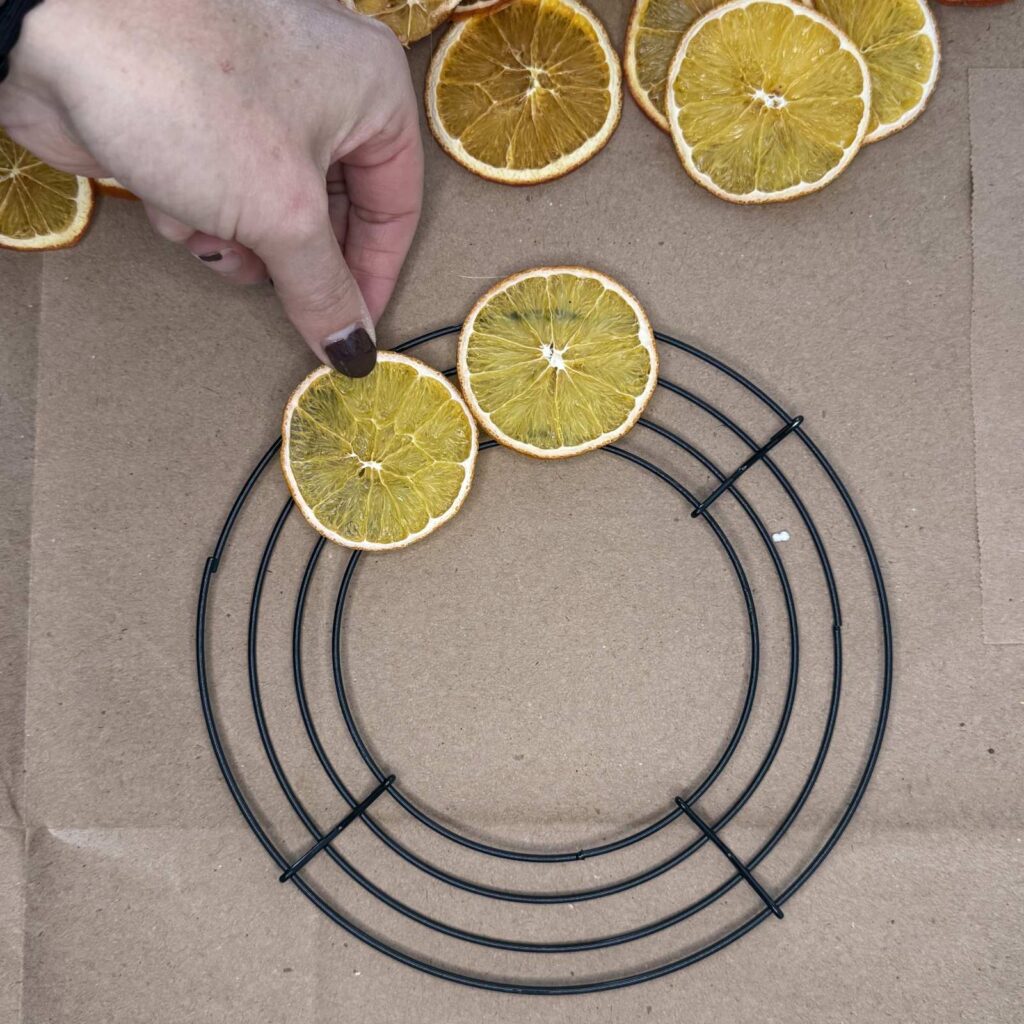

Once the oranges are completely dry it’s time to add them to the wreath form. Using a glue gun, start by attaching a single layer around the frame. Then, continue to layer in an alternating pattern until you are happy with the result.
Step 3: Add Ribbon
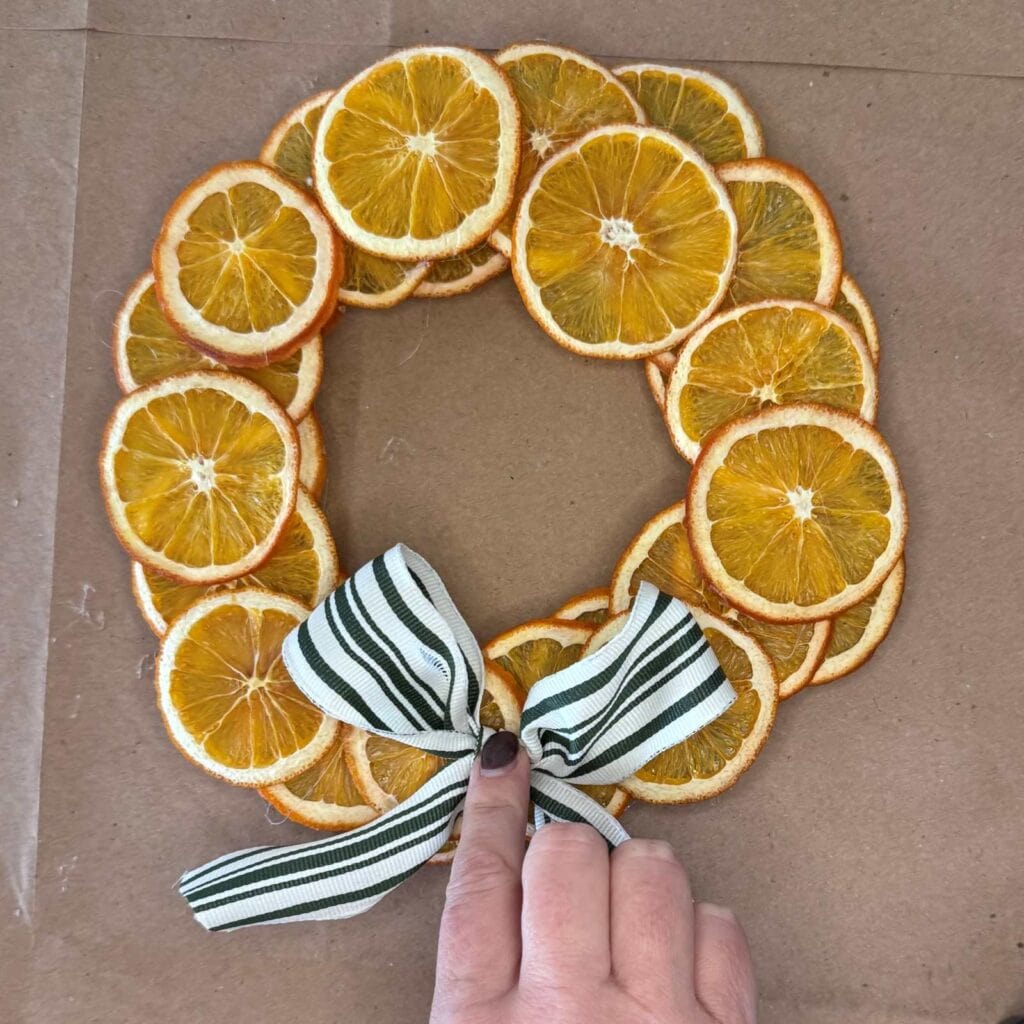
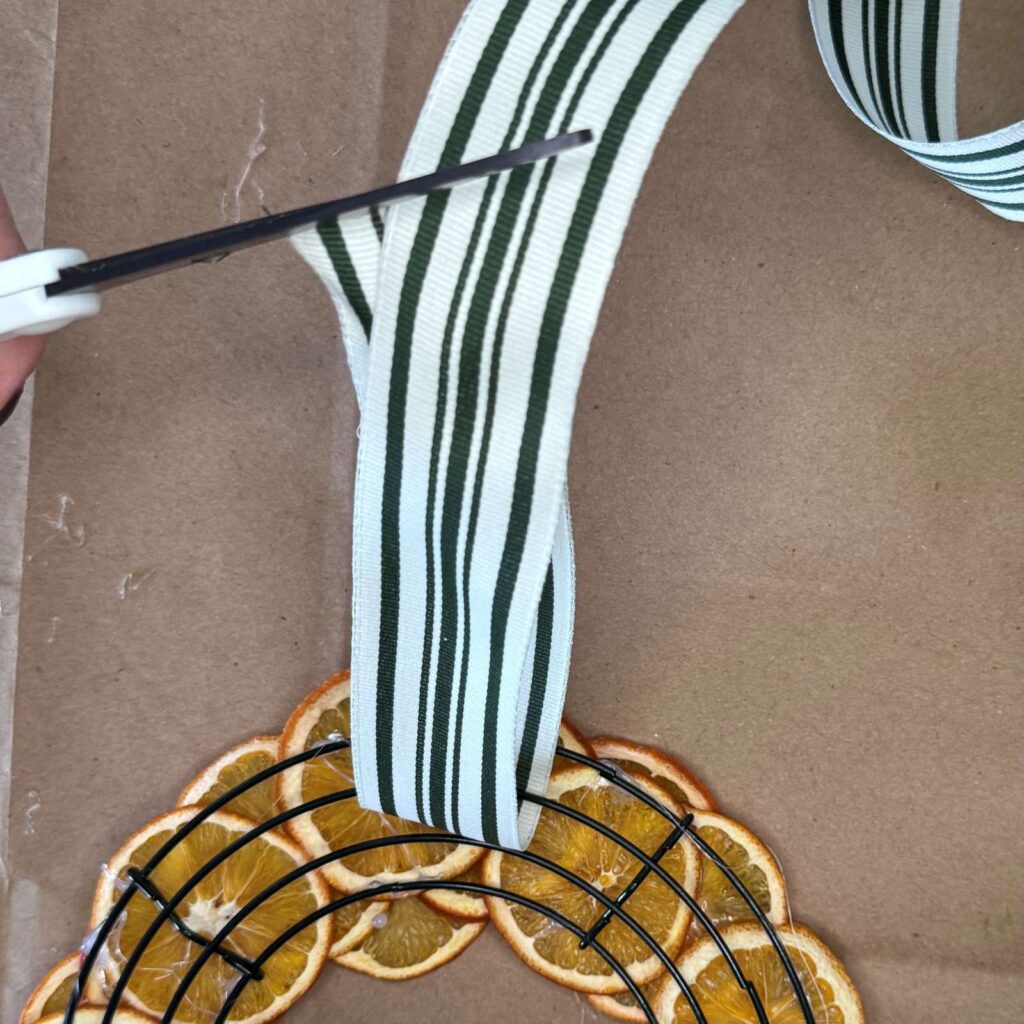
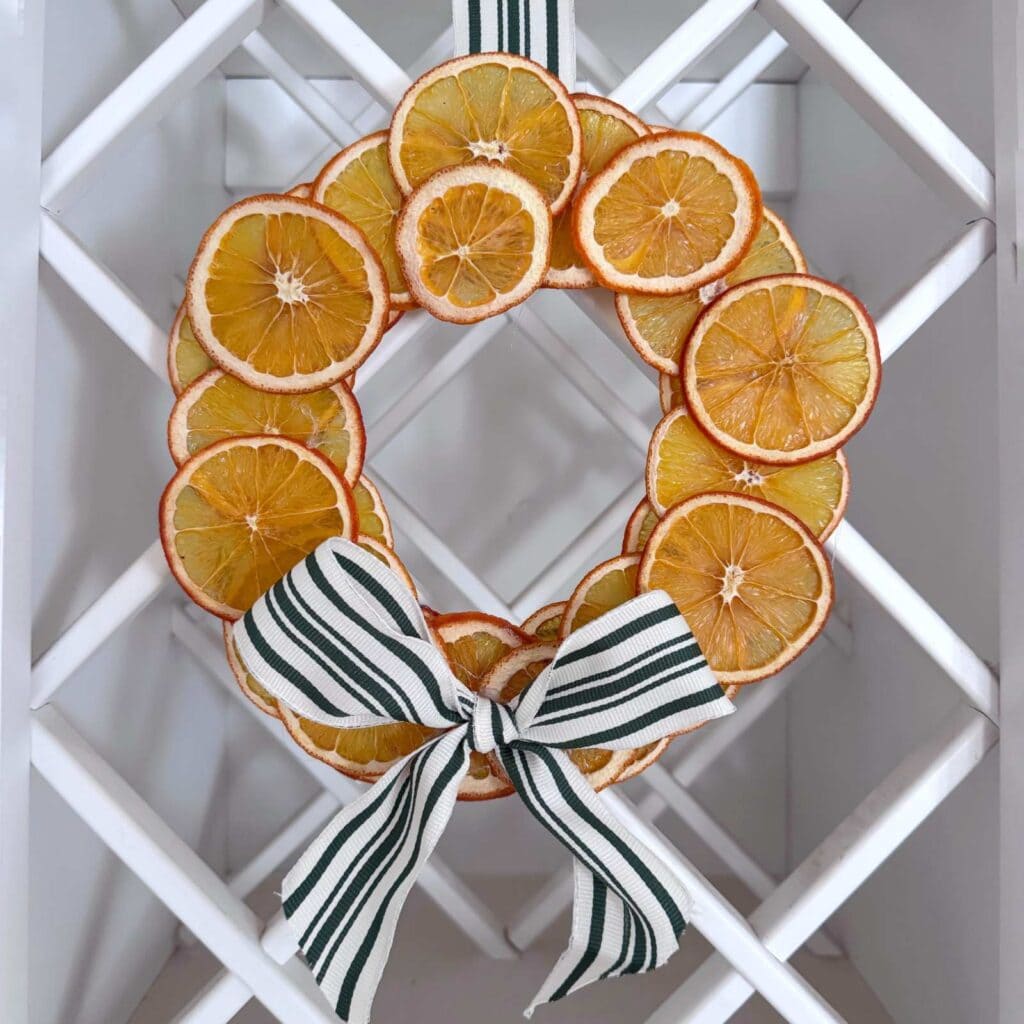
To finish off the wreath, I used some ribbon to make a bow, glued it on, and added some additional ribbon to hang it. I thought this green and white ribbon gave it just enough Christmas while still keeping it natural. For this step, use your creativity to give it the look you want! You can tie it into other holiday decor you have, or just do something fun.
Would you like to save this?
Summary
If you love natural holiday decor and want a project that feels special without being complicated, this dried orange wreath is a great option. With just a few supplies, you can create a natural, timeless wreath that works beautifully in both traditional and modern spaces. Whether you’re decorating a kitchen, wine rack, or entryway, this easy DIY adds warmth, texture, and a handmade touch to your home.