DIY Marbled Ornaments
This post may contain affiliate links, meaning I make a small commission on qualifying purchases.
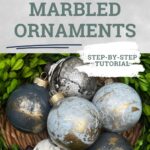

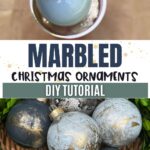
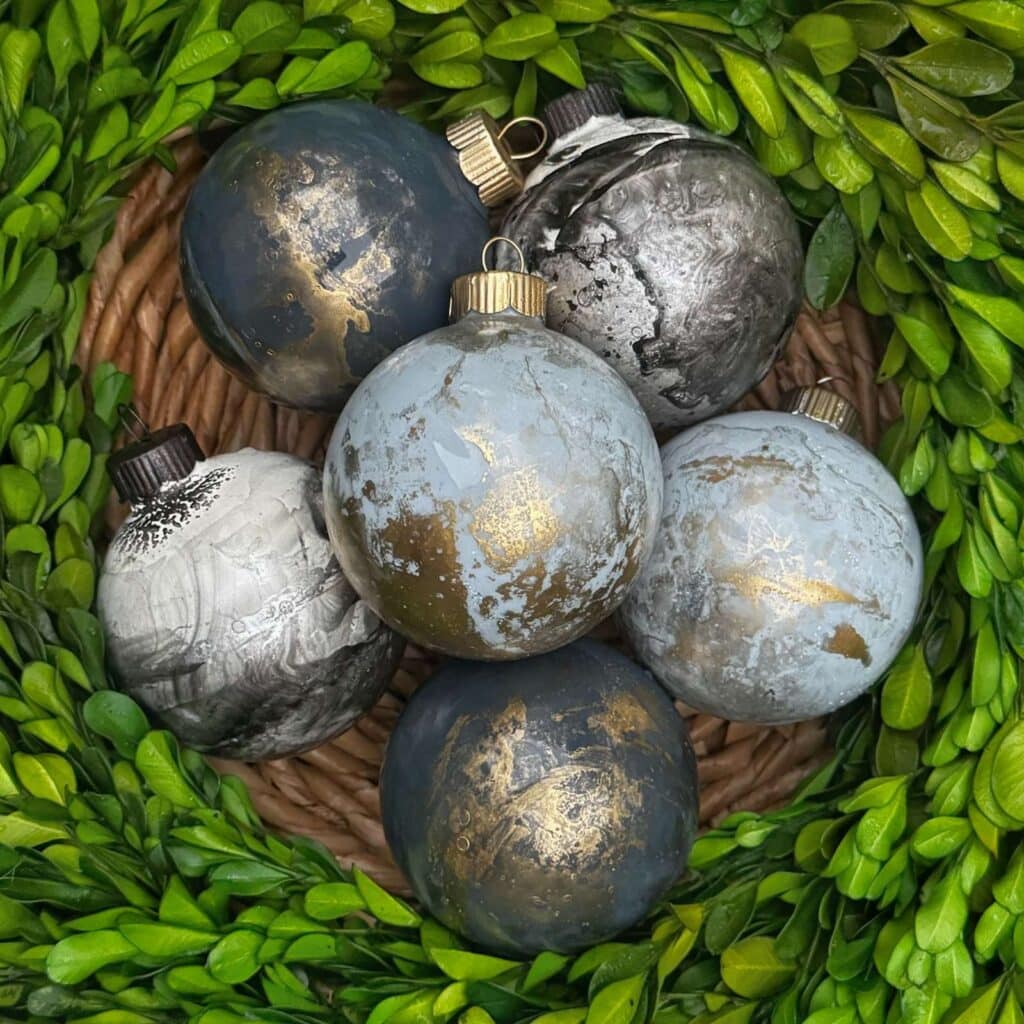
Recently, I made some colored glass Christmas ornaments. I love the simplicity of them and they are a fantastic way to add color to your holiday decor. However, I wanted to add a little wow factor (just to mix up the look on my tree), so I decided to add a marble finish to some of them. And I’m in love! These DIY marbled ornaments look amazing and are so easy to make. Whether you want to update old ornaments you have lying around or make some brand new ones, this tutorial will teach exactly how to get this marbled look.
How To Make Marbled Ornaments
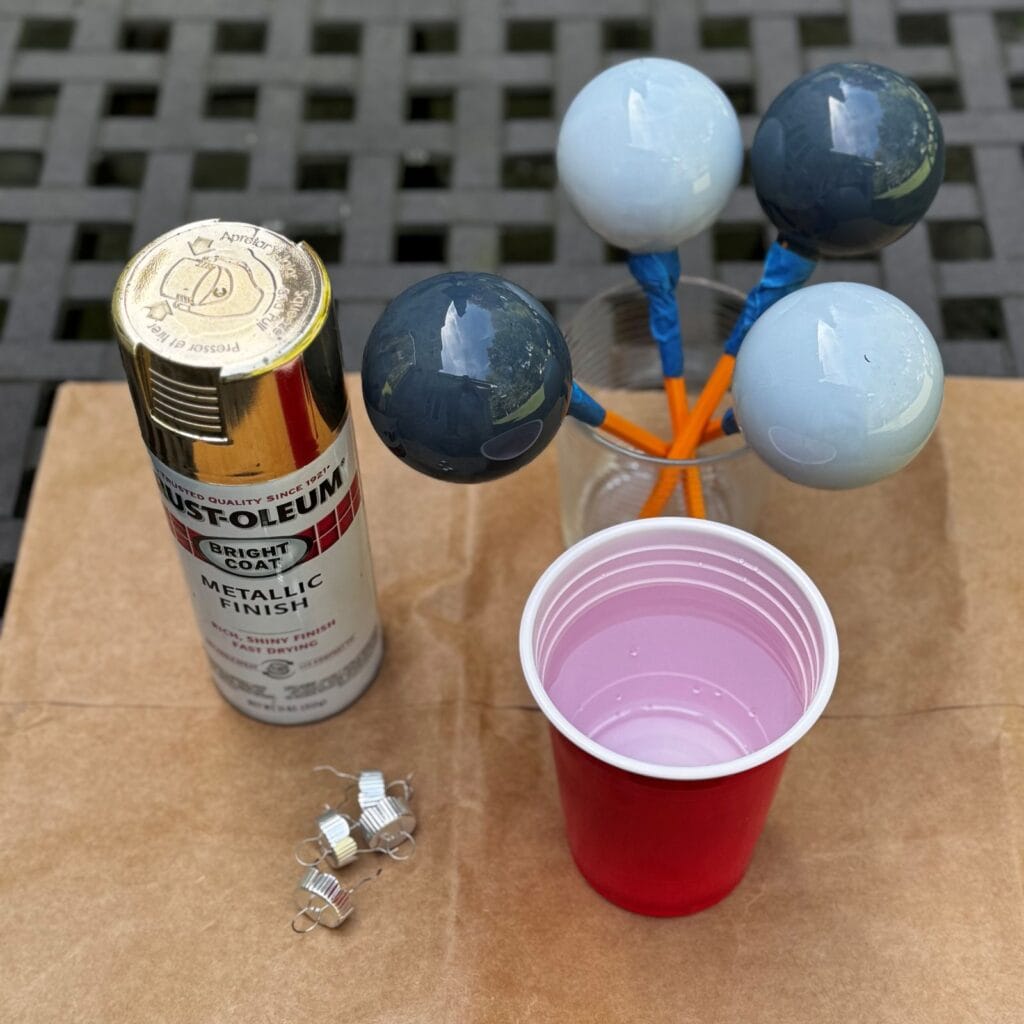
supplies Needed
I love this project because it requires so little setup and supplies. All you need is your ornaments – either old ones you want to recycle or new clear ball ornaments, some spray paint, and a cup of water.
Step 1: Paint Ornament Base Color
There are a couple of ways to get the base color painted. I’ve tried it both ways, and either works great, so choose what you think would be best for you.
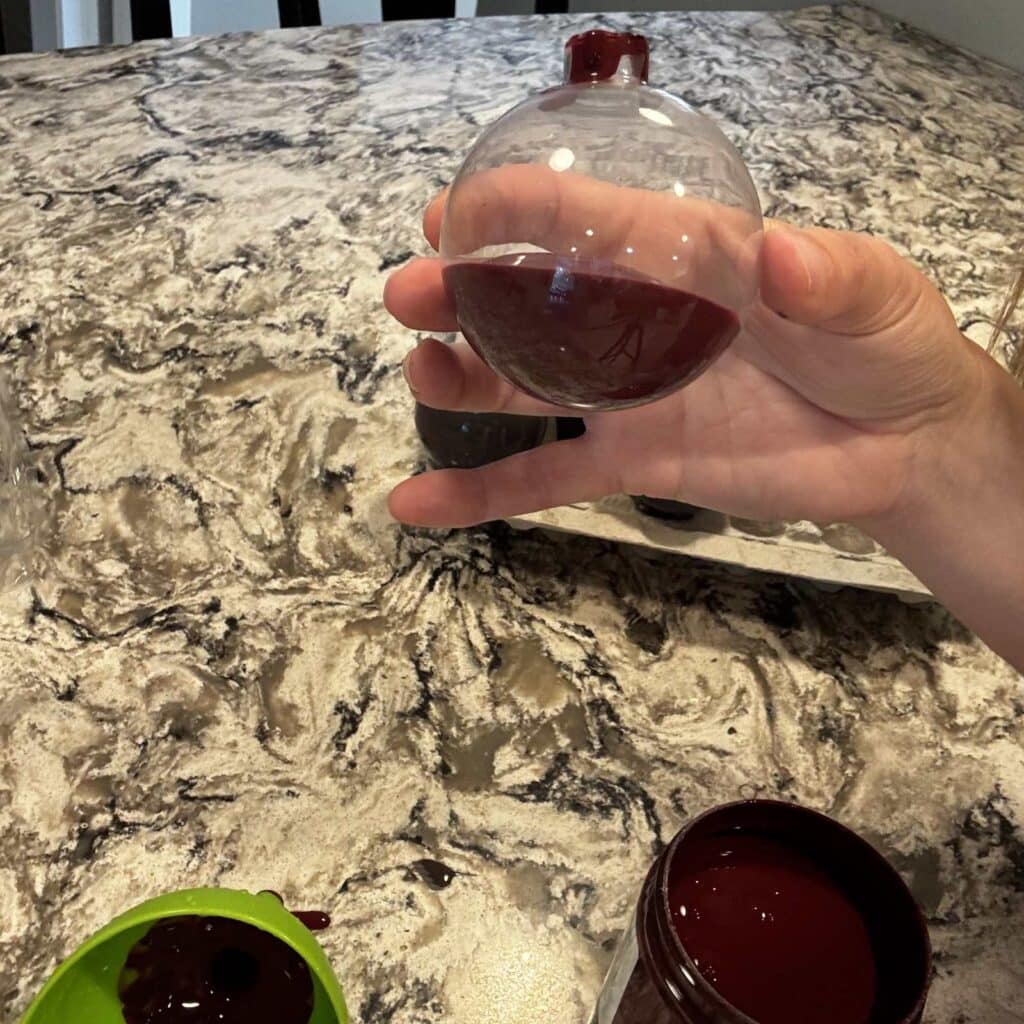
- Paint them on the inside. If you are starting with clear ornaments, this is a great option. I have a full tutorial on painting glass ornaments this way, so check that out if you want to give it a try.
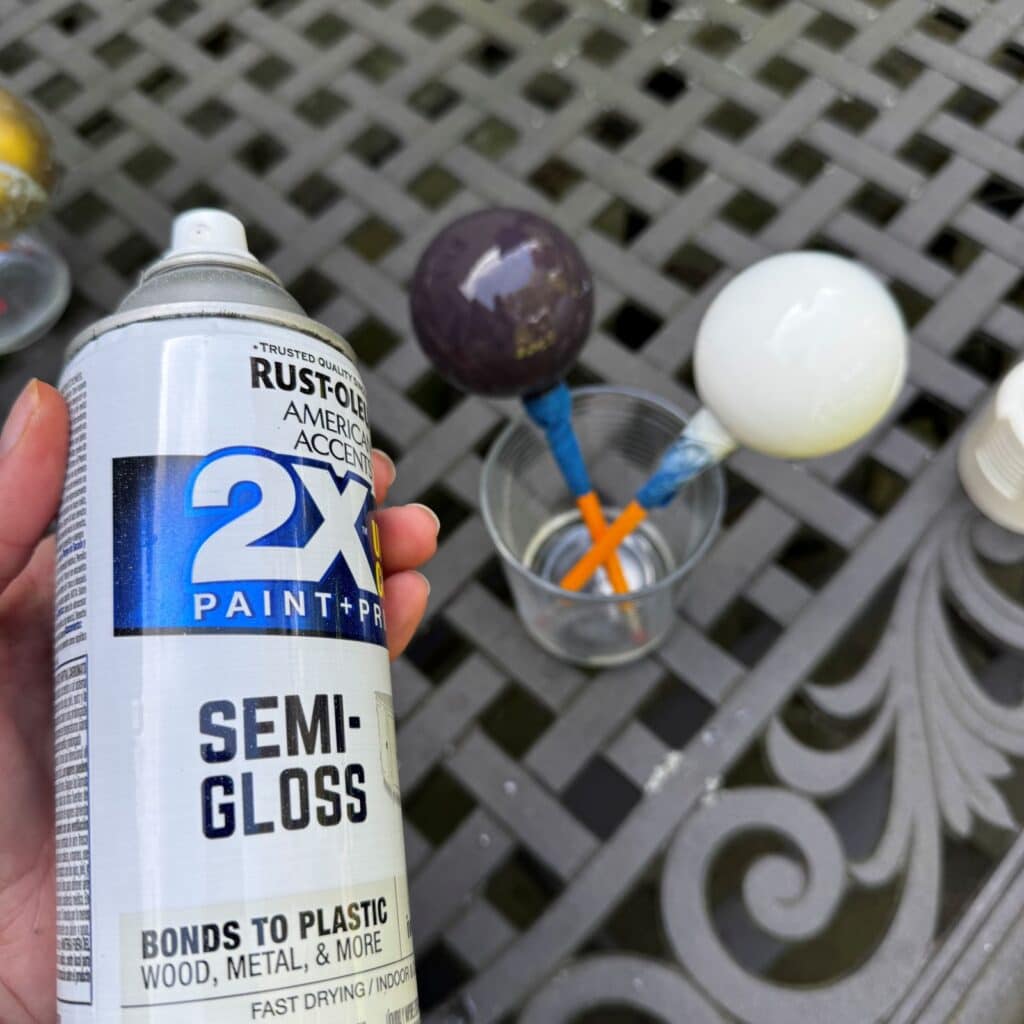
- Spray paint them on the outside. This works for both new ornaments and old ones you already have that you may be looking to update. Make sure to apply several light coats, as I’ve found that the spray paint runs easily if you apply too much.
Drying tip
When painting the outside of your ornaments, you will need to be able to let them dry without touching anything. Try inserting a pencil into the ornament opening and then taping it. This makes it easy to handle while painting and easy to dry!
Step 2: Create Marbled Effect
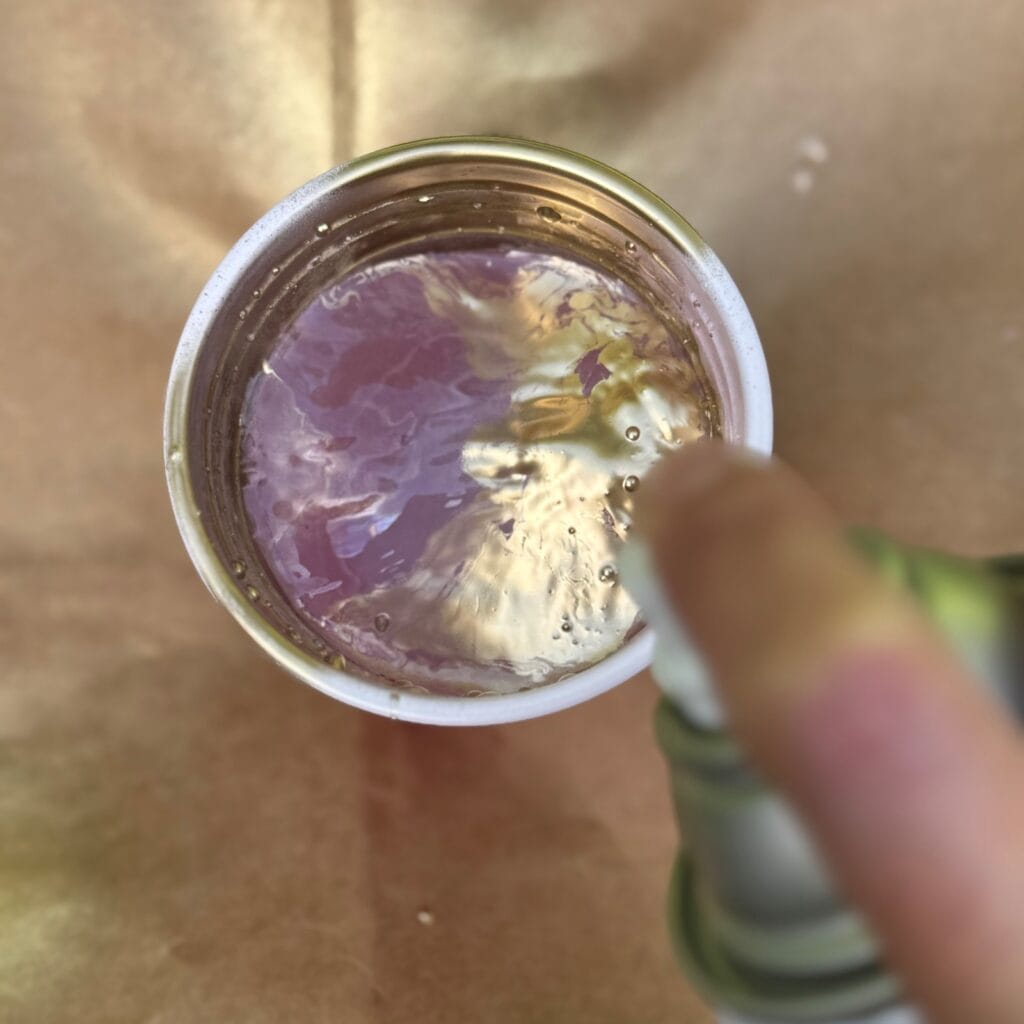
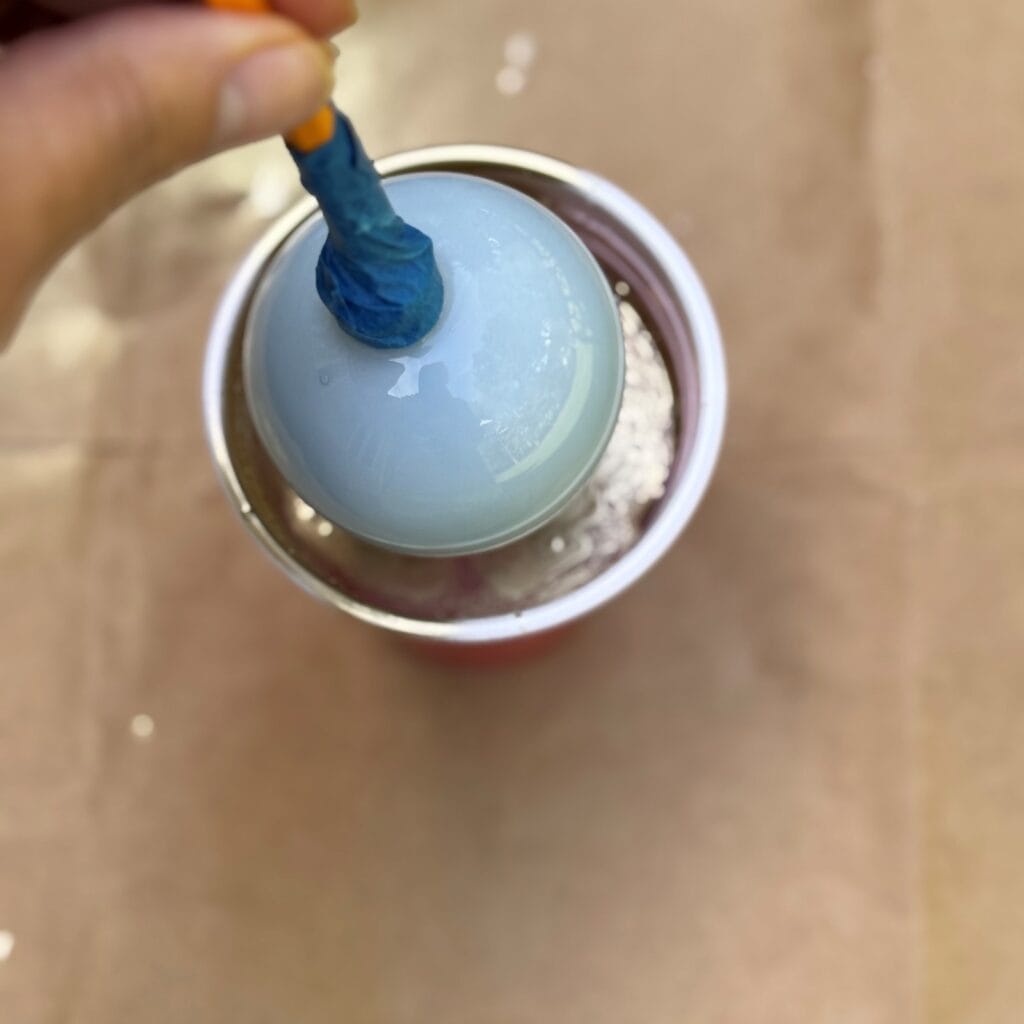
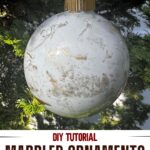
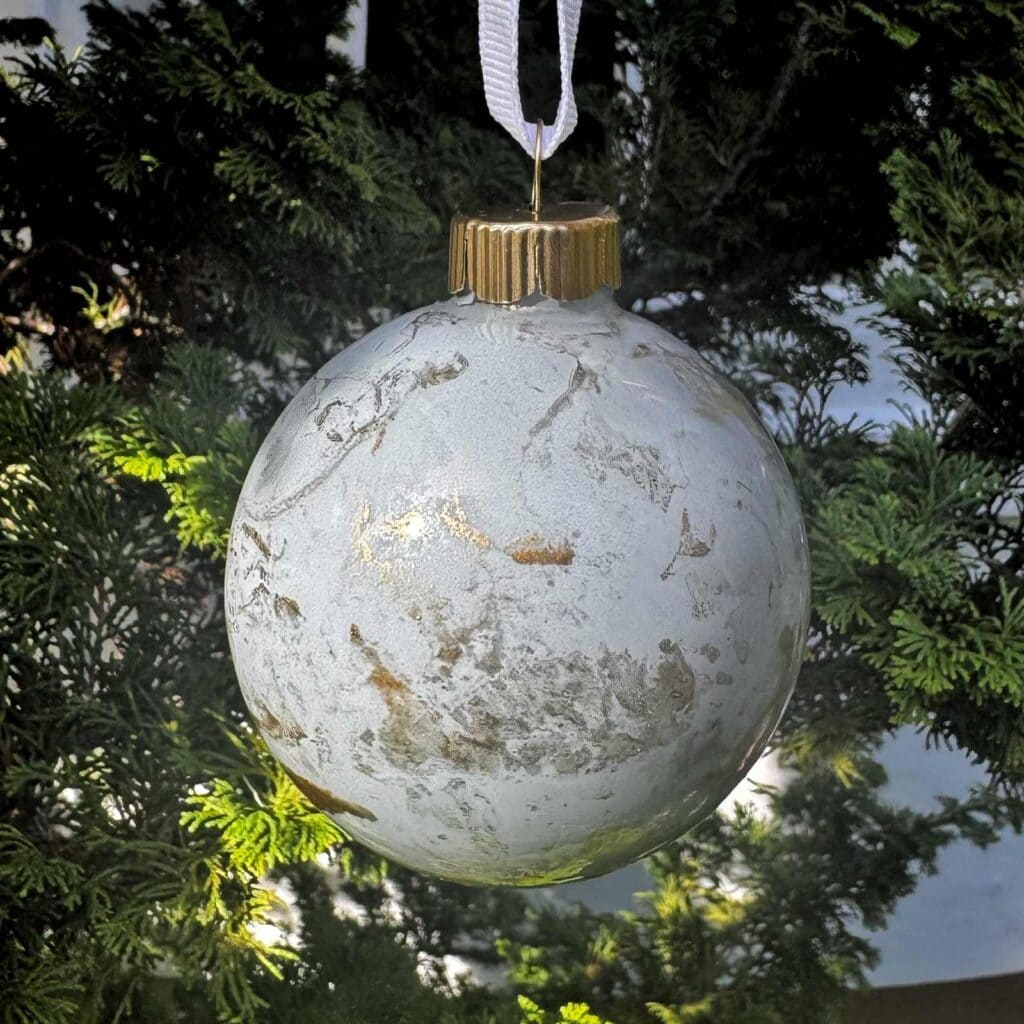
Once you have your base color painted and it has dried, it’s time to add the marbled effect. You can use one or more colors for this step. I used a gold spray paint on some of my ornaments and a satin nickel and oil rubbed bronze on the others.
To start, spray a small amount of the marble colored spray paint into the cup of water. If you add too much, it creates a thicker film that will completely cover the bottom of the ornament when you dip it in. Next, dip the ornament into the water. You can swirl it around a little, dip it a few times, or even spray some more paint in the cup while the ornament is submerged. Play around with it to get the look you want. Once you’re happy with it, set it aside to let it dry.
Step 3: Finishing Touches
While the ornaments are drying, I spray-painted the metal hangers to match the color I used for the marbling. Once everything was completely dry, put the hanger back into the ornaments and added ribbon.
Would you like to save this?
Summary
And that’s it! I told you it was easy! Only three steps and you have some beautiful marbled ornaments. These are a great way to update your own decor, but they also would make great gifts. If you give this a try I’d love to know what colors you’ve used and how they turned out.