

How To Line Drawers The Easy Way!
This post may contain affiliate links, meaning I make a small commission on qualifying purchases.

Details matter. This is true for many things in life, and it is definitely true when it comes to furniture refinishing. One of the easiest ways to add a special touch to a refinishing project is by lining drawers. Not only does it protect the inside, but it also adds character and style. Drawer liners work beautifully in dressers, sideboards, nightstands, kitchen cabinets, bathroom vanities and more!
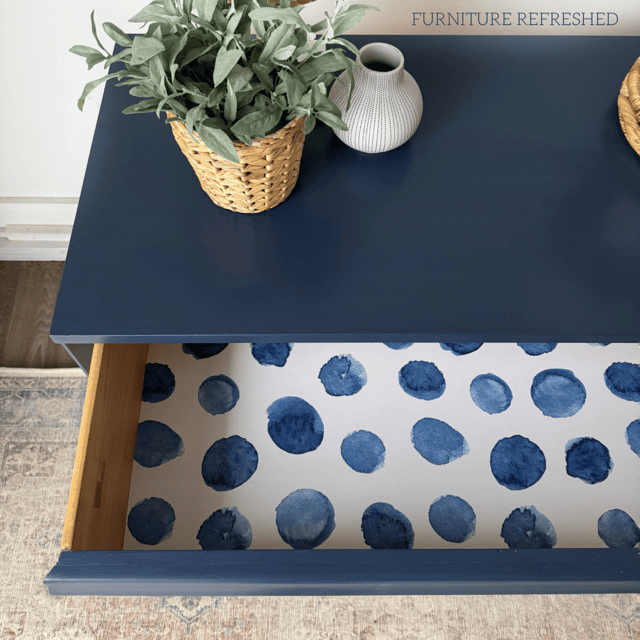
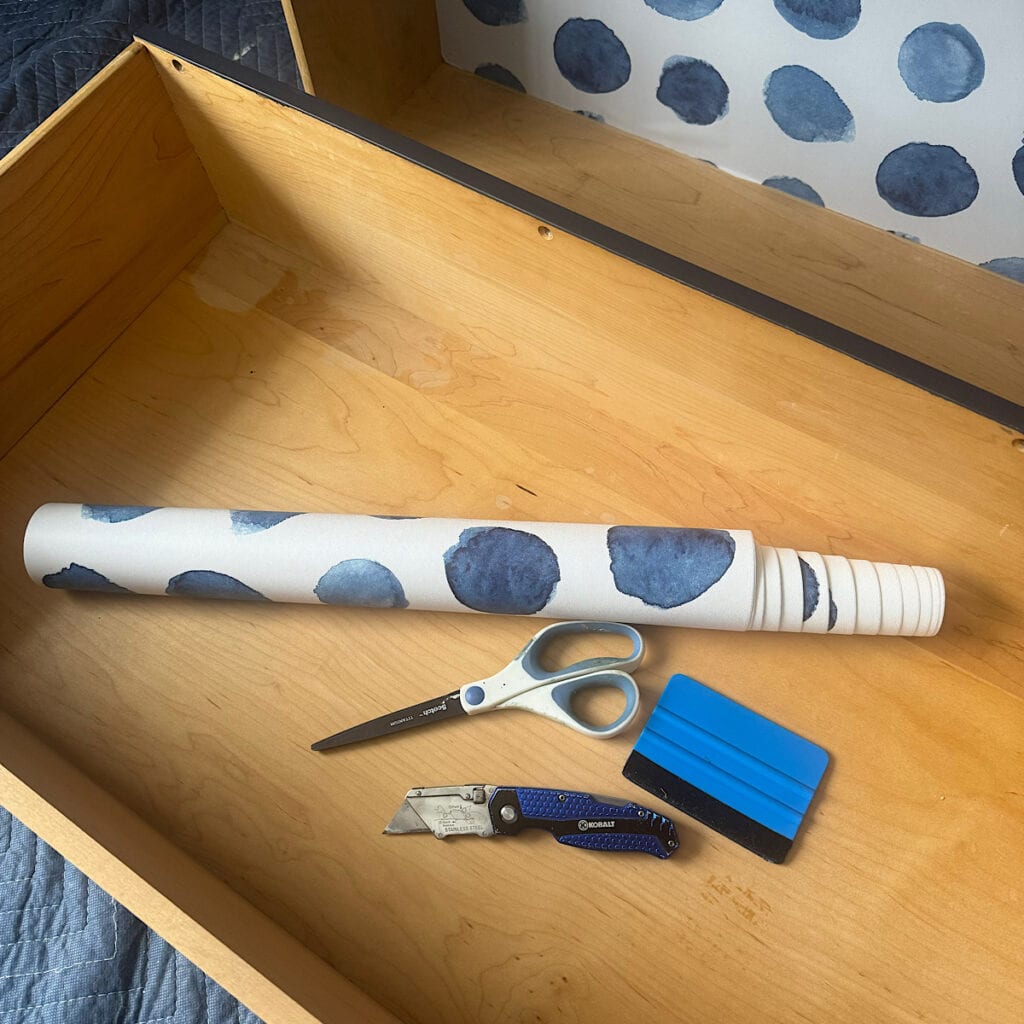
There are many ways to tackle this project. You can measure exactly and even cut out templates, but I find it easiest to skip all of that and simply install with some extra around the edges and trim with a utility knife. Templates are necessary if you are using fabric or some thicker papers. This is why my preference is for peel-and-stick wallpaper. It is easily maneuverable and repositionable, and it works for any drawer shape.
Summarize & Save This Content
How to Line Drawers With Peel-And-Stick Wallpaper
There are so many beautiful peel-and-stick options out there to choose from. Picking a pattern is one of my favorite parts of a furniture makeover! Once you’ve found one you love, follow these steps to add the wallpaper to your drawers.
Step 1: Measure and Cut Paper
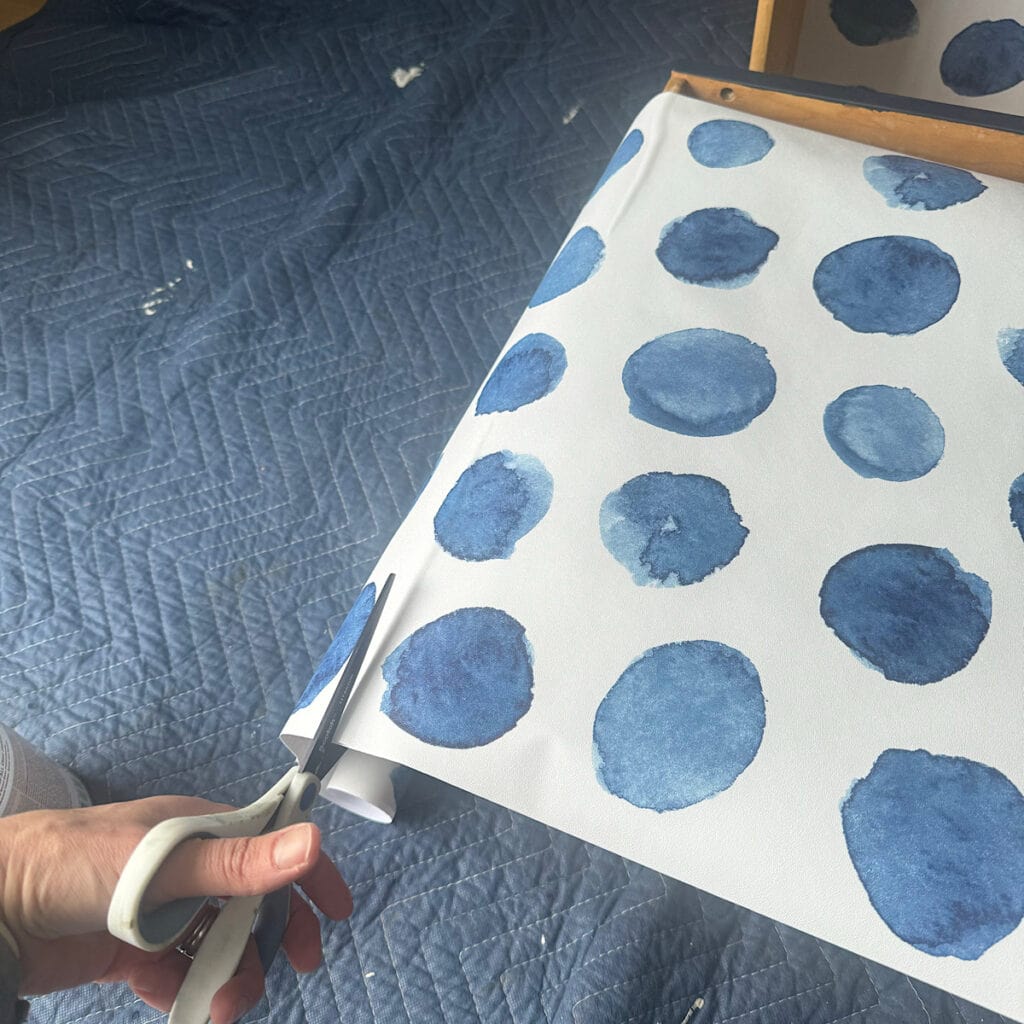
Remove the drawer from the furniture/cabinet. Measure and cut the paper slightly wider than the drawer. And when I say measure, you don’t even need a measuring tape, just unroll and eyeball it!
Next, you want to cut the paper. This does not need to be exact either, just be sure to have a little extra on all sides. While it’s important to have a little extra on all sides, you don’t want a lot. It makes laying it in the drawer a little harder.
Step 2: Place Paper Inside of Drawer
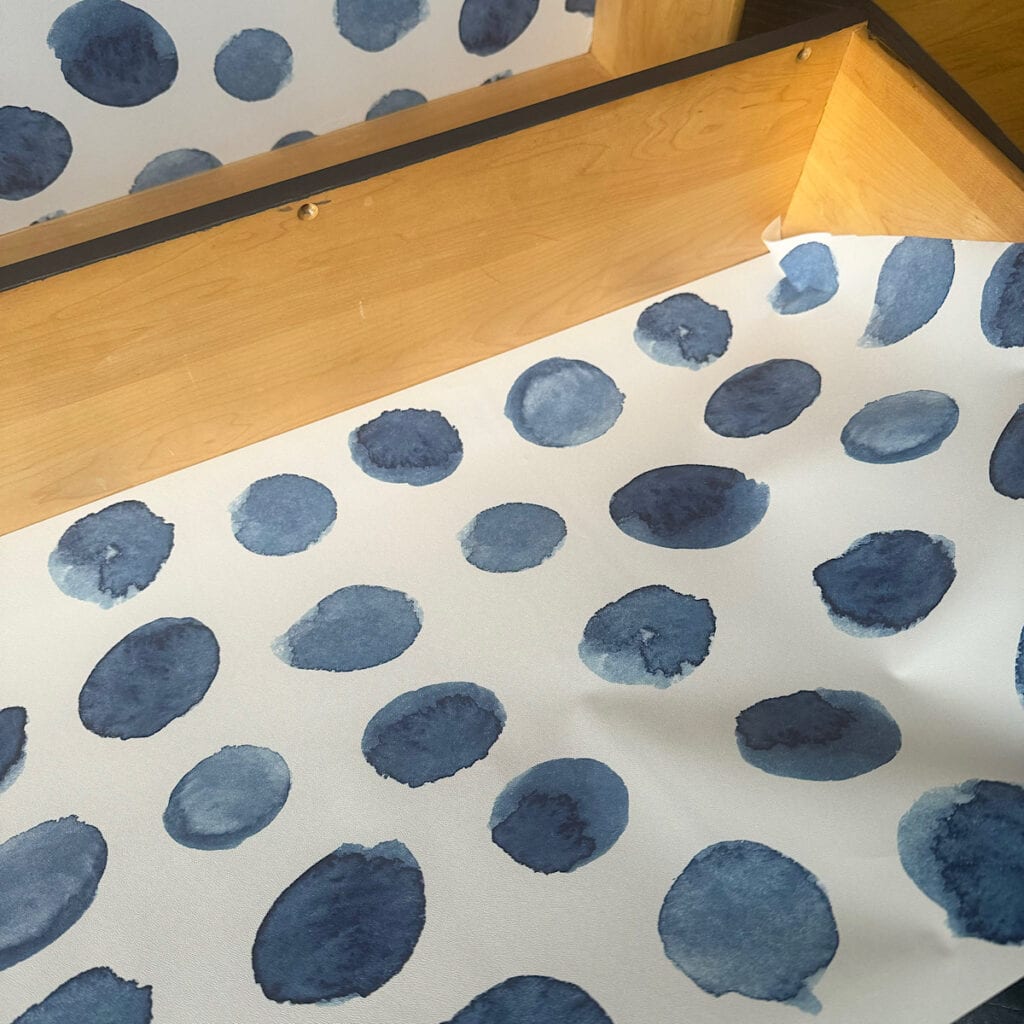
Next, you will remove the backing from the cut piece of paper. Make sure not to let the paper stick to itself (this can be the most challenging part)!
The edge of the paper on the sides of the roll should still have the straight factory edge. Take the factory straight edge and line it up with the front of the drawer (use the back of the drawer if the drawer front is curved).
Step 3: Smooth Out Paper
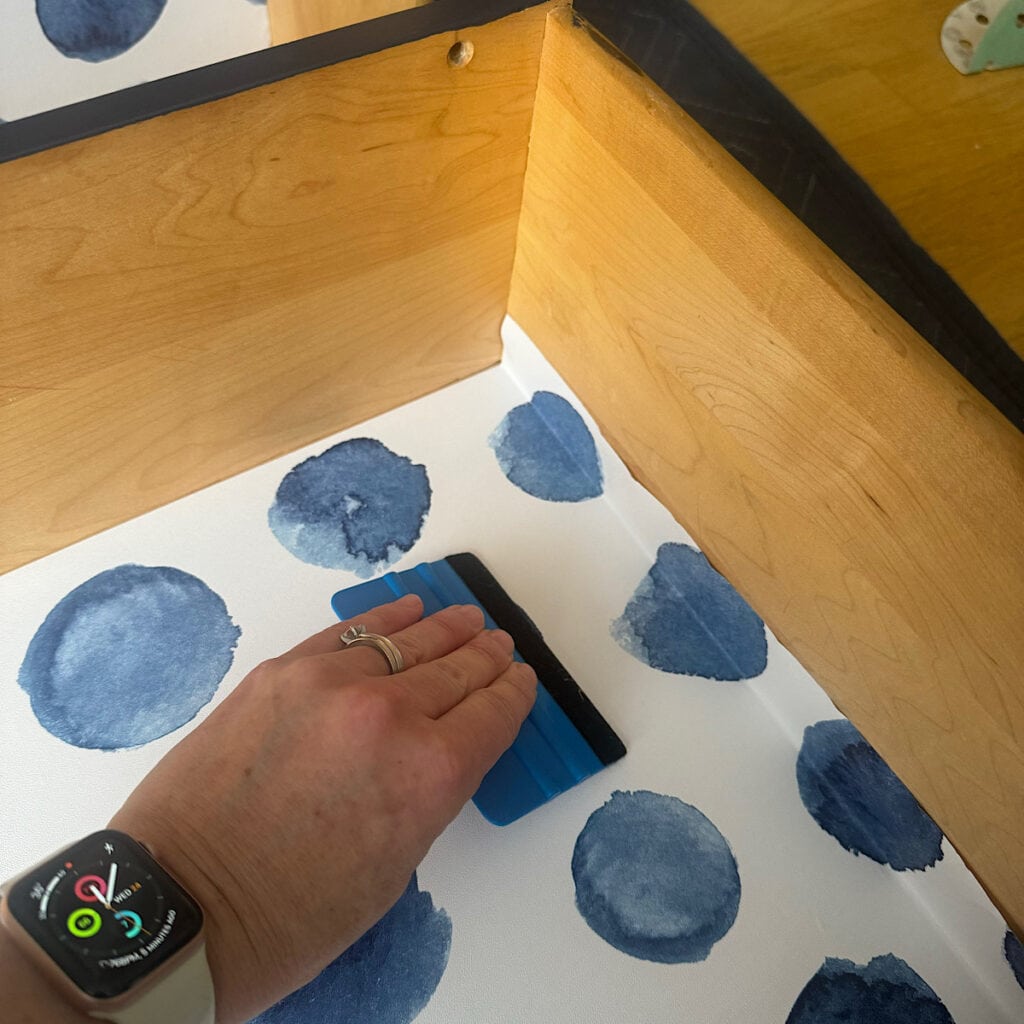
Once you have your front edge lined up, using a wallpaper smoothing tool, smooth out the paper so it’s flat and doesn’t have any air bubbles.
I find it easiest to start in the center front and work backward a bit, then out to the sides, then backward some more, then to the sides again. Continue in the pattern until the entire piece is flat on the bottom. Use the tool to make a good crease around the edges.
Step 4: Remove Excess Paper
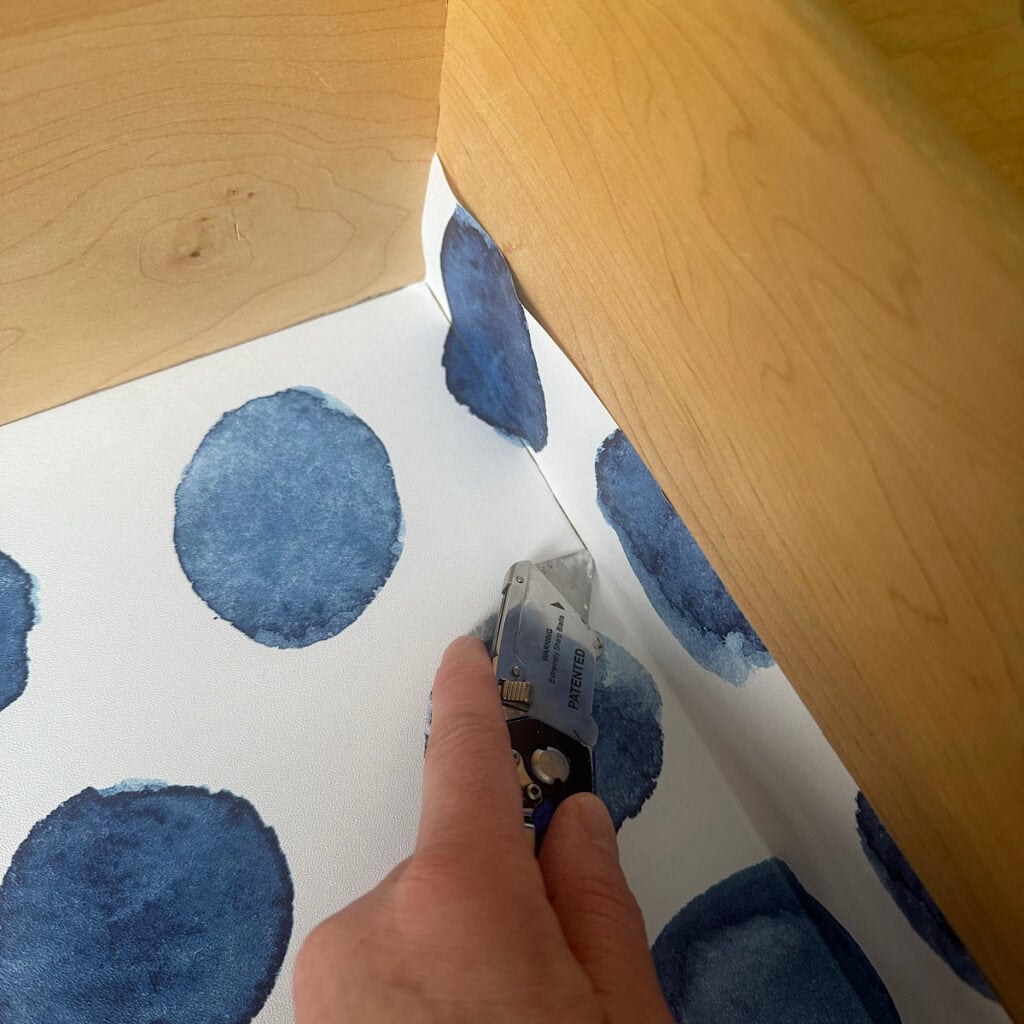
Once you have the paper down, use a utility knife to cut along the edge. Then peel off the excess and you have your lined drawer!
Would you like to save this?
Other Options For Lining Drawers
While peel-and-stick wallpaper is my go-to for lining drawers, there are plenty of other materials you can use depending on the look and function you want. Below are some other options to consider.
Traditional Pasted Wallpaper
This is another great option to line drawers, and when going this route, I generally do not paste them down, just cut them to size and let them lie unattached in the bottom of the drawer. That way, they are easy to remove if you ever want to change them.
Wrapping Paper
Wrapping paper is another option, similar to traditional wallpaper. However, wrapping paper is usually thinner, so using an adhesive spray to hold them in place is helpful. Sticking to thicker wrapping papers will also make the job easier. Keep an eye out for wrapping paper on sale when you’re out and about.
Fabric
Fabric drawer liners add a touch of elegance to your project. They require a bit more work because you will need to cut a piece of posterboard to size, and then attach the fabric to the board with adhesive spray. They then lay nicely in the drawer, and you can take them in and out easily.
Felt
Felt is a great option for drawers where jewelry, silverware, or fine china/glassware are stored. You can either buy a self-adhesive felt or a regular felt and attach it with double-sided tape. The self-adhesive gives a more professional-looking finish but may be more difficult to remove down the road.
What NOT To Use For Lining Drawers
What should you NOT use when lining drawers? Contact paper. The adhesive is incredibly strong, making it very difficult to remove. Whenever I come across a potential piece to refinish and it has contact paper in the drawers, I groan. Often, you will need a heat gun or a scraper to get it all off, and it’s not a fun process. Peel-and-stick wallpaper has all the advantages of Contact paper PLUS it is easy to remove!
Summary
Adding drawer liners is a great way to add character to your next furniture makeover. Whether you are just learning how to paint furniture, or looking to get started flipping furniture, this detail is sure you make your project stand out! I’ve found using peel-and-stick wallpaper to be the easiest type of drawer liner to use, and with this step-by-step guide, you can tackle drawer lining with confidence. As always, please post any questions in the comments. I’m happy to answer!
I love this! Years ago I used to be able to get scented drawer liner. They were wonderful. Do you have any ideas for adding a scent to the wallpaper? I would love to have that option.
Thank you so much!
There are scented wood furniture salves that are great for adding scents to your drawers, plus they nourish the wood. You can add it to the wood on the drawer sides and backs. Wise Owl Paints makes some great scents!
Thank you so much, Katie! You have such great and creative ideas. I love your website.
I am so glad you like it! Thank you Barbara!