Finishing A Butcher Block Top: Step-by-Step Island Cabinet Makeover
This post may contain affiliate links, meaning I make a small commission on qualifying purchases.

If you’ve ever come across a tired butcher block cabinet or island and wondered whether it’s worth saving, this post is for you. These small cabinets are great workhorses for any small kitchen space – they work well as islands or sideboards, providing extra cabinet and counter space. In this makeover tutorial, I first focus on finishing the butcher block top, then the cabinet itself. Keep reading for all of the details!
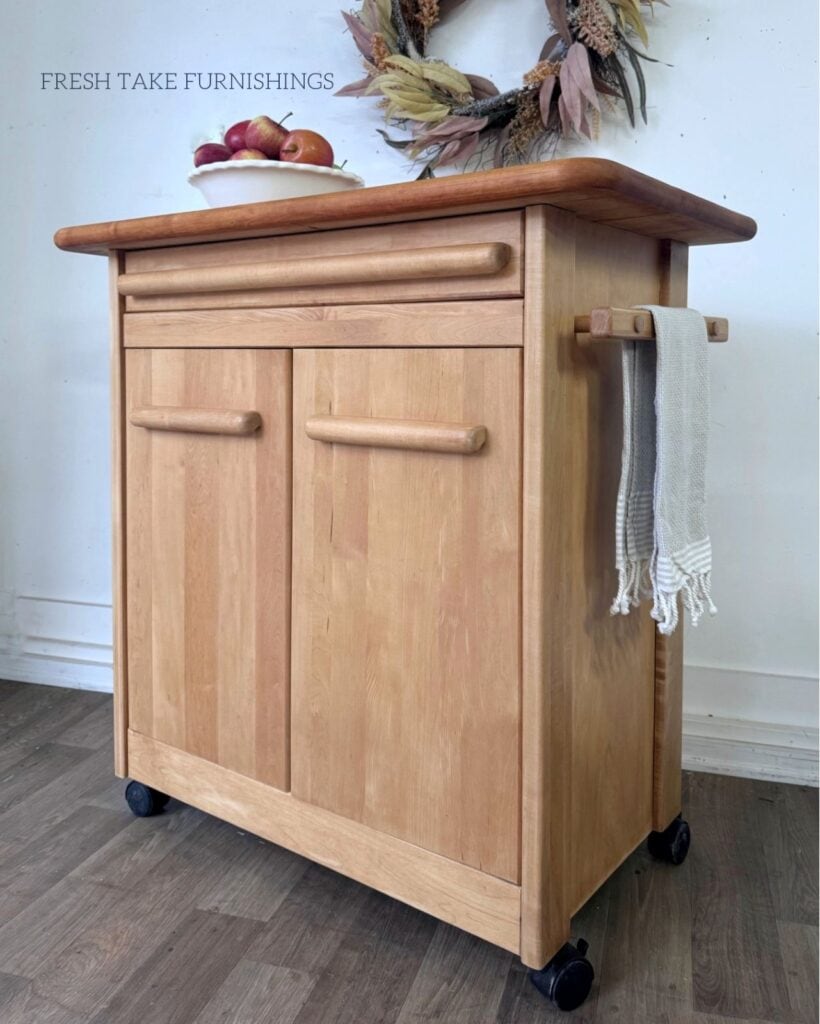
One of my favorite things about commissioned work from clients is that I often get to work on projects that are outside of my typical painted furniture makeovers. This cabinet is a perfect example of that. It had been sitting in the basement of my client’s house for years. Their son was moving to a small apartment and needed some additional storage and counter space, so they dug it out and asked me to give it a refresh!
Summarize & Save This Content
Choosing The Best Butcher Block Sealer
Before starting, I did some research on sealing butcher block surfaces. And like most things in furniture refinishing, there is no one answer, other than “it depends.” I narrowed it down to three different types of sealers, each with its own benefits and drawbacks:
- Penetrating Oil: Mineral oil is completely food safe and penetrates into the surface of the wood. It needs to be reapplied over time and is not stain-resistant or waterproof.
- Oil and Resin Blends: An example of this is Waterlox, which is a tung oil and resin blend. The oil penetrates the wood, and then the resin creates a hard surface when cured. These are food safe after curing, but cutting directly on the surface may cause the finish to deteriorate.
- Polyurethane: Traditional oil-based polyurethane is another option. This is also considered food safe when fully cured, but again, if it is a cutting surface, the finish may not hold up over time.
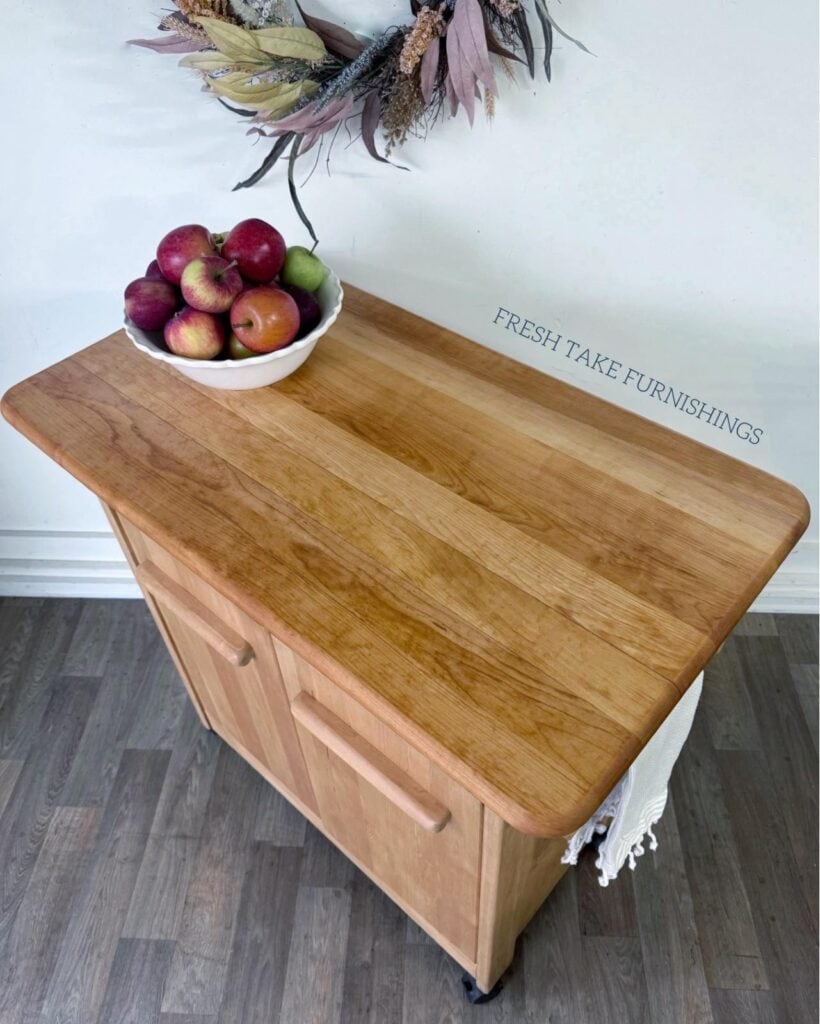
Ultimately, I decided on using a penetrating mineral oil becuase this countertop will be used as a cutting surface. I then followed with a butcher block conditioner (with food-safe waxes) to seal it a bit more and improve its resistance to liquids.
However, if there wasn’t going to be food preparation happening directly on the surface, I would have tried Waterlox instead. Also, if you are looking to stain the butcher block, either using Waterlox or polyurethane will seal an oil-based stain.
Steps For Finishing A Butcher Block Top
Step 1: Cleaning And Sanding The Butcher Block
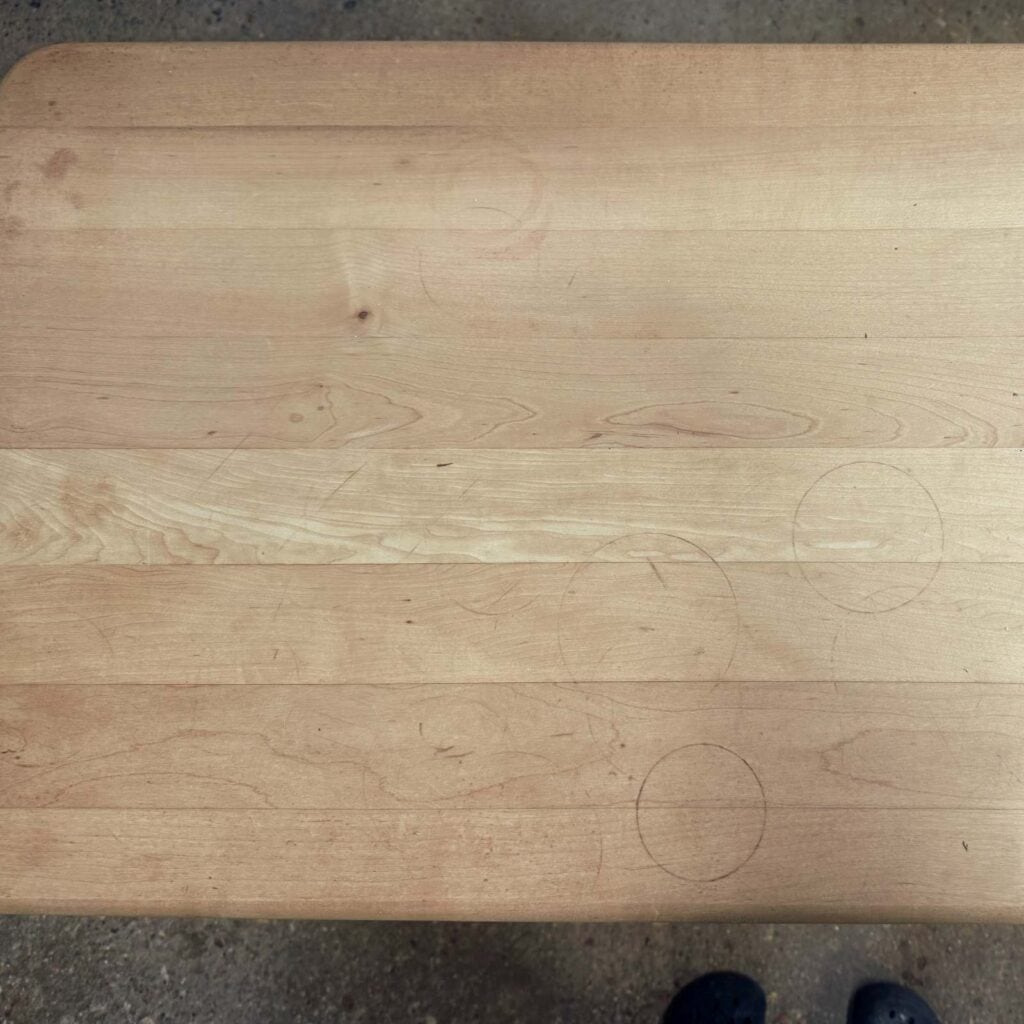
As always, I started this makeover with cleaning. For the butcher block top, I wanted to use something that was food safe, so I used dish soap and water, scrubbing well with a scotchbrite pad and then wiping clean with a microfiber cloth. This removed some, but not all of the stains and water rings.
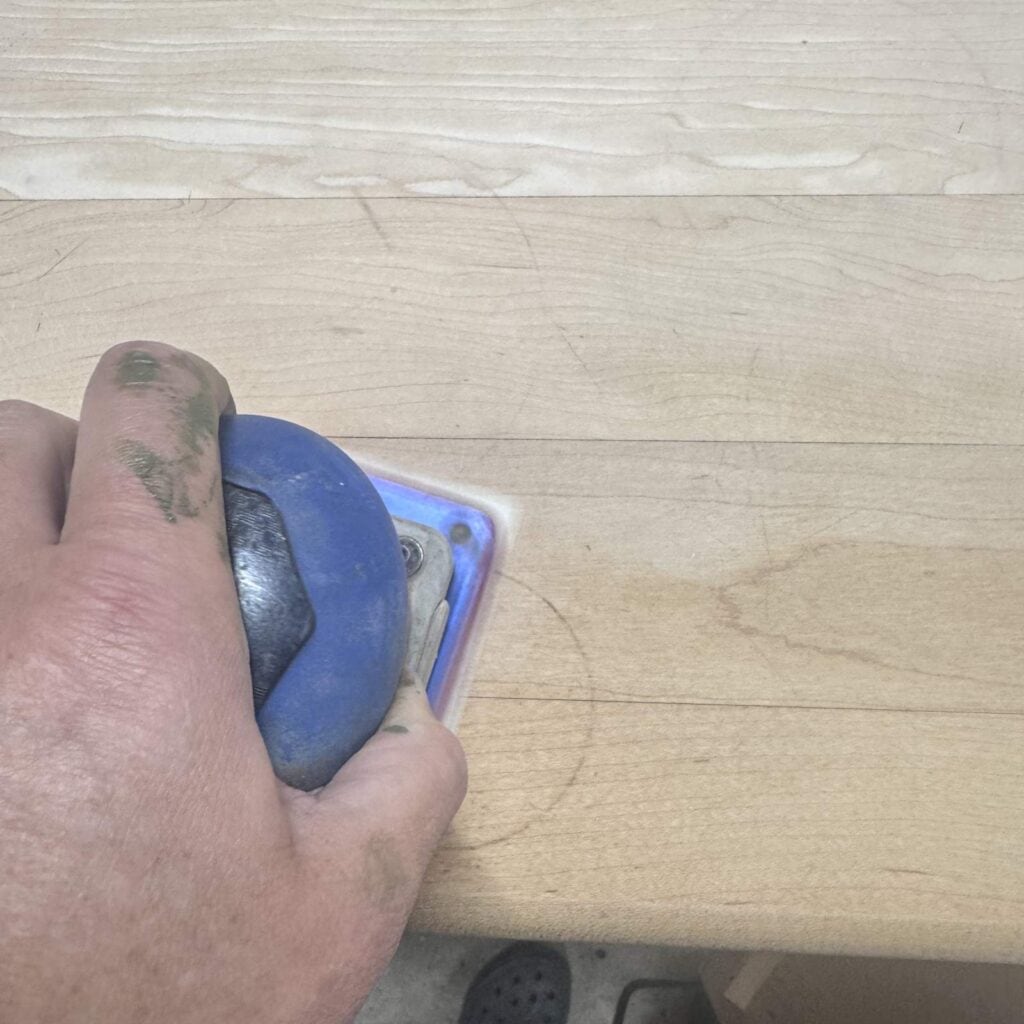
After the top had dried, I began sanding. I started with 100-grit and worked my way all the way up to 220-grit (100 to 150 to 180 to 220). This removed all of the stains and water rings from the top. If the stains had lingered, I would have tried some oxalic acid or Barkeeper’s Friend on the stained areas, followed by a thorough rinse with water.
Step 2: Oiling The Butcher Block

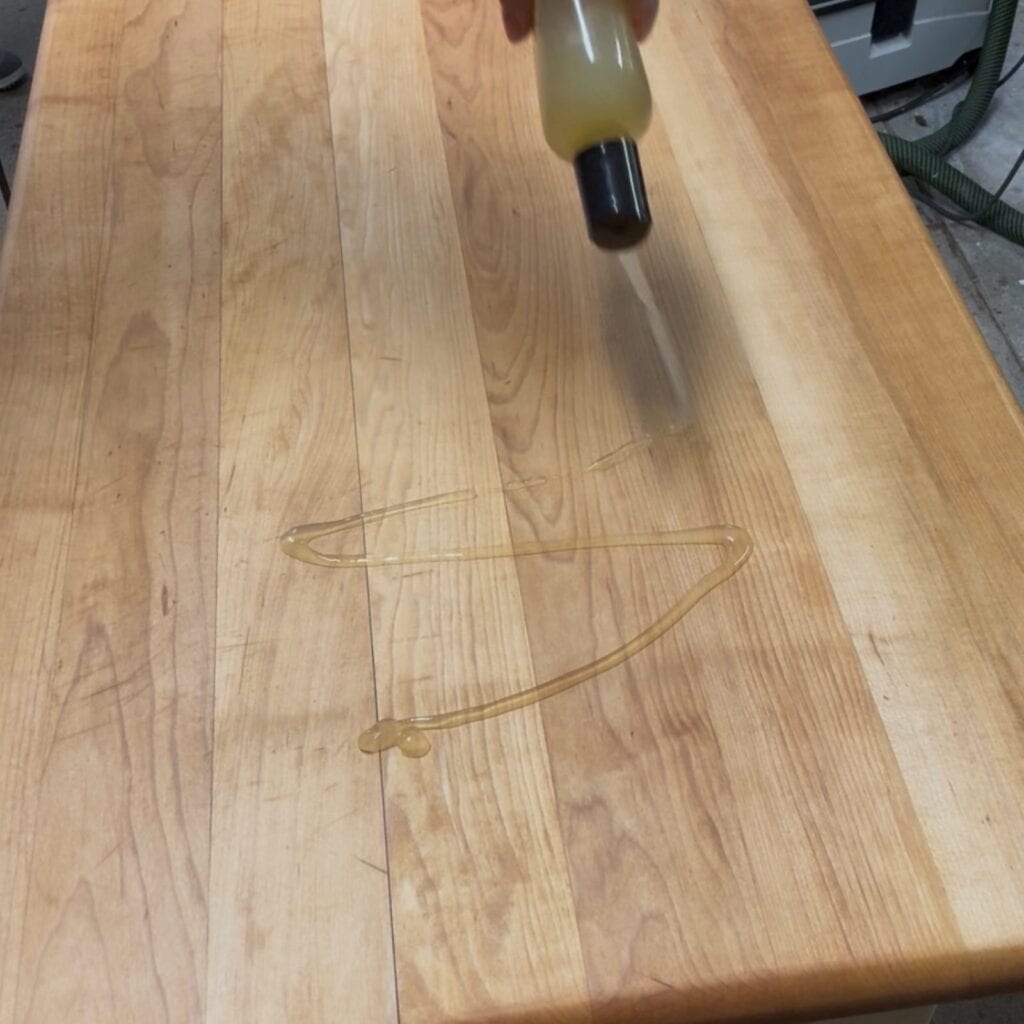
Once the butcher block top was cleaned and sanded (and sanding dust wiped away), it was time to add the mineral oil. To start, squeeze a liberal amount onto the top, then, using a blue shop towel, cover the surface completely.
Let it soak in for at least an hour and reapply. For unseasoned, raw wood, Howard’s recommends 3-4 coats. I did 4 on this top.
Step 3: Sealing The Butcher Block
After applying 4 coats of mineral oil, it was time to seal it with the butcher block conditioner (again, this product is mineral oil with wax to improve its water/stain resistance).
I did 4 more coats of the conditioner, waiting at least an hour between coats. I waited until the product was mostly soaked in before reapplying.
Would you like to save this?
Steps For Finishing The Cabinet
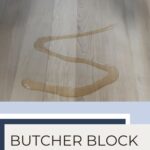
With the butcher block top refreshed, it was time to turn my attention to the cabinet base. While there are many options, such as painting or staining, my client ultimately chose to keep the natural wood finish. However, as you can see below, there were some discolorations in the existing wood finish (either mildew or dirt/oil stains) that needed to be removed before re-sealing the wood.
Step 1: Cleaning And Sanding The Cabinet
I started by cleaning the cabinet base with Dawn soap and water, let it dry, and then sanded to remove any existing finish. I started with 100 grit and worked my way up to 220 (just like the butcher block top).
Step 2: Removing Stains From The Cabinet
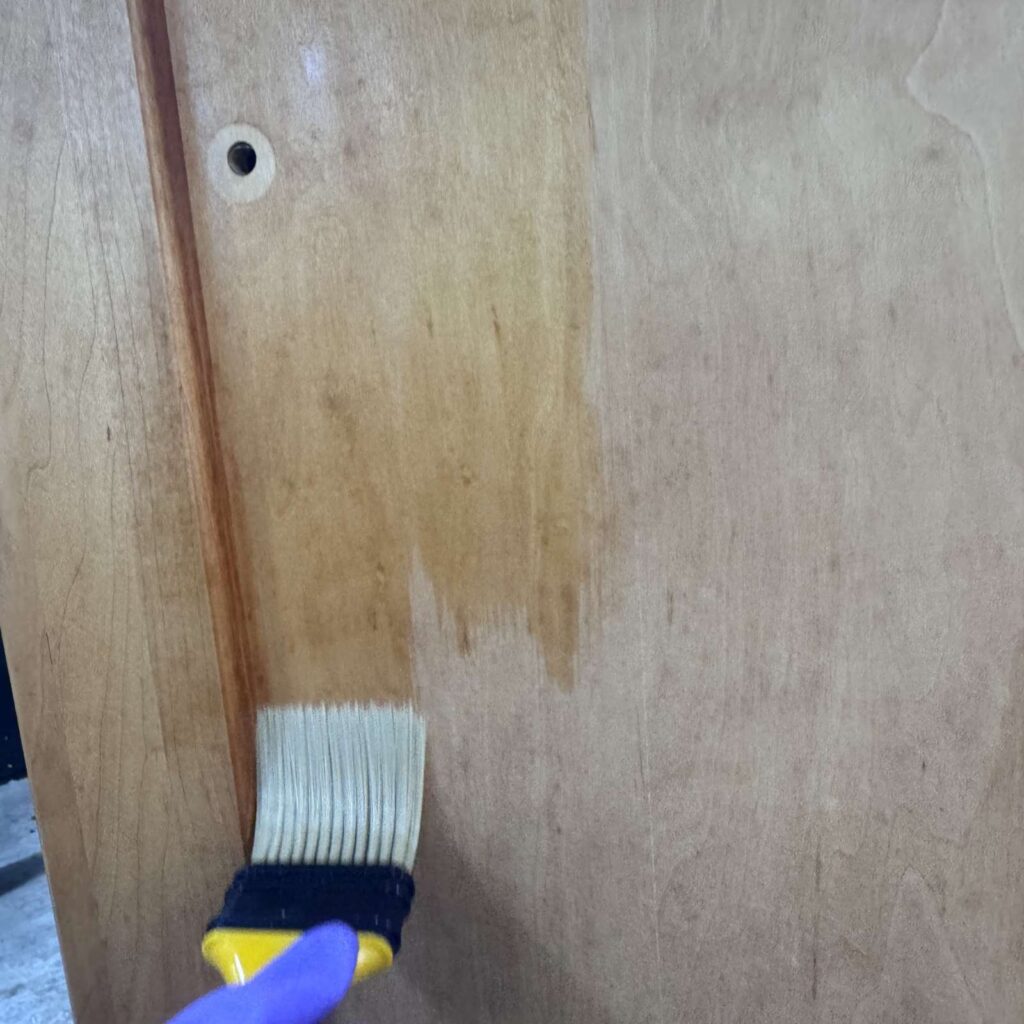
While the stains were much better after cleaning and sanding, they were still noticeable, so I knew I needed to do something more.
I started by applying household bleach over the entire surface and letting it dry completely. Then I followed with a vinegar wash to neutralize the bleach and kill any mold spores in the wood (bleach will only kill mold on the surface). This got rid of almost all of the staining (and I knew what was left wasn’t mold or mildew), and it was ready to seal.
Step 3: Sealing The Cabinet
After letting the vinegar dry, I sanded again with 220-grit. And then sealed the entire base with 3 coats of General Finishes High Performance Topcoat.
Summary
This island cabinet went from forgotten to functional! By cleaning, sanding, and properly finishing the butcher block top with food-safe oils, you can bring out the wood’s natural warmth while keeping it durable for everyday use. Whether you’re restoring an old island, building a new one, or simply refreshing a tired countertop, these steps for finishing a butcher block top will help you achieve a beautiful, lasting finish that’s both functional and timeless.
New to furniture painting?
Get my FREE Beginner’s Guide to Painting Furniture! This guide walks through the steps of a furniture painting makeover and includes a downloadable project planner and supply checklist.