

Sanding Furniture: Everything You Need to Know!


When I first got into furniture painting, I had no idea how much sanding was involved! And it can be confusing – I get questions about sanding all the time! Does the finish always need to be sanded off, or is it okay to leave some on? How is the process different for a painted versus a stained refinish? And wondering if and when it’s time to invest in an electric sander? These are all important questions, and hopefully, by the end of this article you will have a great understanding of all things sanding!
A note on product links
This post contains Amazon affiliate links, meaning I get a small commission on qualifying purchases at no cost to you.
Sanding a peice to paint
Can you paint furniture without sanding? The short answer is no, I never recommend painting a peice without sanding. Sure, there are plenty of paint products that claim no sanding is required – and it may work out some of the time, but it usually doesn’t work out all of the time. And trust me, it is much easier to deal with at the start of a project! There is nothing worse than having to remove a fresh paint job becuase it hasn’t adhered properly to your piece.
That said, you don’t have to sand off the finish completely and start from bare wood. Sanding isn’t an all-or-nothing approach when painting furniture. This is where scuff sanding comes in!
Safety First!
When sanding, it is important to protect yourself with the appropriate gear. Be sure you are using a respirator, safety goggles, and work in a well-ventilated area. If using an electric sander, you can reduce the dust created by pairing it with a shop vac or dust extraction system while working. I also use noise-canceling ear protection when using power tools.
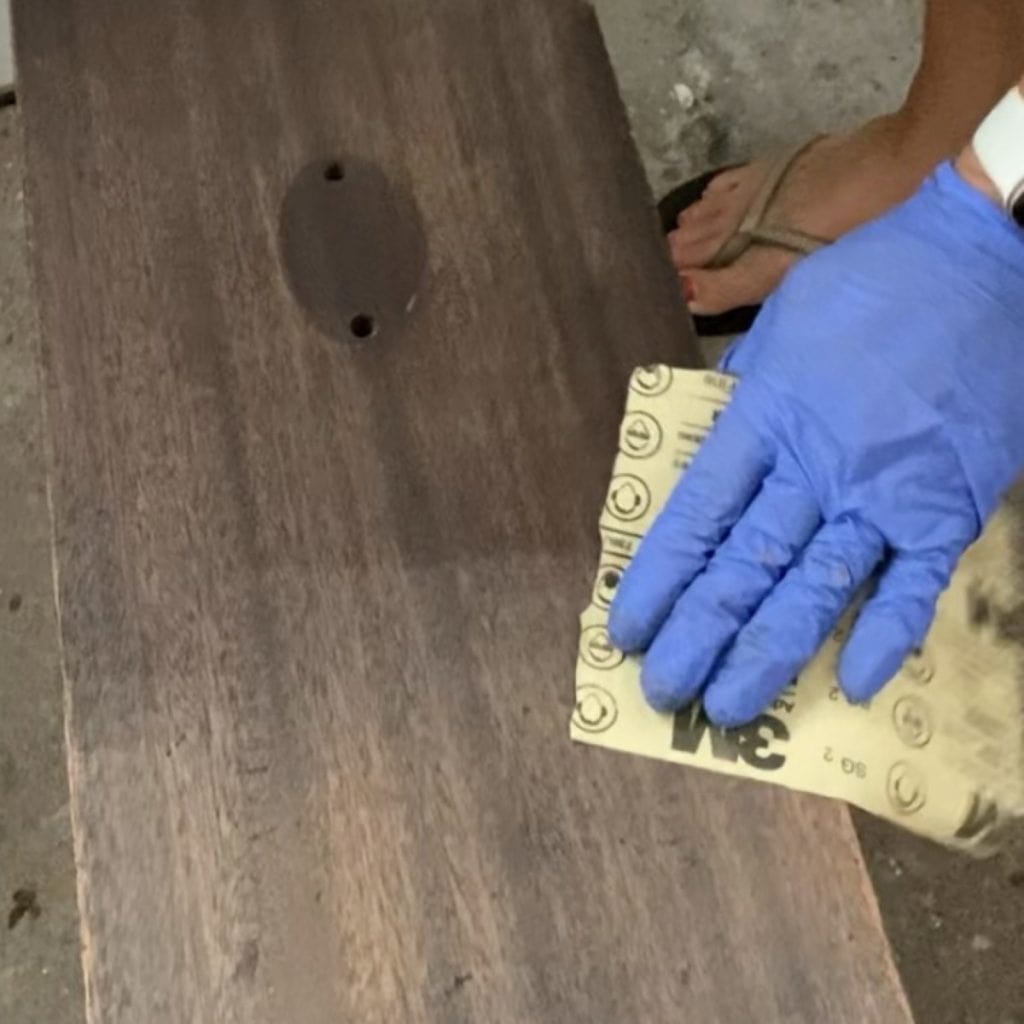
Scuff Sanding
Scuff sanding is exactly what it sounds like – scuffing up the existing finish to help with paint adhesion. Think of it as giving your surface some teeth. The good news is you don’t need an electric sander for this, just grab some sandpaper and go over the entire surface to scuff it up. It shouldn’t take you a lot of time, remember that you don’t need to remove the finish!
Before getting started with scuff sanding, it is important to clean your piece. Any dirt, grime, oils, or waxes are going to gum up your sandpaper and you’ll end up using a lot more. Plus that grime can also get driven down into the wood and create adhesion issues.
If it is a high gloss surface (or laminate surface), I generally start with 180 grit and see if that will scuff up the surface. On occasion, I have had to go down to 120 and then follow with the 180. If the surface isn’t overly glossy then I generally scuff sand with 220.
Once completely scuff sanded, remove all of the dust with a damp microfiber cloth. Since you’ve already given a peice a thorough clean and removed the grime, simply removing the dust is all that’s needed here. I don’t like using tack clothes becuase their waxy makeup can leave a film on your piece and prevent the paint from adhering as well.
Sanding dings and scratches
A vintage piece of furniture will often have dings and scratches on the surface. Often, these can be sanded out while scuff sanding. However, you don’t want to sand too much and create a depression or unevenness in the surface. Using a wood filler (like Bondo Glazing and Spot putty or QuikWood) for dings and scratches will help to keep your surface smooth. I have more details on filling dings and scratches in my article about basic furniture repairs.
Sanding off all of the finish
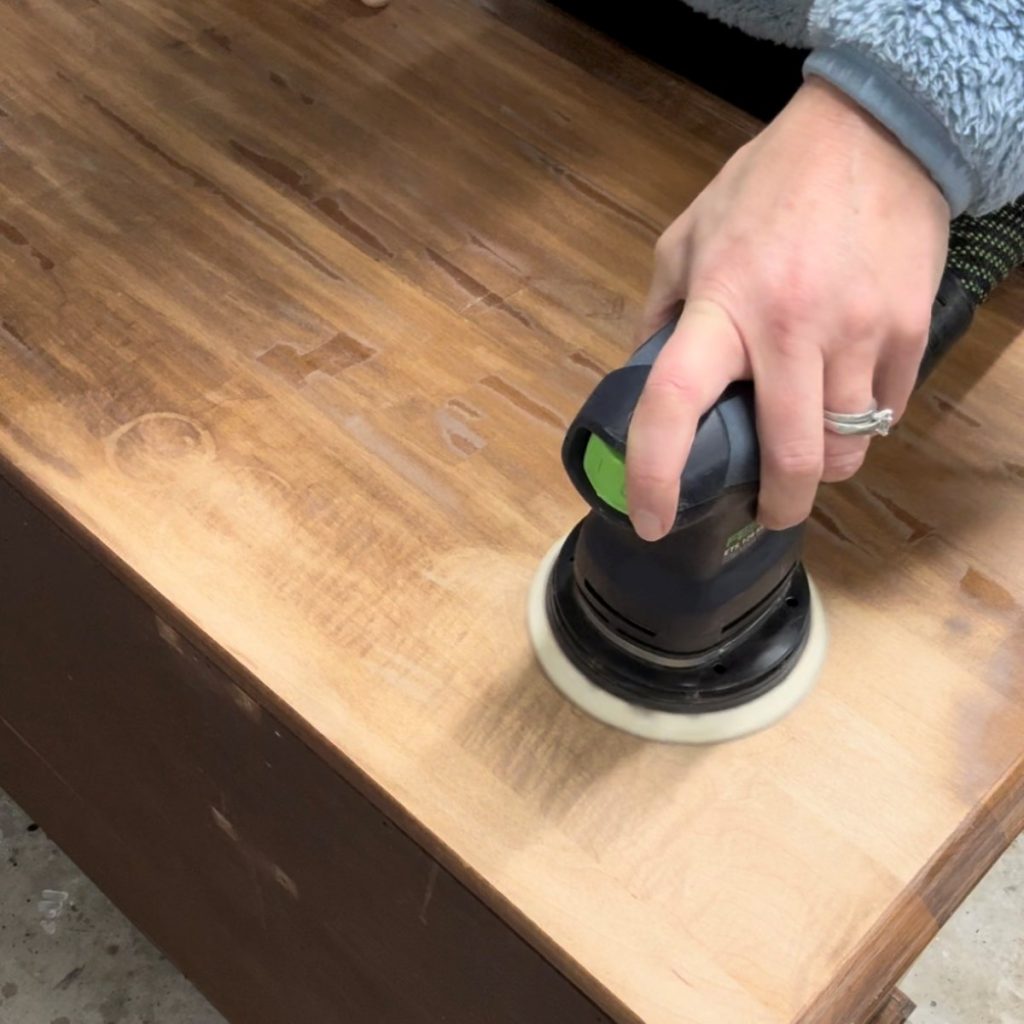
Sometimes when you start to scuff sand you will find the old finish comes off very easily – flaking when you take sandpaper to it. This means the finish is failing, and unfortunately, needs to come off. You definitely don’t want a finish that isn’t sticking to your peice to be under your paint – it won’t last. Your final finish is only as good as your prep! This is when having an electric sander is helpful – it will make the job of removing the finish much easier.
Priming your piece
Priming is a whole other subject (which I talk about here), but it is important to mention it because it goes hand-in-hand with sanding. If you have sanded off significant areas of finish while scuff sanding then it is important to prime so that your finish paint has a uniform surface to lay down on.
Would you like to save this?
Sanding for a wood finish
When creating a new wood finish on a piece of furniture, you will need to remove all of the existing finish. This can be a time-consuming process, to say the least! Unless the finish is coming off very easily with sandpaper alone, I recommend using a stripper or carbide scraper to help with removal. And I would not recommend tackling a complete sand with an electric sander.
Again, before getting started with finish removal, it’s a good idea to clean your peice. I worry about this less when stripping, but if you’re using a carbide scraper or sanding only, removing any dirt or oils before getting started will save you sandpaper and ensure you don’t have any of that residue left behind.
Going through the grits
I get this question all of the time – what grit to use? It is important to understand that the sandpaper grit you start with isn’t going to be what you end with. To remove a finish, you will want to start with a coarse paper, or low grit. I will often start with 100 or 120 and see how well that works. If needed you can go down to 80 but I almost never go below that. If 80 isn’t working, it’s time to use a stripper or a carbide scraper.
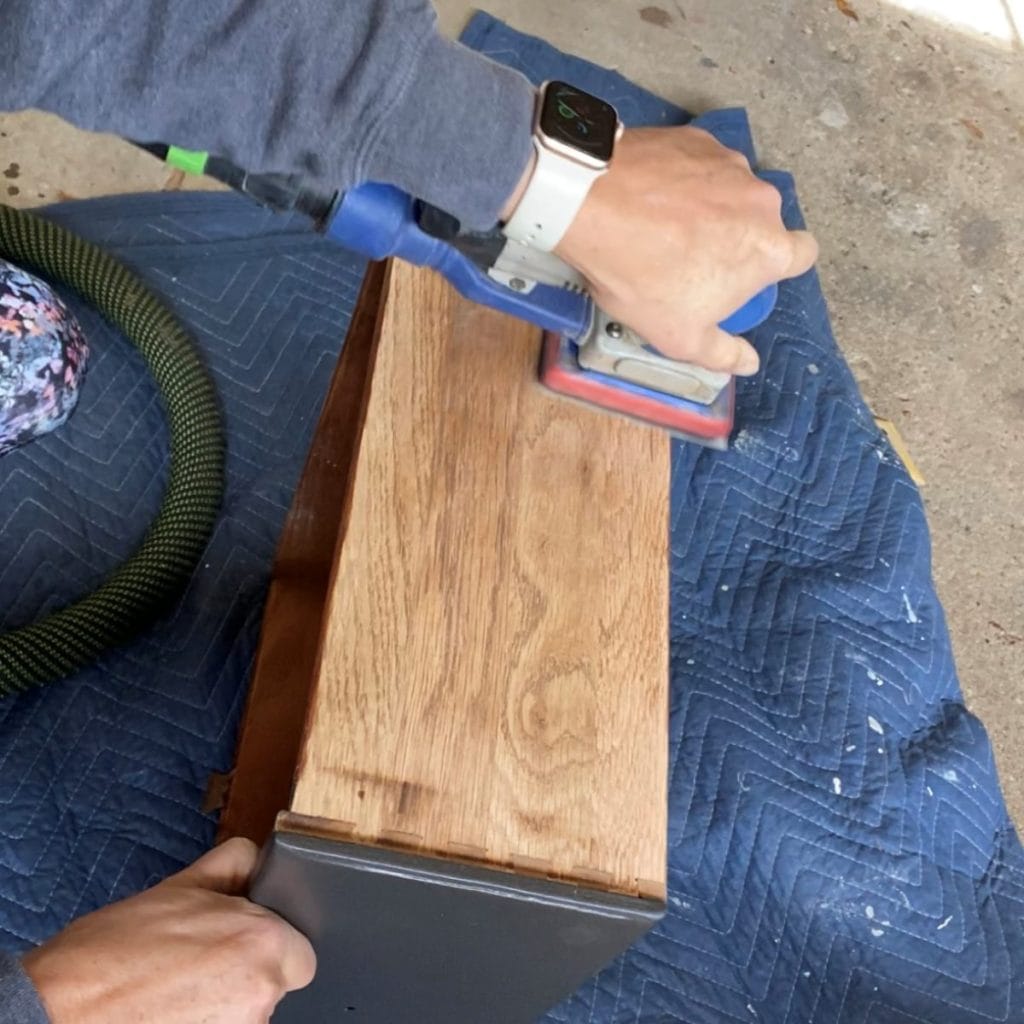
Once you have removed the finish with a coarse grit, you can feel that the wood is not very smooth. This is where the additional grits come in. You will want to sand with progressively finer and finer grits until you reach the desired smoothness. I recommend moving to 150 grit for the next go around, then finishing with 180-220. If you go beyond 220 you will likely seal up your wood too much and it will have difficulty absorbing stains.
Sander recommendations
While you can get by with a quick scuff sand by hand, more intensive sanding jobs are made a lot easier with an electric sander. A sander was the first tool I purchased when I started painting furniture.
1. Basic orbital Sander
I started with a basic orbital sander and used it for a few years before it died. These are generally inexpensive compared to some of the fancier sanders and are great for beginners.
2. SurfPrep Electric Ray
My next sander investment was a SurfPrep 3×4 Electric Ray. I wanted something to use regularly for scuff sanding and detail sanding. I have had mine for nearly 5 years, use it on every project, and it is still going strong! Its size makes it easy to reach all of the nooks and crannies and the sponge abrasive pads make sanding contours and details so easy. I have an attachment that hooks my SurfPrep up to my Festool dust extractor, which does an amazing job of keeping my workspace sanding dust-free!
3. Festool sander and dust extractor
While I loved my SurfPrep, I still used my old orbital sander when completely removing a large area of old finish (sanding down a dresser top, for example). When it finally died, I did some research and decided to replace it with a Festool orbital sander. While more expensive, if you do a lot of sanding I think it is worthwhile because it vibrates significantly less than my old Bosch orbital sander. My hands and wrists were tingly after using my Bosch, and I knew long term this wasn’t good for me. Plus, I combined this purchase with my dust extractor to reduce the amount of dust in my working environment.
Summary
I hope this guide to sanding furniture helps you on your next refinishing project! The key is knowing when to scuff sand, when to remove the finish completely, and what tools to use. Investing in an electric sander can make sanding faster and more efficient, especially for larger projects.
I hope this guide has helped! Have more sanding questions? Drop them in the comments below, and don’t forget to sign up for my newsletter for more refinishing tips!