

How to Reupholster a Chair Seat with New Fabric
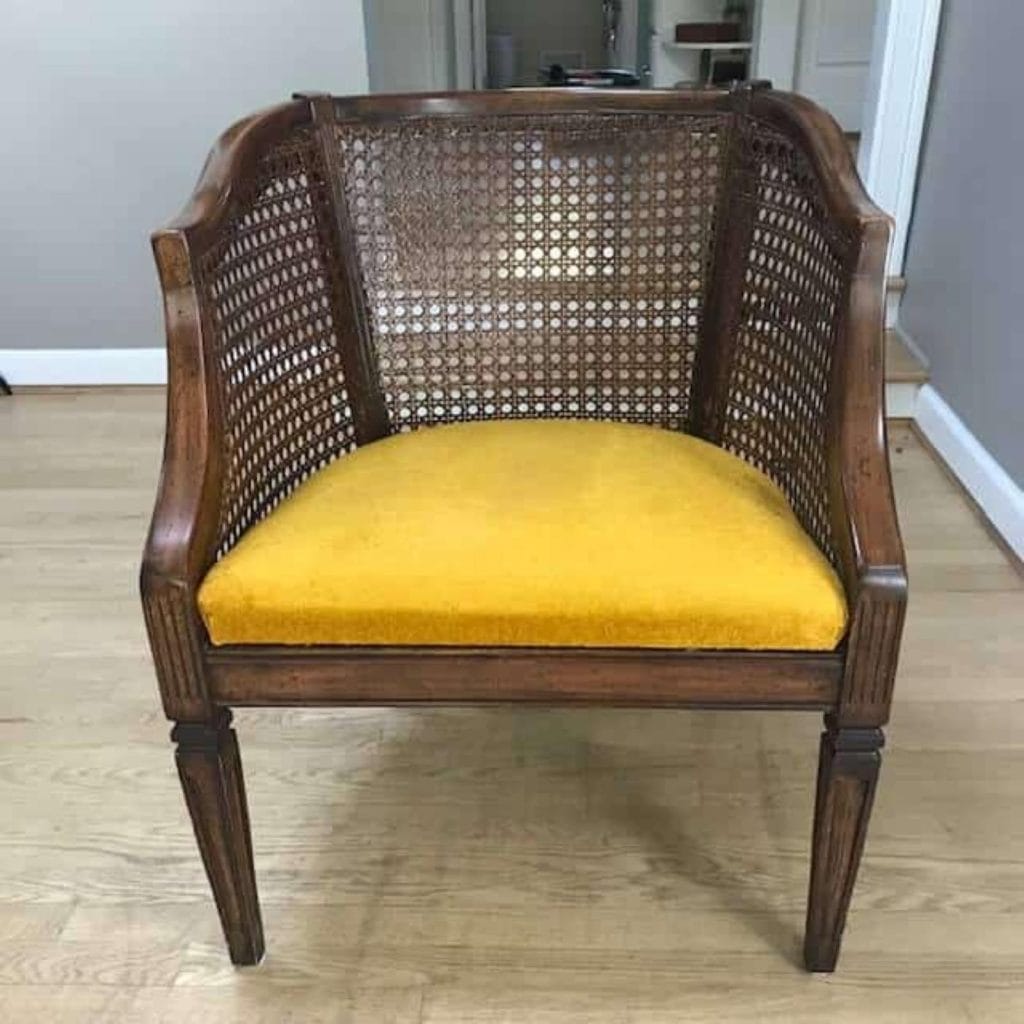
Hello friends! If you’ve ever thought about how to reupholster a chair seat, you’re in the right place. While it may seem intimidating, as long as the cushion itself is in good shape, this is an easy update, I promise! I’ve updated the fabric on my dining room chairs (several times) as well as our piano bench, plus chairs for clients too! With a few simple tools and this step-by-step DIY guide, you’ll tackle your first project with confidence. ”I just love this style of chair.
A note on product links
This post contains affiliate links, meaning I get a small commission on qualifying purchases.
The project
Anything with caning – sign me up! However, I wasn’t loving the mustard yellow fabric so I needed to reupholster the chair seat. The wood and cane on this chair were in very good shape and the chair had nice detailing. There were a few steps I took before getting to the upholstery:
- Separated the chair from the cushion: generally the cusion is screwed onto the frame of the chair, check underneath and remove any screws.
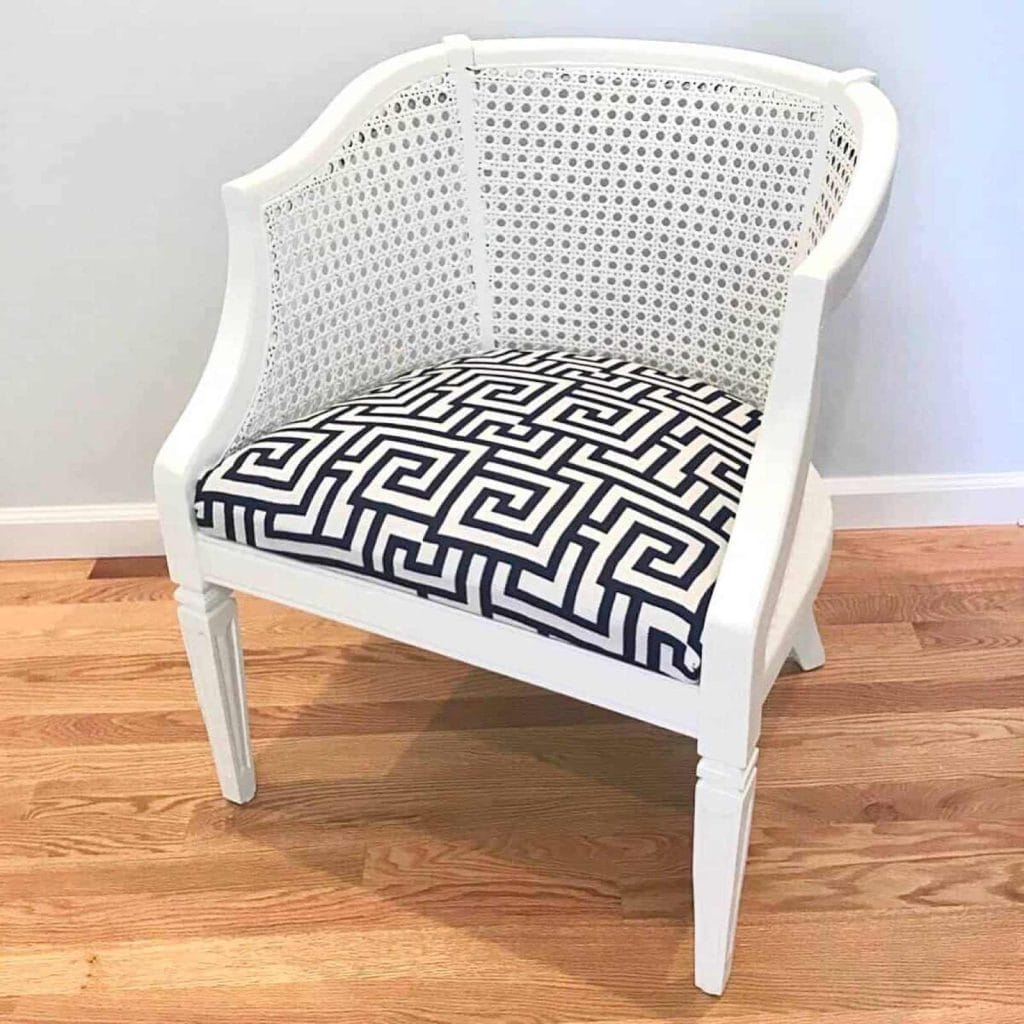
- Painted the frame: I decided to paint the chair white, using Annie Sloan Chalk Paint in Old White, Check out my furniture painting tutorial for more details on this step.
Supplies Needed
How to reupholster the chair seat
Once I finished painting the chair frame, it was time to turn my attention to the cushion. I found this fabric at JoAnn Fabrics and purchased a yard, although half a yard would have been enough. Be sure to measure ahead of time and allow for a couple of extra inches on all sides.
Step 1: Remove the existing fabric
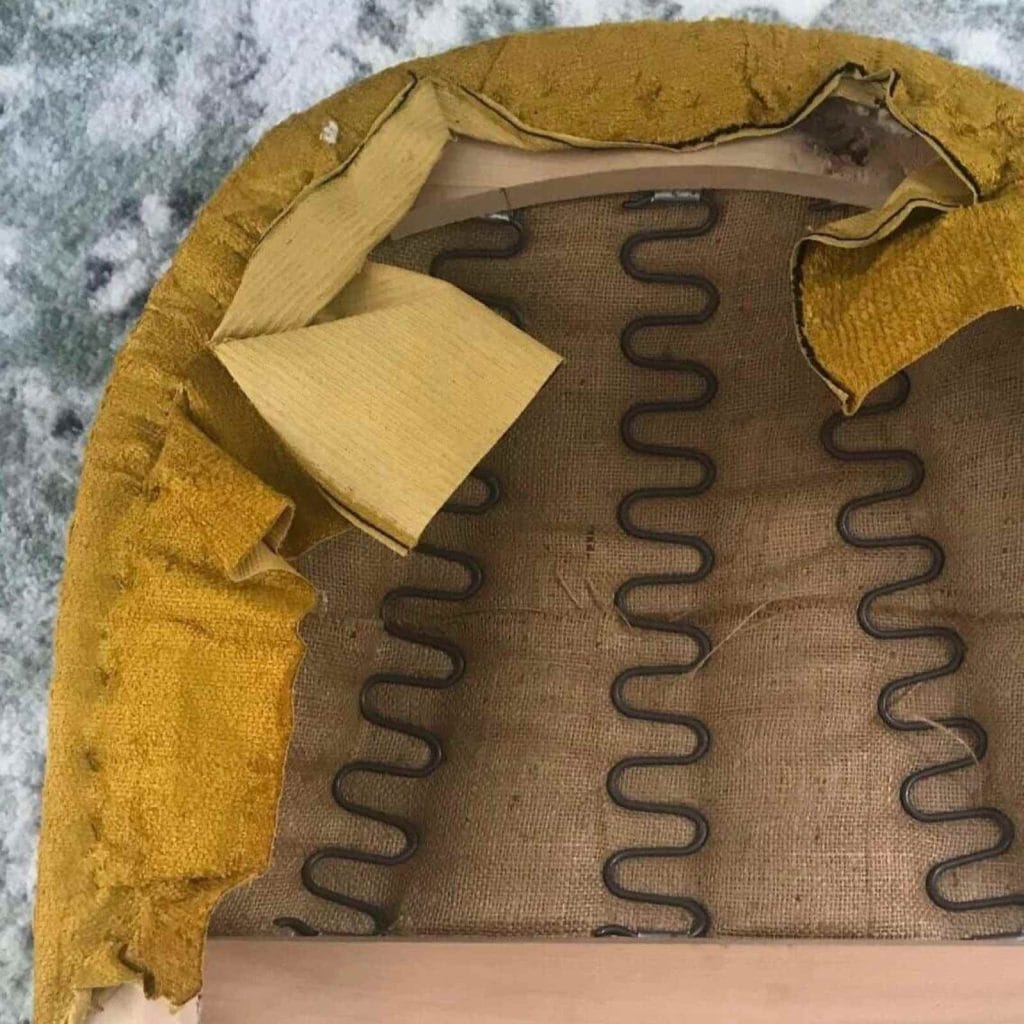
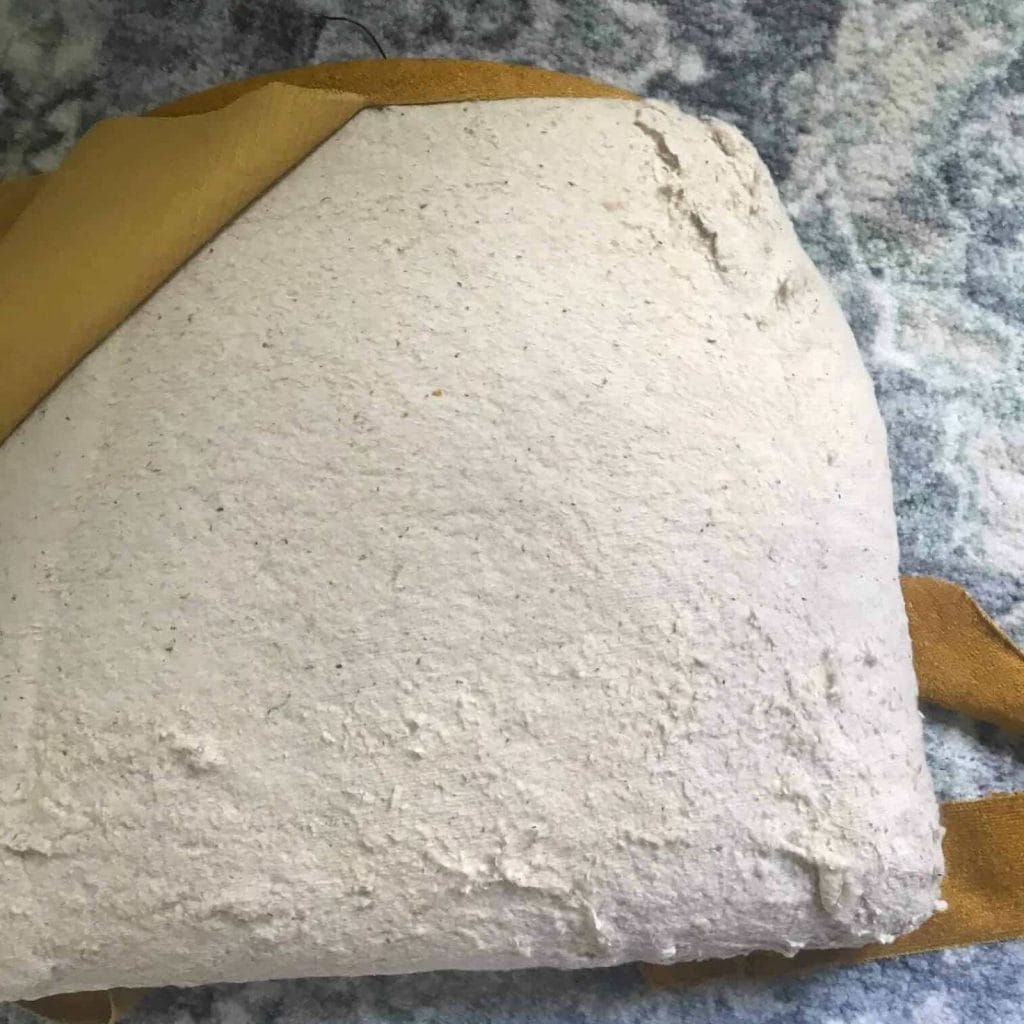
Sometimes you can just cover the existing fabric, but in this case, I didn’t for two reasons. One, I was worried the darker yellow would show through the white. Two, the cushion was already tightly fitting in the frame of the chair, and another layer of fabric would have made it even worse.
So off came the old fabric. Using needle-nosed pliers, I pulled out the staples and carefully removed the fabric. This can be tedious depending on the number of staples or nails holding the fabric in place.
Would you like to save this?
Step 2: Replace the foam or batting
I didn’t have to do this step in this project, however there are times when the foam and/or batting are in bad condition and need to be replaced. If you want to add new foam, you can purchase high density foam in various thicknesses and cut it to size (a bread knife works well for cutting the foam).
You can also purchase batting and install that if needed. Simply follow the steps 3 and 4 with the batting and then repeat with fabric. Keep in mind you don’t want your cushion to become so thick that it won’t be able to fit back into the chair frame – check this before you spend the time stapling your batting and fabric down.
Step 3: Cut and position the fabric

I laid the fabric down on top of the cushion to see how I wanted the pattern to line up and then cut, making sure there was enough overhang to staple it back underneath.
Pay attention to the pattern, especially if it is striped or geometric. I lined up excatly how I wanted this pattern to lay on the chair, then put marks in the center on underside of the cushion frame to help me when stapling in the next step.
Step 4: Staple fabric to the cushion frame
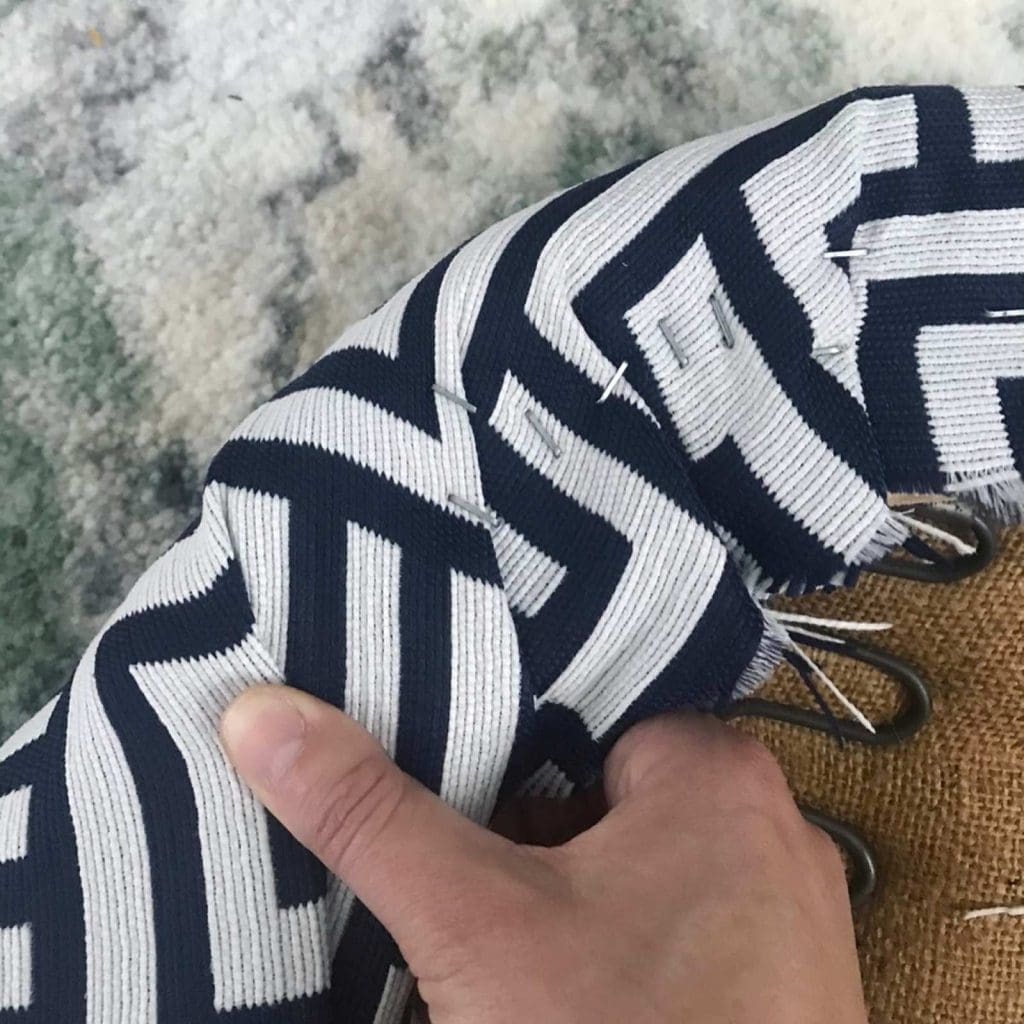
With the pattern lying where you want it to be on the cushion, flip the whole thing over. Becuase this chair had a straight bottom and rounded curves, I started with the bottom. My first staple went in the center where I had marked, and then I worked my way out, checking the front of the cushion to be sure things looked straight.
Next came a staple on the center top, then I worked my way down either side. For the curved edges, simply create a number of small folds, stapling after each one. If things aren’t lining up well or get bunchy, pull out the staples and redo.
Step 5: Add fabric protector
This is an optional step, but one I think is worthwhile! Adding ScotchGuard fabric protector will help repel water and stains and keep your cuhsions looking fresh. This is especially important for dining chairs! I generally do this outside in a well ventillated area. Simply spray each cushion with the ScotchGuard, let dry and give it a second coat.
Reupholstering a chair seat is one of my favorite ways to update furniture with a personal touch—and it’s totally beginner friendly. Whether you’re giving a dining chair a fresh look or rescuing a thrifted find, this simple project can make a big impact. I hope this guide gave you the confidence to try it for yourself! Have questions? Drop them in the comments—I’m happy to help.
And that’s it! Finish it up by putting the cushion back on the chair frame and screwing it back together. This is a project that anyone can do and is a great way to refresh your furniture. Whether you’re giving a dining chair a fresh look or rescuing a thrifted find, this simple project can make a big impact. All you need is some pliers, scissors, a staple gun, and some new fabric! I hope this guide gave you the confidence to try it for yourself! Have questions? Drop them in the comments, I’m happy to help!
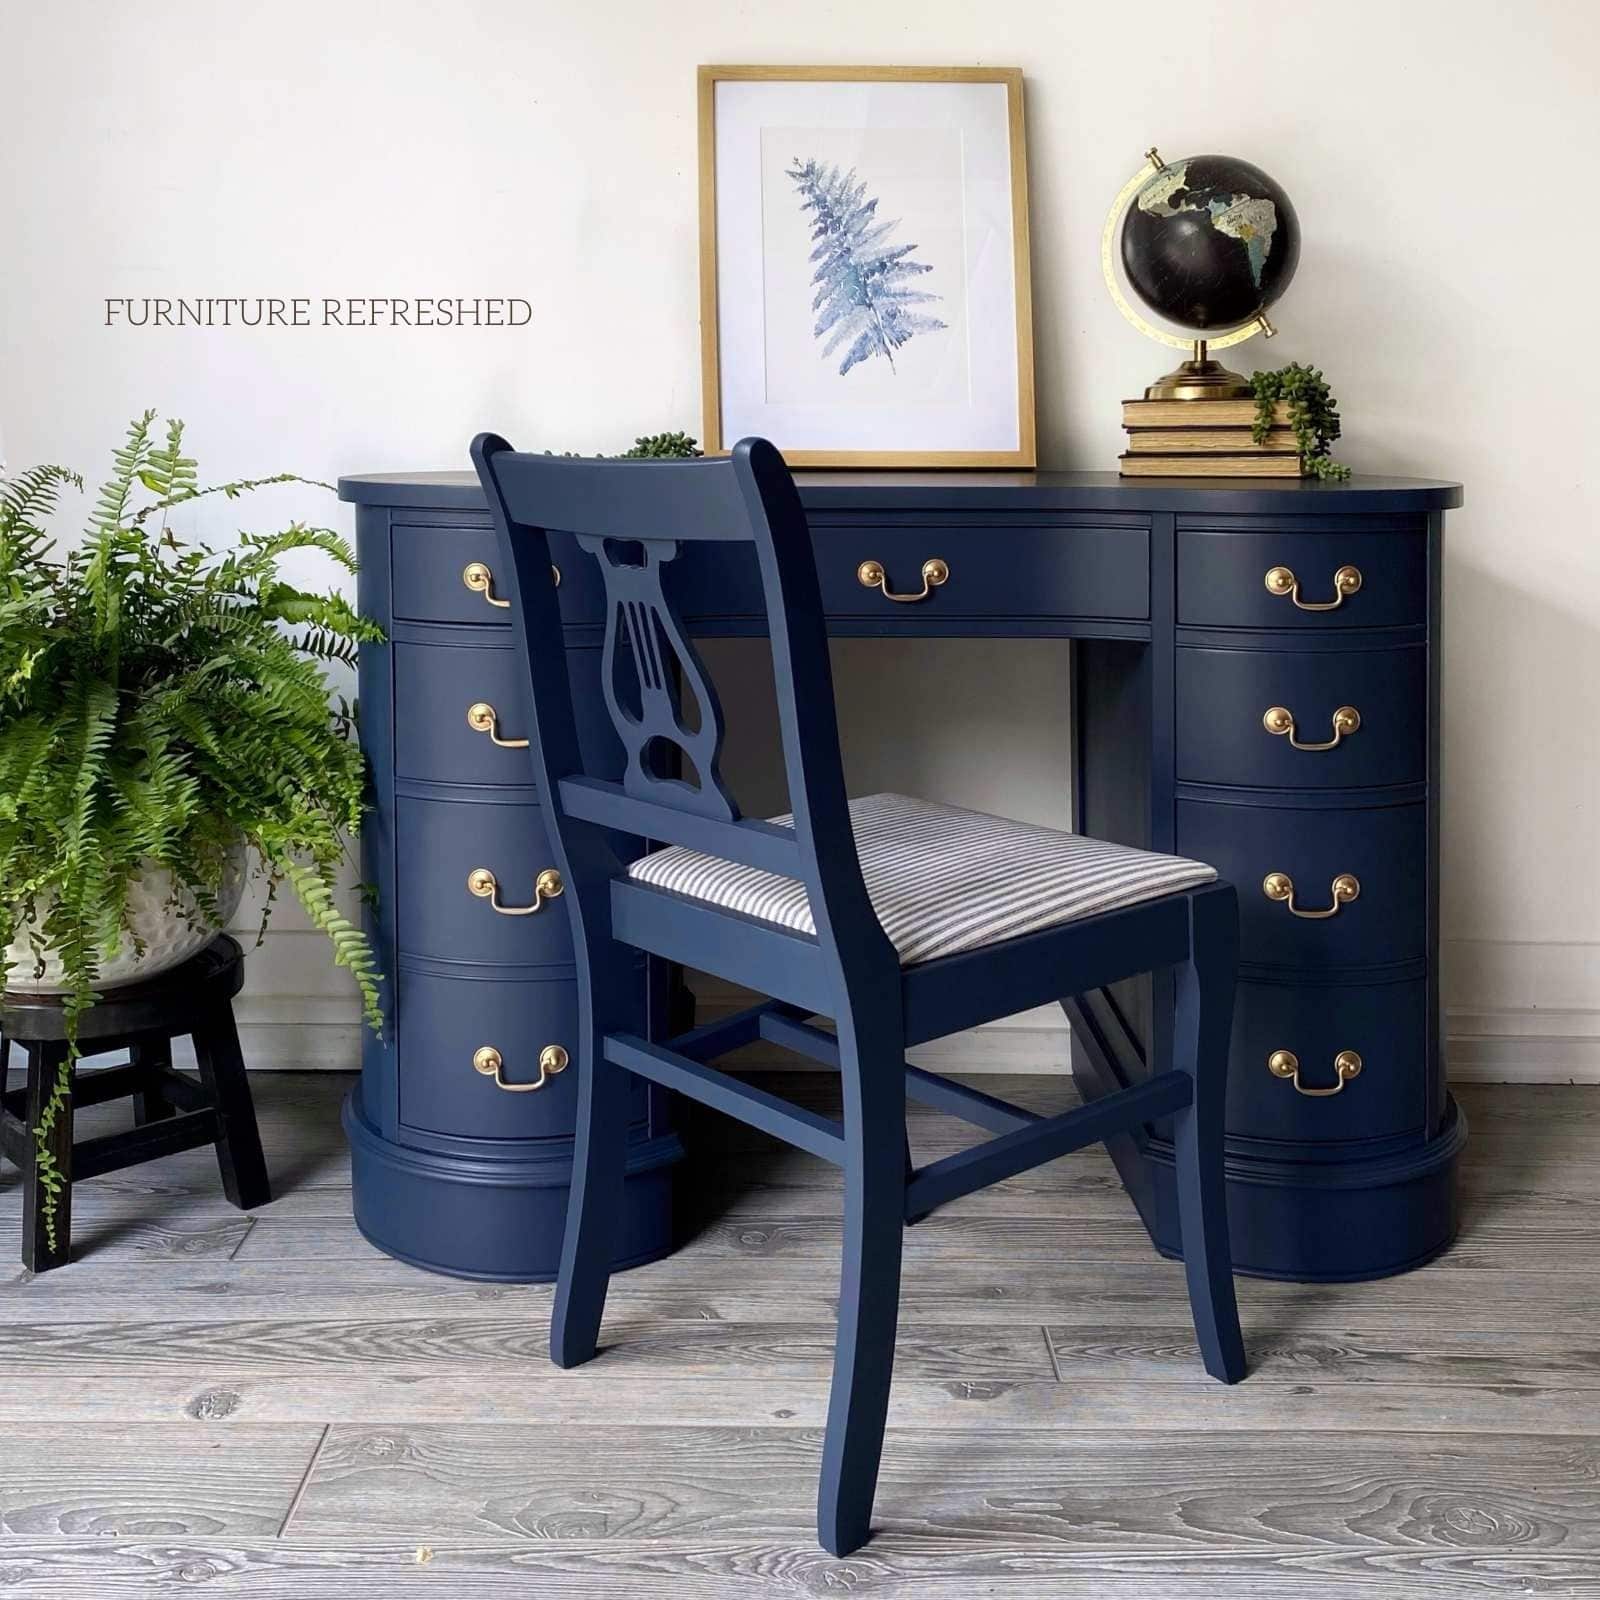
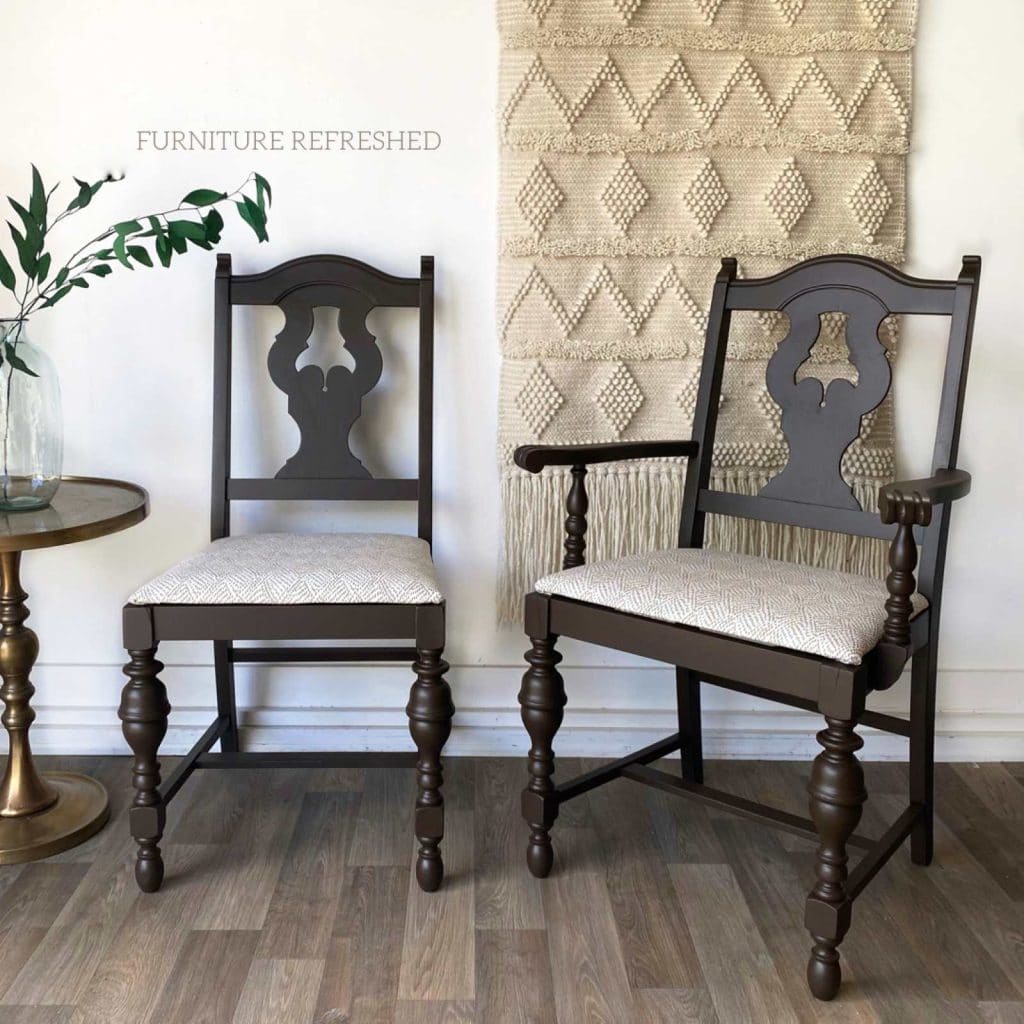
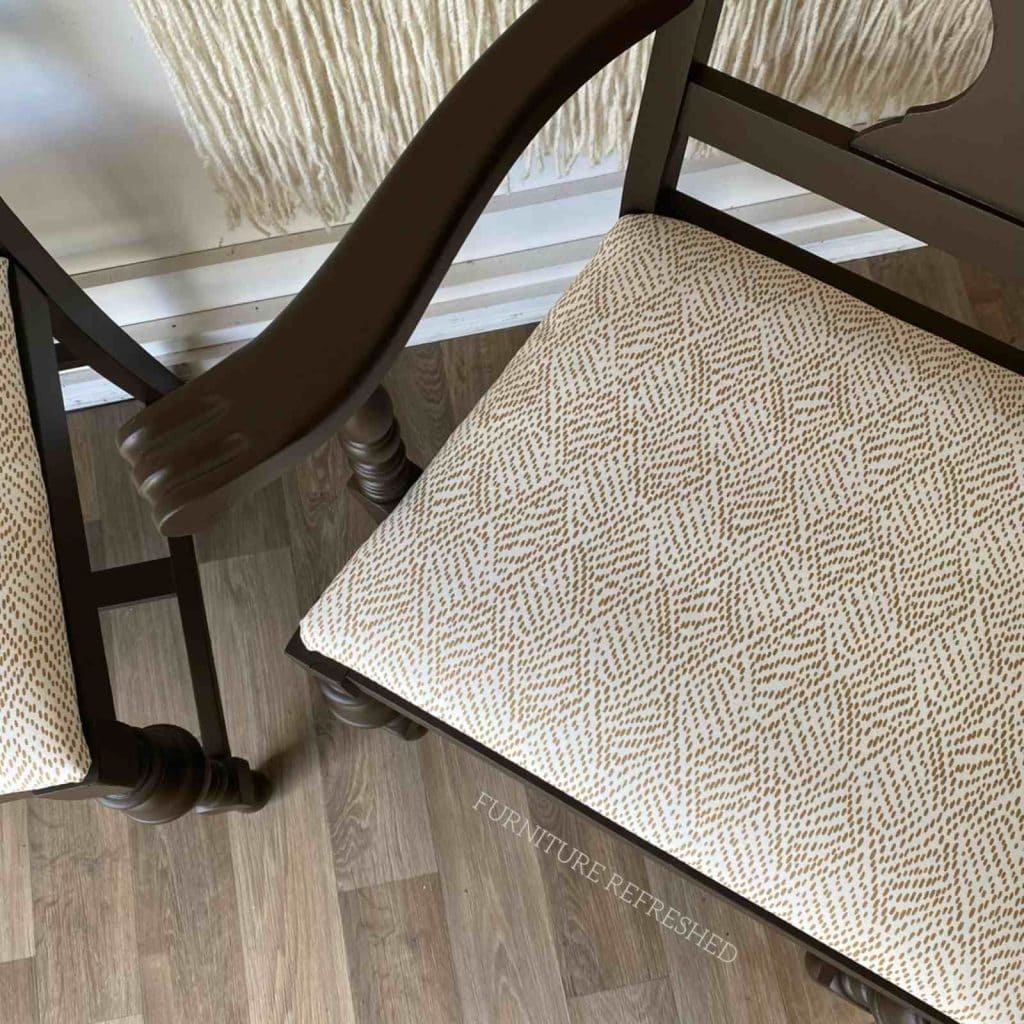
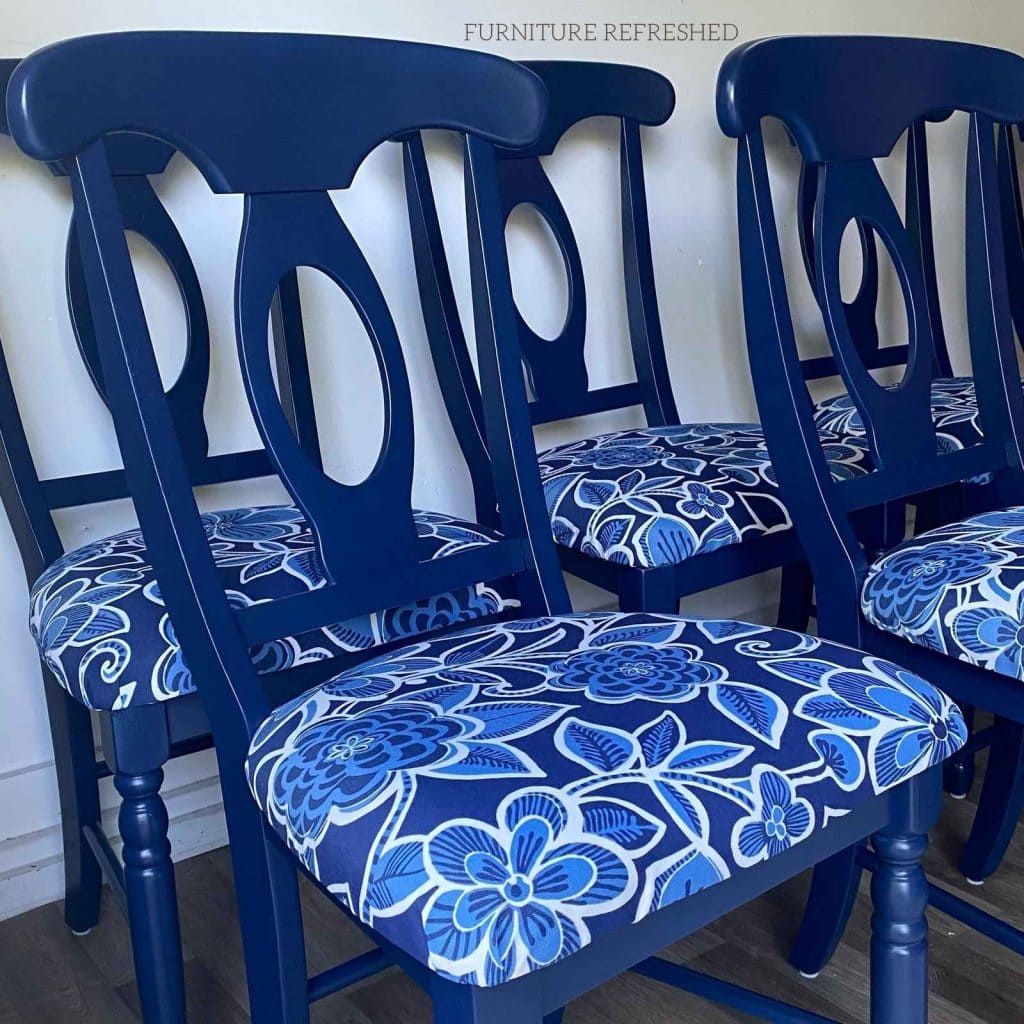
Other examples of reupholstered chair seats
I hope I’ve inspired you to try something similar, let me know your thoughts or questions in the comments below. Want to learn about all things furniture? Make sure to sign up for my newsletter for more!