

DIY Faux Marble Countertops

I love the look of Carrera marble! But let’s be honest, it’s expensive and high maintenance. But there are other alternatives out there. You can pay significant money for engineered countertops (like quartz), or if you want something even more budget-friendly, you can DIY it. I decided to give DIY faux marble countertops a try, and I absolutely loved the end result! This step-by-step tutorial teaches you how to make your counters look like marble.
The project
When we redid our primary bathroom several years ago, we decided to use an engineered quartz that looks like marble on our main vanity. In the closet that is right off the bathroom, we have a second, smaller vanity that was original to the house (circa 1970). When we did the renovation, we removed the dated Formica top and just replaced it with a wood top, and I painted it white to coordinate with the bathroom. I couldn’t justify spending the money on a matching piece of quartz that would be sitting in a closet!
A note on product links
This post contains affiliate links, meaning I get a small commission on qualifying purchases.
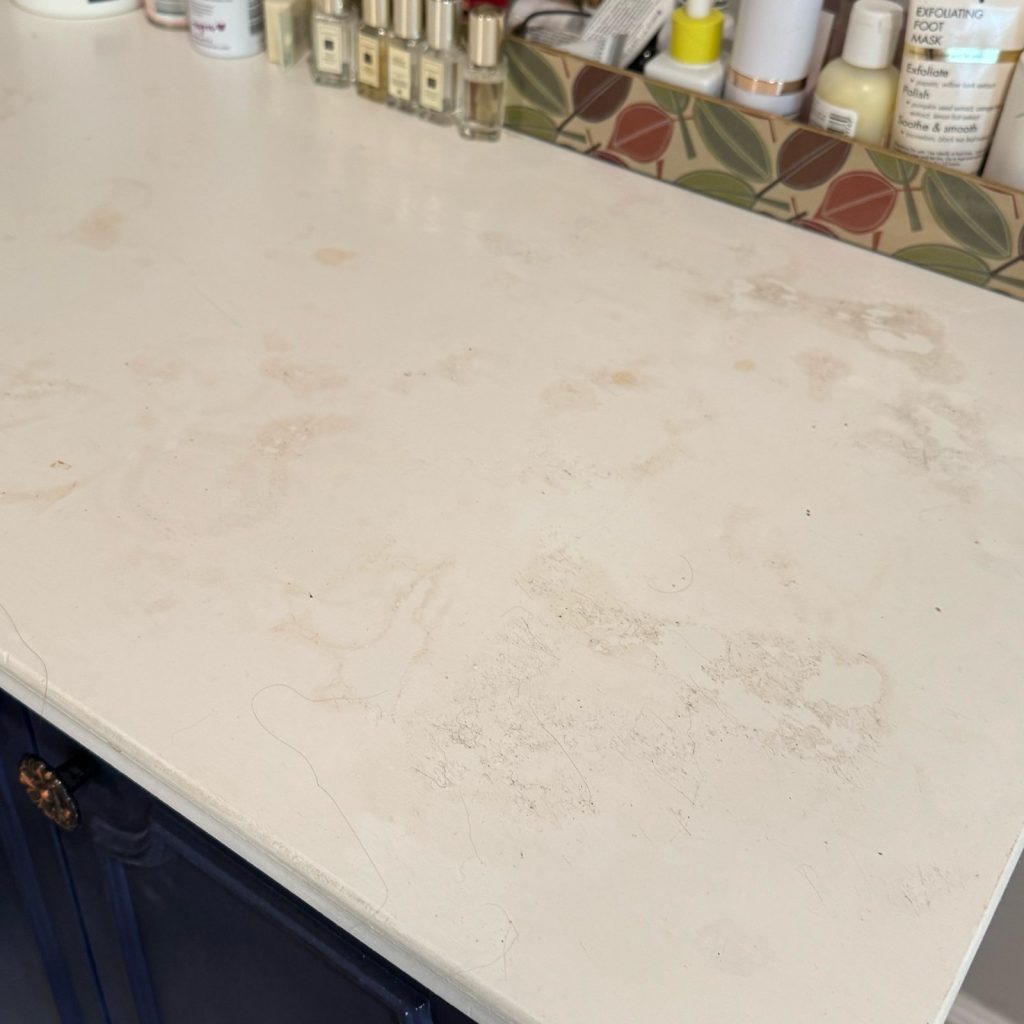
Unfortunately, the paint didn’t hold up all that well with the constant use of hair products and makeup, and it was time for a refresh. I wanted to try a faux marble painting technique on the top, but I needed something that was more durable than just paint. After a bit of research, I decided to try a DIY faux marble countertop kit by Gianni Marble. Keep reading to see how I did it.
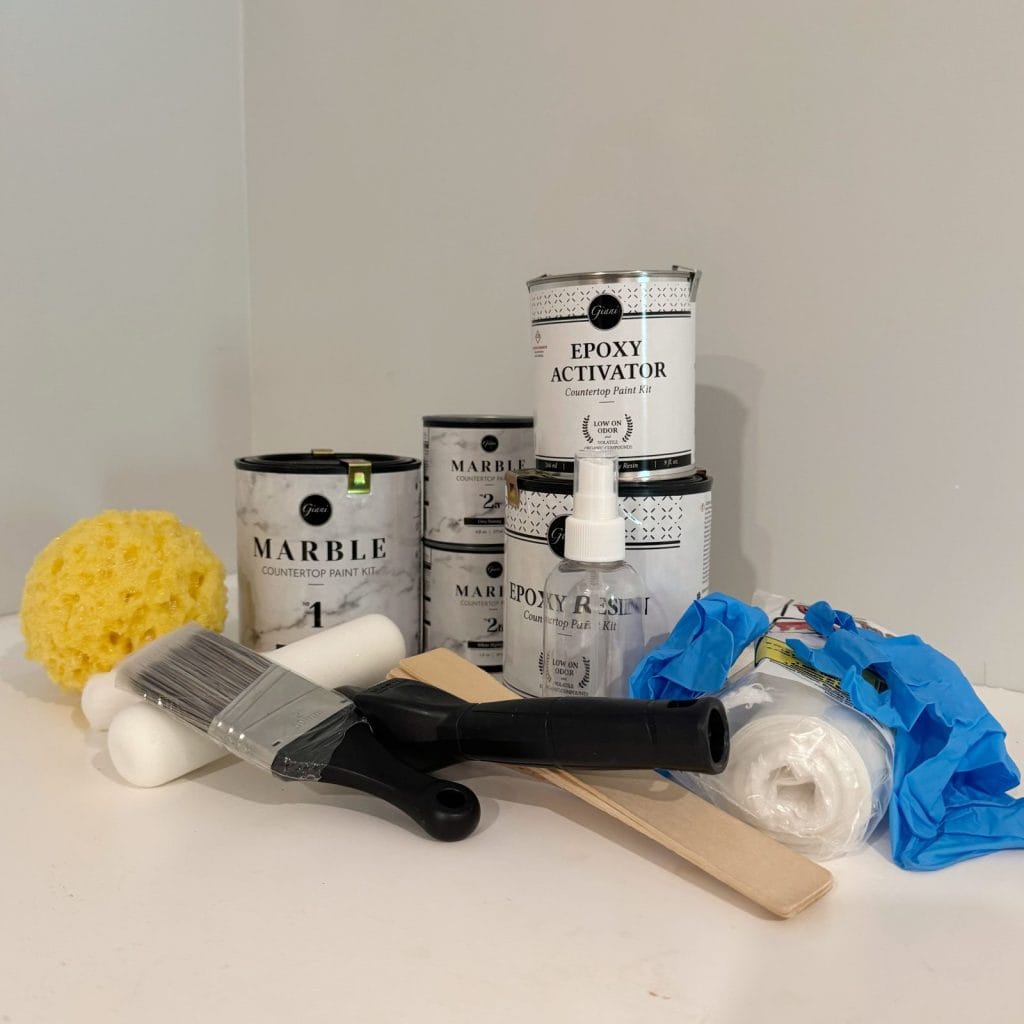
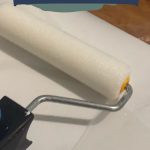
Supplies Needed
This kit includes almost everything you need! Just a few extra supplies are necessary to complete this project.
Steps for creating a faux marble countertop
Giani has great instructions for using their products. The written directions that came with the kit are very thorough, and they have some great instructional videos on their website as well. I will say that the process is relatively easy, with the most challenging part being the artistry of creating realistic-looking veins. The products themselves were easy to use!
Step 1: Clean and prep the surface

The prep for this project is fairly straightforward. The included directions focus on the prep of more traditional countertops and only call for cleaning with a Stotch Brite or SOS pad. Then rinse very well with water.
But because my surface was such a mess with the peeling paint, I wanted to sand all of that off. So after cleaning, I sanded well, and then cleaned again.
Once cleaned, I used the plastic drop cloths included in the kit and painters’ tape to tape off my work area. This is important, as the epoxy will drip over the edges and the end and get anywhere you have not taped off well!
Step 2: Apply white primer
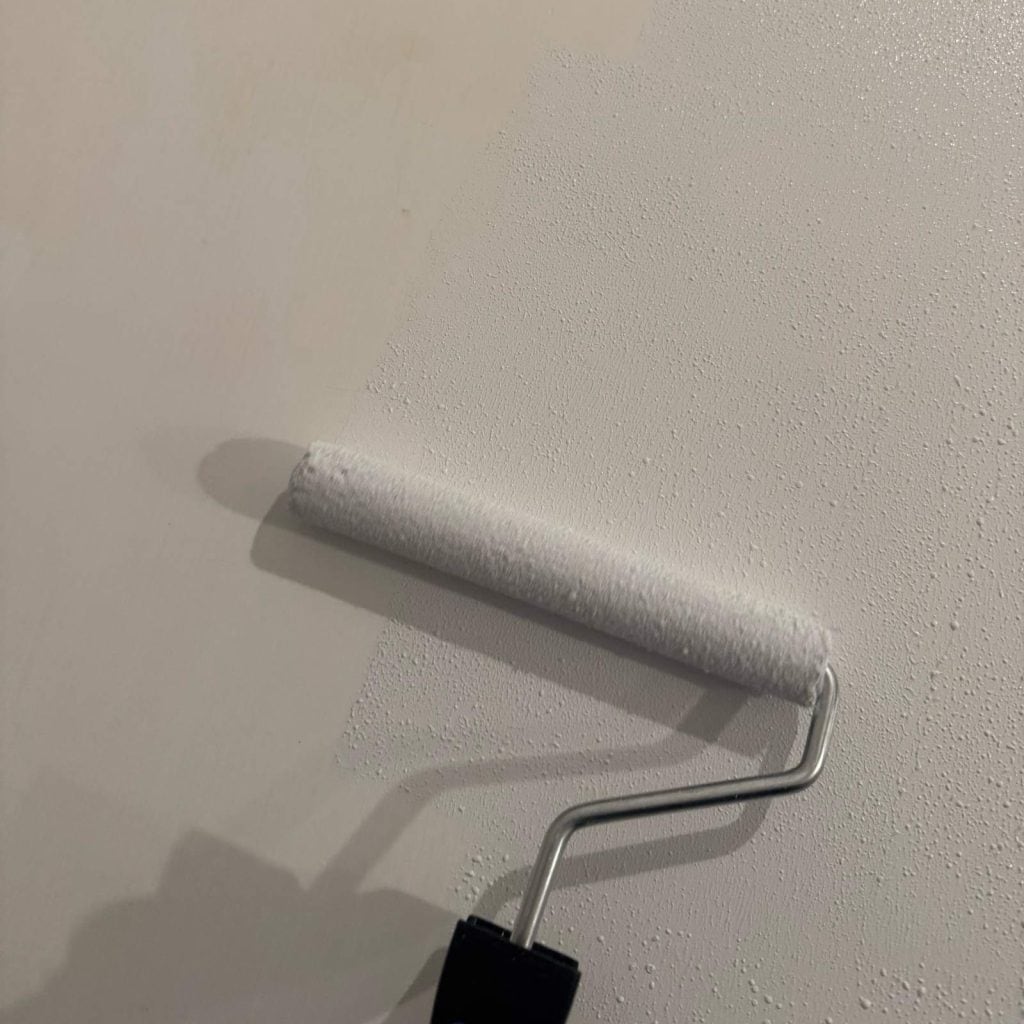
Using one of the included 2-inch brushes and the microfiber roller, I applied the primer on the top and sides of the countertop. I let it dry for an hour and then added a second coat. Becuase I started with a light base, two coats were all I needed. But if your surface is darker, you may need to add a third.
After your final coat, let the primer dry for at least 2 hours before moving on to the next step.
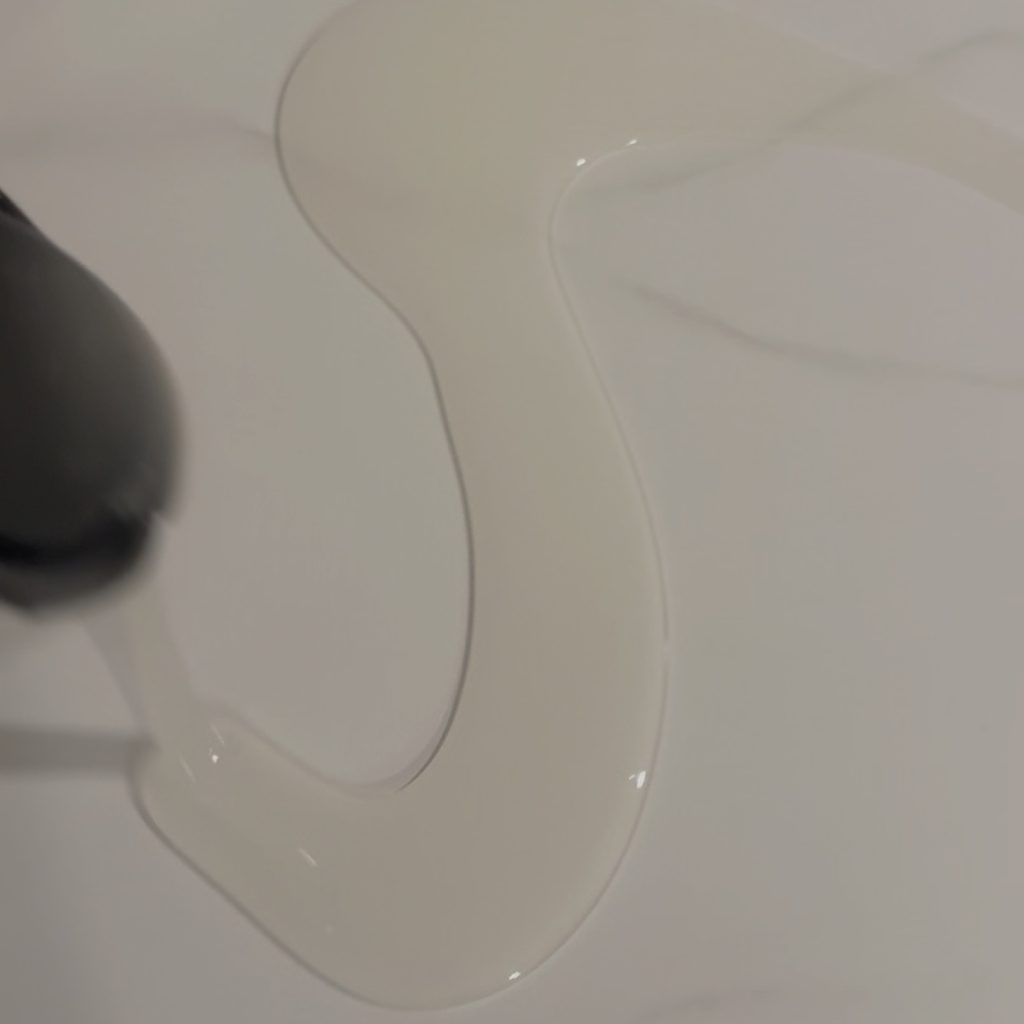
Step 3: Create marble veins
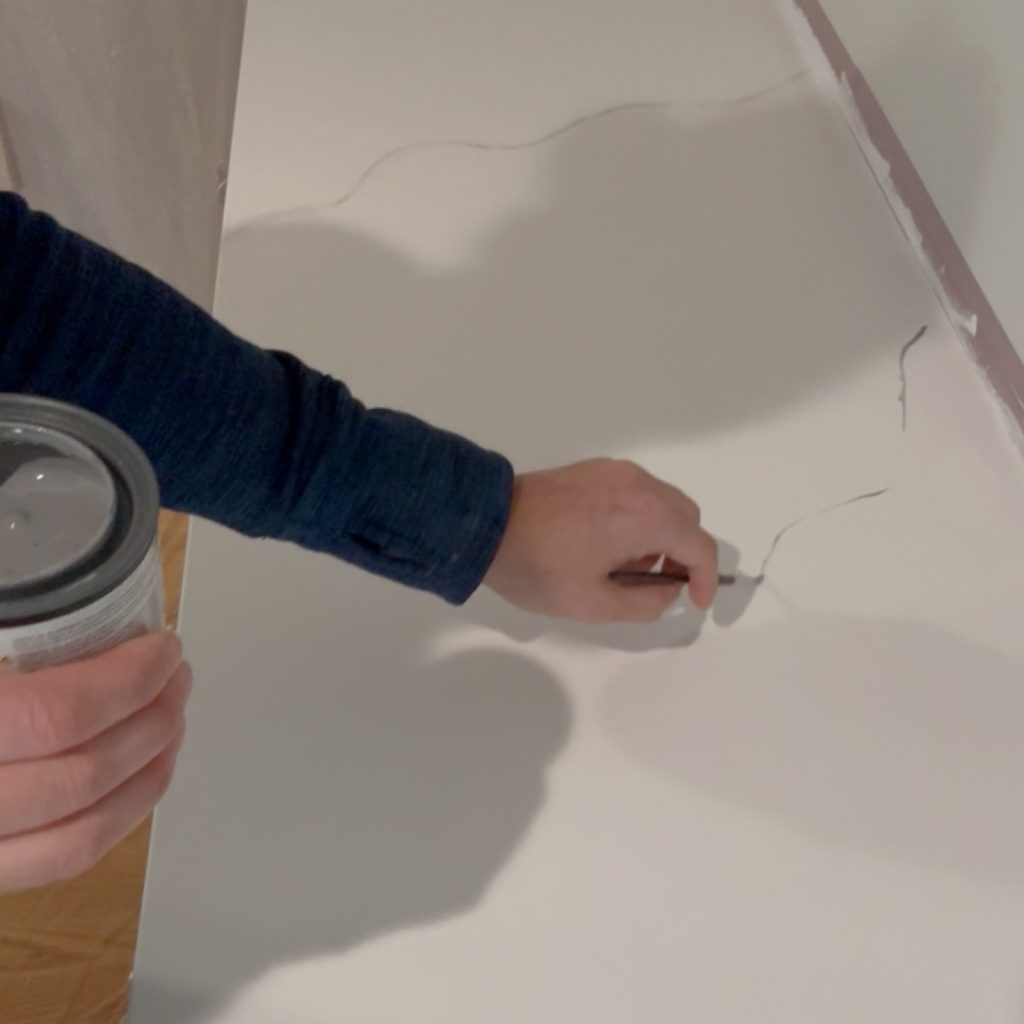
Now for the fun (and challenging!) part, creating the veins with the gray paint. Giani recommends practicing this first and even includes a small white sample board ot practice on. Use this to get your technique down! Then, plan out what you want your pattern to look like. I focused on the major veins first and then went back to add some more minor veins.. The instructions Giani provides have a lot of great information on vein patterns and how to mimic them with paint.
Would you like to save this?
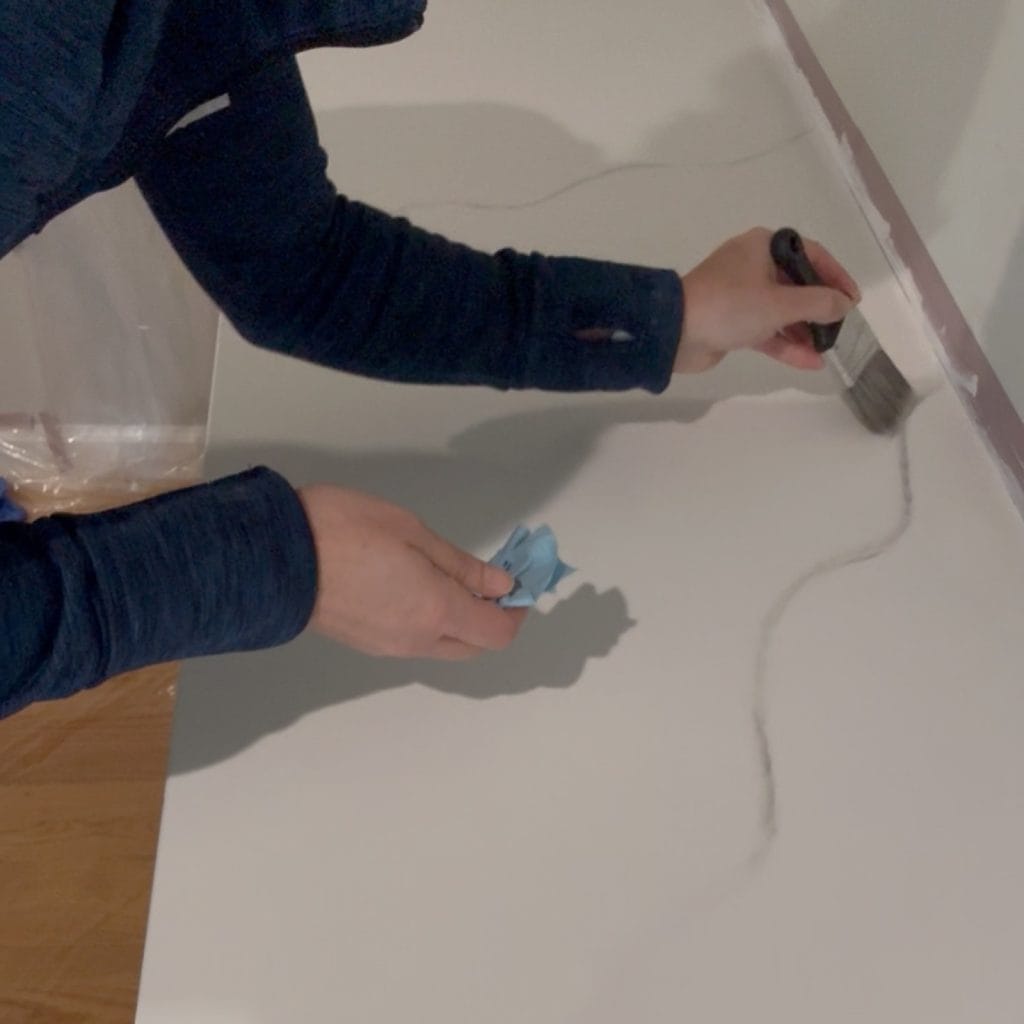
Start with the small artist’s brush, dip into your paint, and lightly drag across the surface, mimicking the natural look of marble. Try not to make it too straight or curvy. Working quickly, spritz the newly painted area with water and use the 2-inch brush to smudge and feather the paint line, making it look more natural. Work on one vein at a time. The instructions Giani provides have a lot of great information on vein patterns and how to mimic them with paint. After creating the major veins, go back and work on the minor ones.
The most helpful piece of advice I can give is to work on one vein at a time (in sections if necessary). If you don’t like a vein, it’s easy to redo it. As long as the paint hasn’t dried, it is easy to spray the whole line with water, wipe it away, and start over.
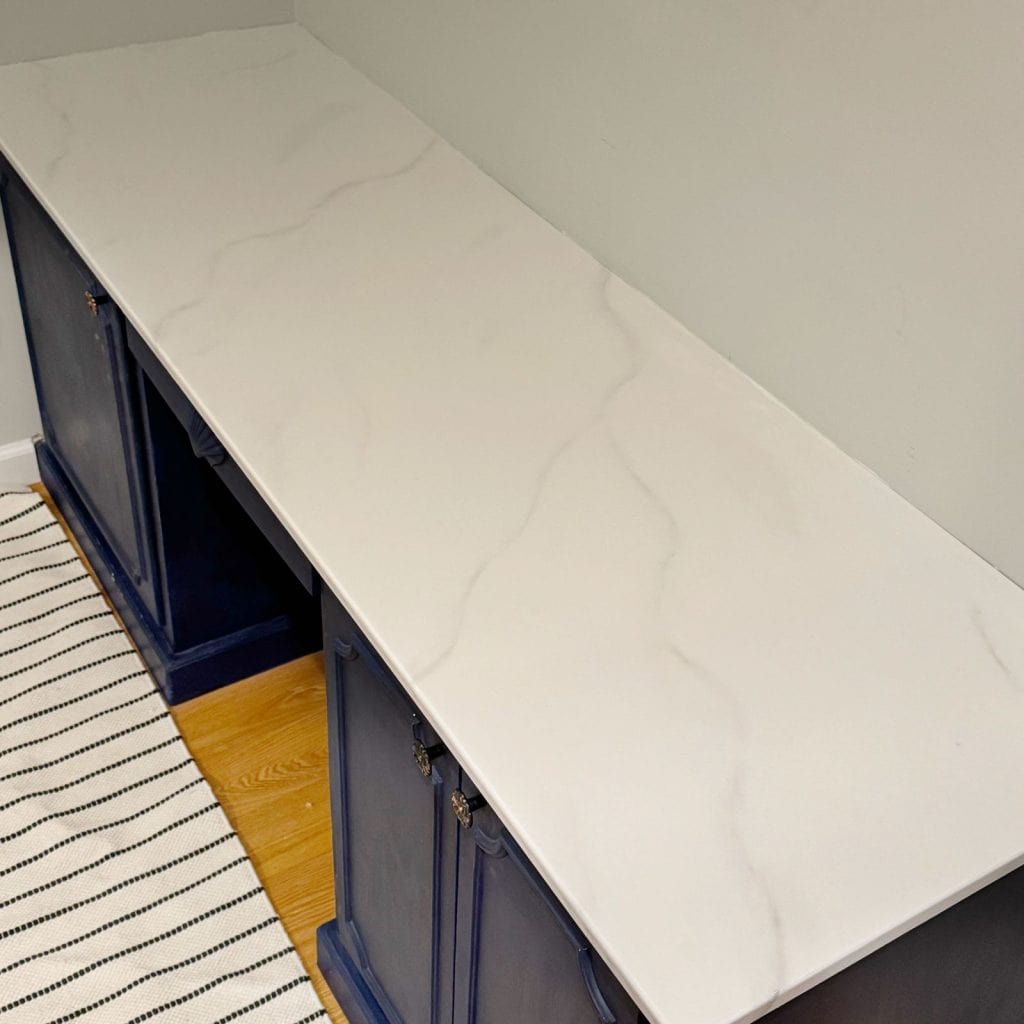
After the veins have been added and have dried, use the white highlight paint and the included sponge to add some extra interest to your veins. I found it helpful to have the regular brush on hand to smudge and feather some of the white paint as well.
Once you are satisfied with the faux marble look, let it dry for at least for hours before moving to the next step. I ended up letting it dry overnight, just because of timing.
Step 4: Seal with epoxy
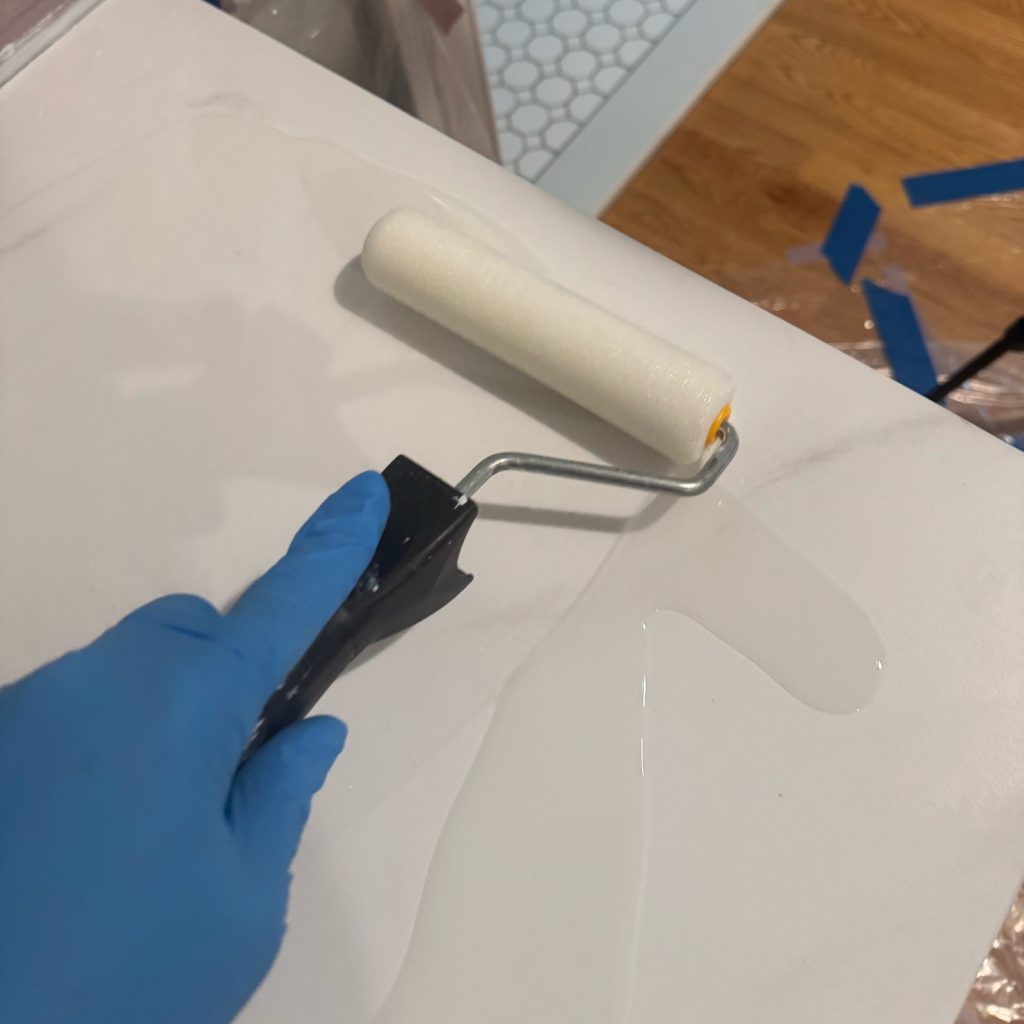
After letting the paint dry for at least four hours, it’s time to seal the countertop with epoxy. Following the kit’s instructions, combine the 2 parts of the epoxy and stir well for 3.5 minutes. Then I poured it onto the surface and used the foam roller to spread it evenly around. You can use a brush to make sure it gets all the way to the edges and sides. You want to use the roller to push the epoxy around gently, not firmly roll it all off!
The amount you use is important. Be sure to measure and use the amount of product that is recommended. Once you have it evenly spread, use tweezers to pop any air bubbles and remove any dust or other contaminants. It will self-level, just make sure you complete this step within 30 minutes or so.
Step 5: Dry time and cleanup
While it is tempting to walk away from it totally and let the epoxy dry, it is really important to come back between 1-2 hours after you’ve done the pour to remove the tape and plastic. If you do this too soon, it will make a mess as it hasn’t set up enough. If you wait too long, the epoxy will harden too much and make tape removal almost impossible.
Key takeaways/lessons learned
- Make sure you tape everywhere: The taping process is super important! As the epoxy levels, it will leak into any areas that are well taped off.
- Step back and look at your design often: I wish I did this more. I got to the very end and realized one of my major veins was wavier and not as realistic as I hoped. If I had stepped back and seen it earlier, it would have been an easy fix. But by the time I realized it, the paint had dried enough that my only real option was to re-prime the entire surface and start over (and I didn’t hate it enough to do that).
- Keep your area as dust-free as possible: They tell you this in the instructions, take it seriously! I had a few contaminants settle into my surface, and it was too late. They aren’t super noticeable, but they are there.
Summary
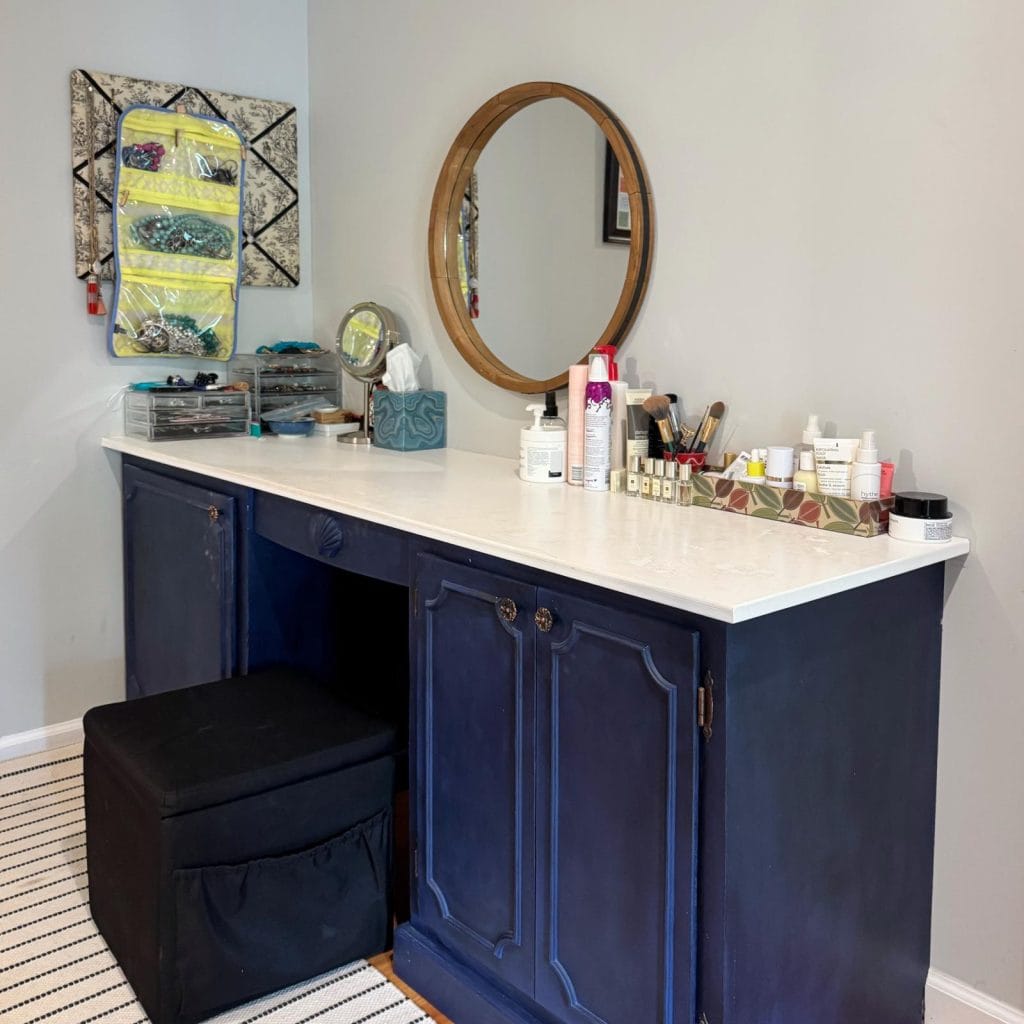
Painting a faux marble countertop is an affordable, satisfying way to get the high-end marble look without the cost or upkeep. The Giani Marble kit was easy to use and gave beautiful, durable results that completely transformed my vanity space. While I used this on a smaller project, I think it would be great in a kitchen! And you could even add that marble look to any piece of furniture!