

How to Add Cane to Cabinet Doors: A DIY Tutorial


Adding cane webbing to furniture is one of my favorite ways to give a tired piece a fresh, custom look. It’s stylish and surprisingly beginner-friendly. Whether you’re updating a thrifted find or giving a new vibe to a piece you already own, adding cane to cabinet doors is a great way to add texture and charm. In this post, I’ll show you how to add cane webbing to cabinet doors using two simple techniques so you can find the method that works best for your project.
A note on product links
This post contains affiliate links, meaning I get a small commission on qualifying purchases, at no cost to you.
What is cane webbing?
Cane webbing is woven wicker material traditionally used for chair seats, but it can also be used as a design element in furniture. Adding cane to cabinet doors is a great way to add texture and interest to a piece. I’ve purchased from several places over the years, but my favorite is www.caneandbasket.com. Their cane is high quality, they have a great selection of varying styles, and you can purchase the exact amount that you need.
Supplies Needed
Steps for Adding Cane Webbing to Doors
For this tutorial, I decided to highlight two makeovers where I used two different techniques to add the cane webbing. As with many things furniture DIY, there is no one right way to do things! Often the furniture dictates what may work best, and in this case, it is the style of the doors.
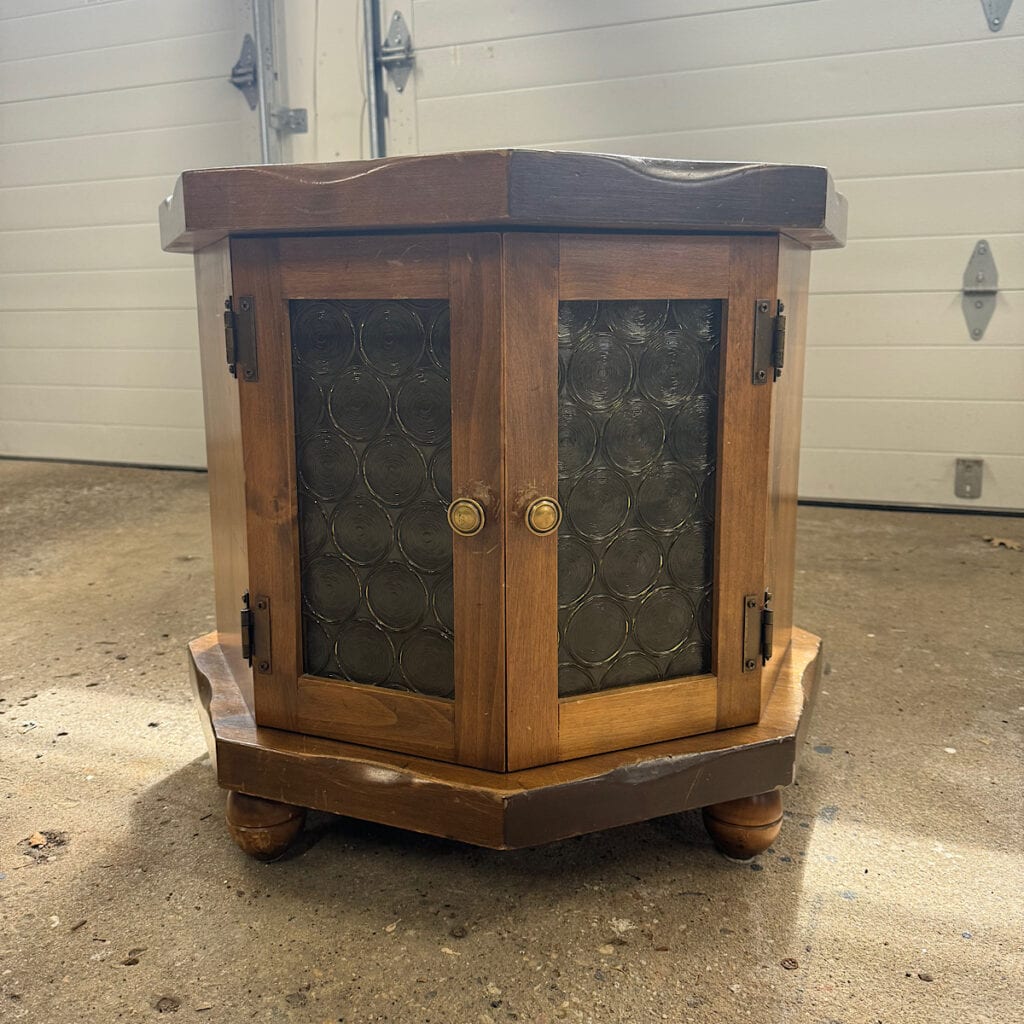
- Small Side Table Makeover: Removing the panel from the door. The doors had a glass panel in them that I wanted to take out and REPLACE with cane webbing.
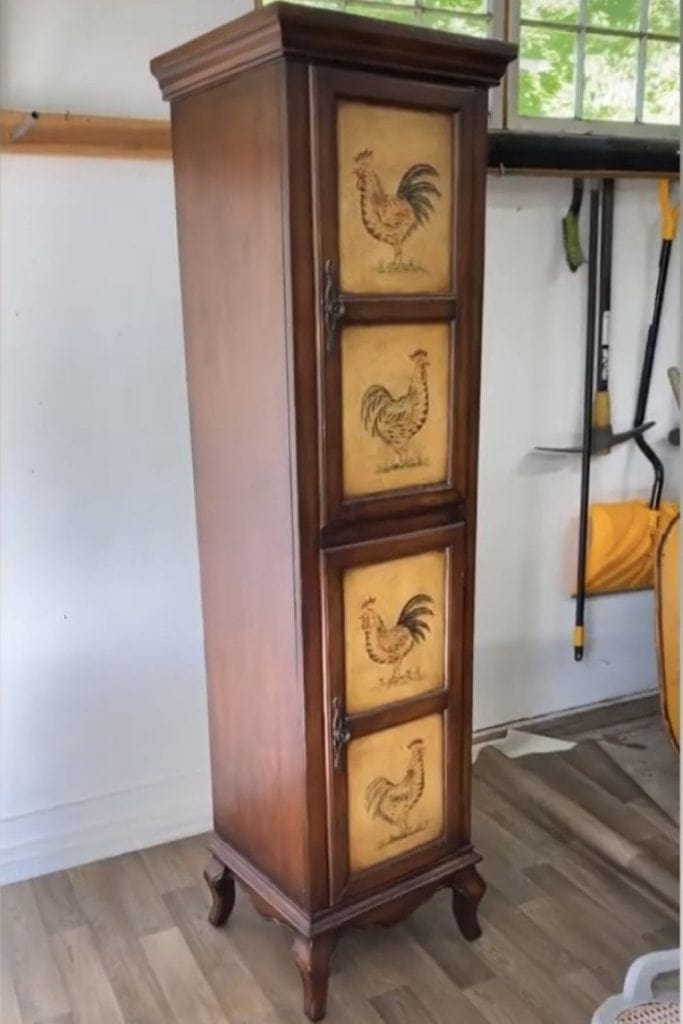
- Tall Cabinet Makeover: Keeping the existing panel on the door. The wood panel is not easy to remove, so I decided to apply the cane webbing OVER an existing door and then add some trim on top of that.
Step 1: Remove and prepare cabinet doors
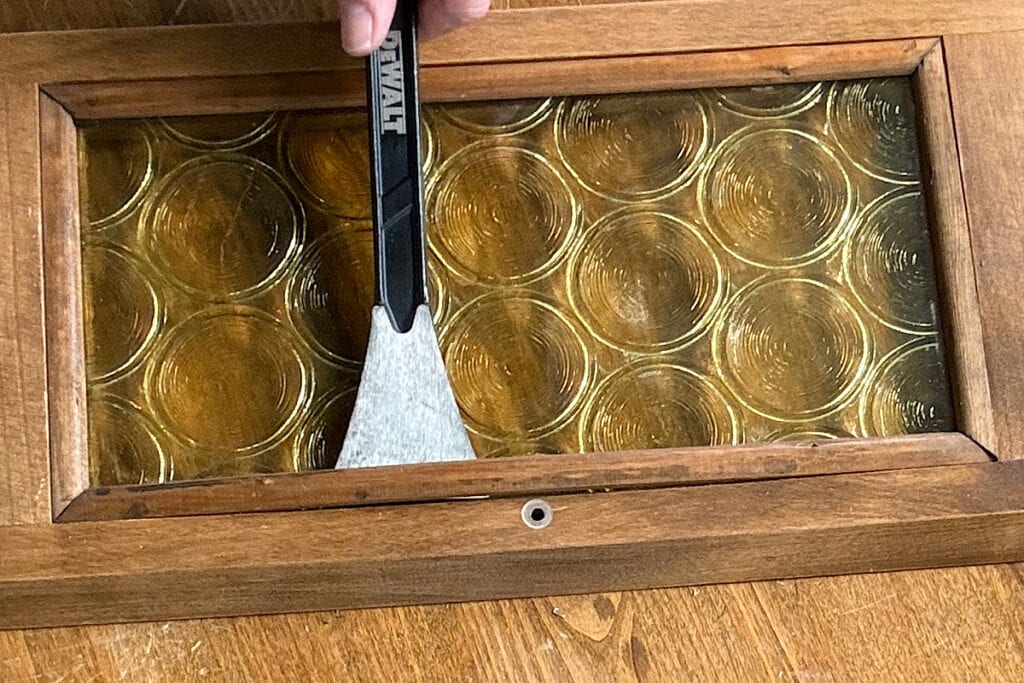
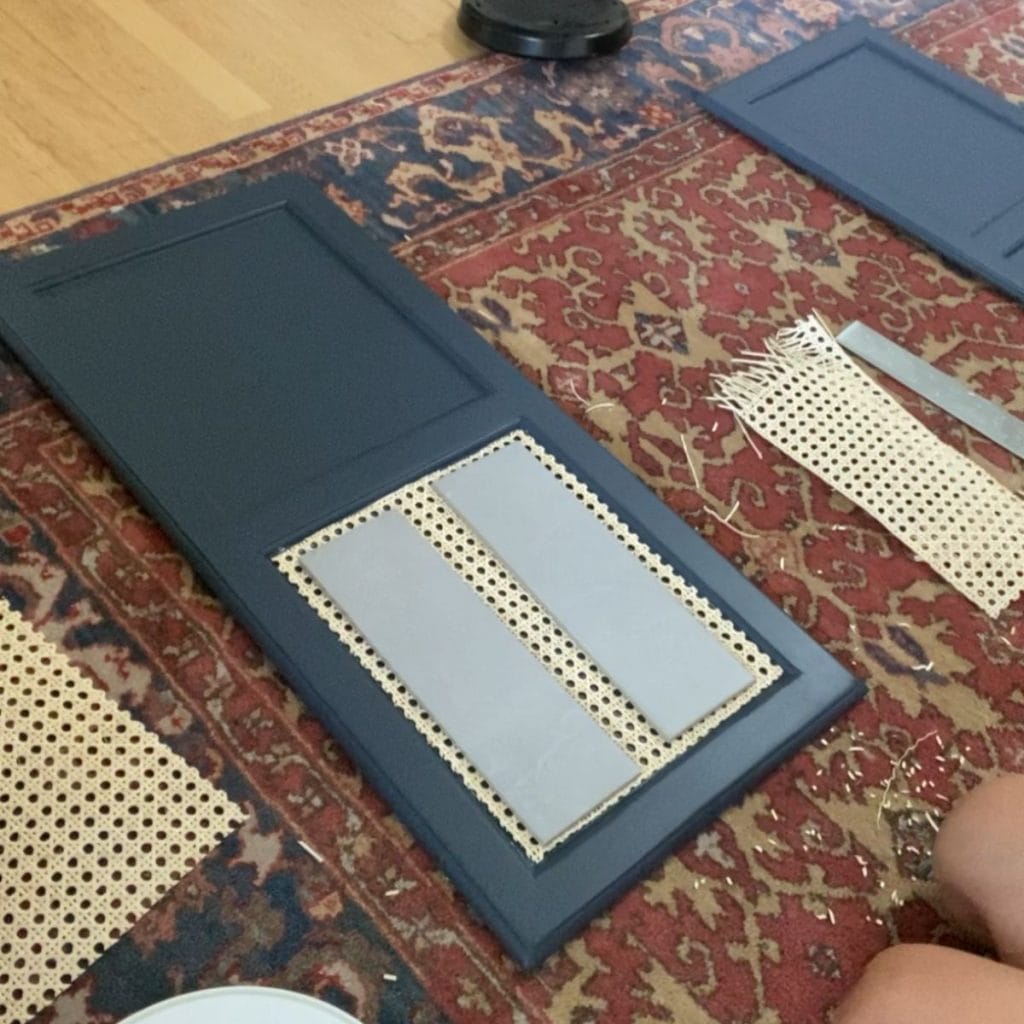
- Small Side Table Makeover: To make working on the doors easier, I removed them from the side table first. The glass was held in place by small wood strips on the back of the doors, so using a small crowbar, I gently pried the wood strips off and removed the glass. Save the strips for later, as you’ll want to paint them and reinstall them over the cane webbing. If they break (they can be fragile), you can always find some small trim pieces at a lumber or hardware store and cut them to size.
- Tall Cabinet Makeover: Again, I started by removing the doors. Then I cut some small trim pieces I had on hand (available at lumber/hardware/big box stores). Using this trim cutter makes it so easy to get a clean 45-degree cut.
Step 2: Soak the cane webbing
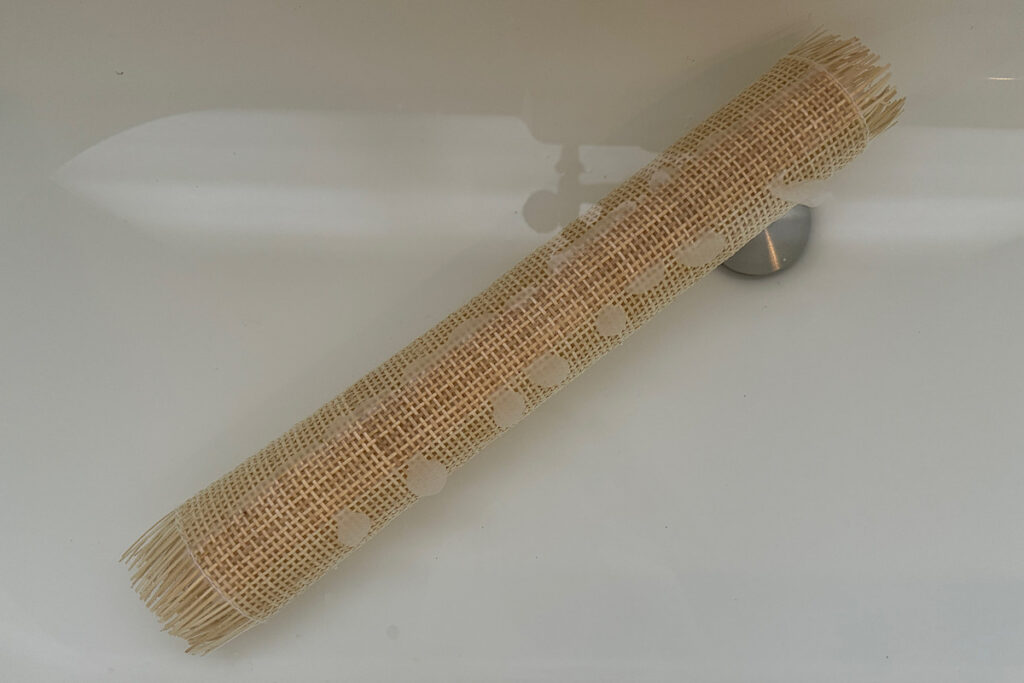
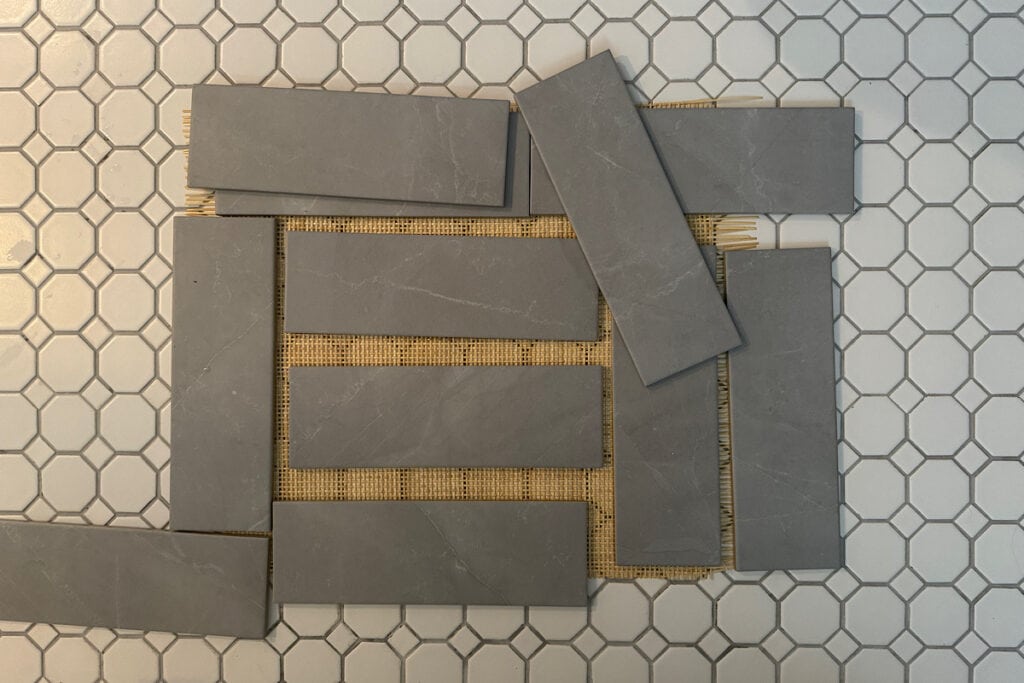
When purchased, the cane webbing comes in a roll, which needs to be flattened. To do this, soak in water for several hours, then lay flat (with some weights) until dry. I use extra bathroom tiles I have lying around as weights – anything that you don’t mind getting wet will work.
Step 3: Prep and paint the piece
While the cane is drying, you can move on to prepping and painting the rest of the piece, including the doors and trim pieces you have removed. I cleaned and scuff-sanded all of the wood parts to prepare them for paint.
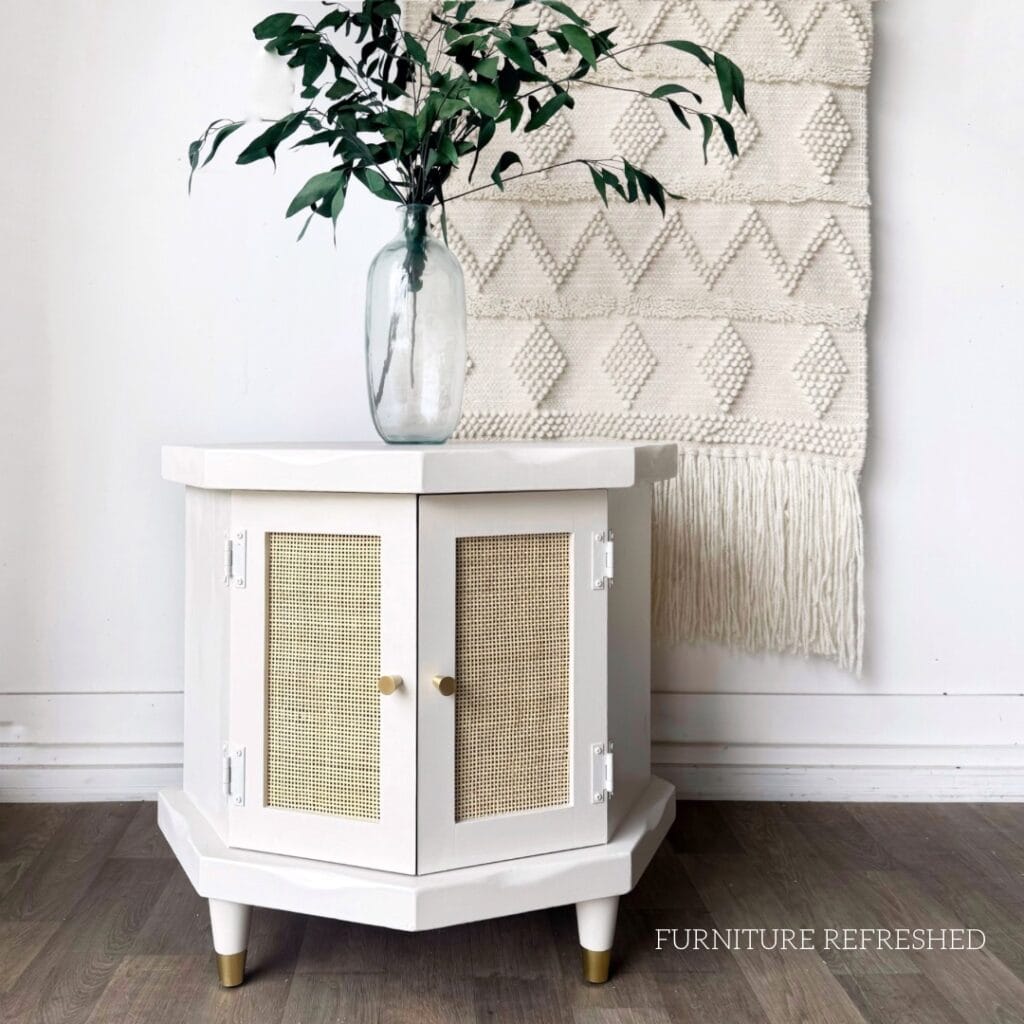
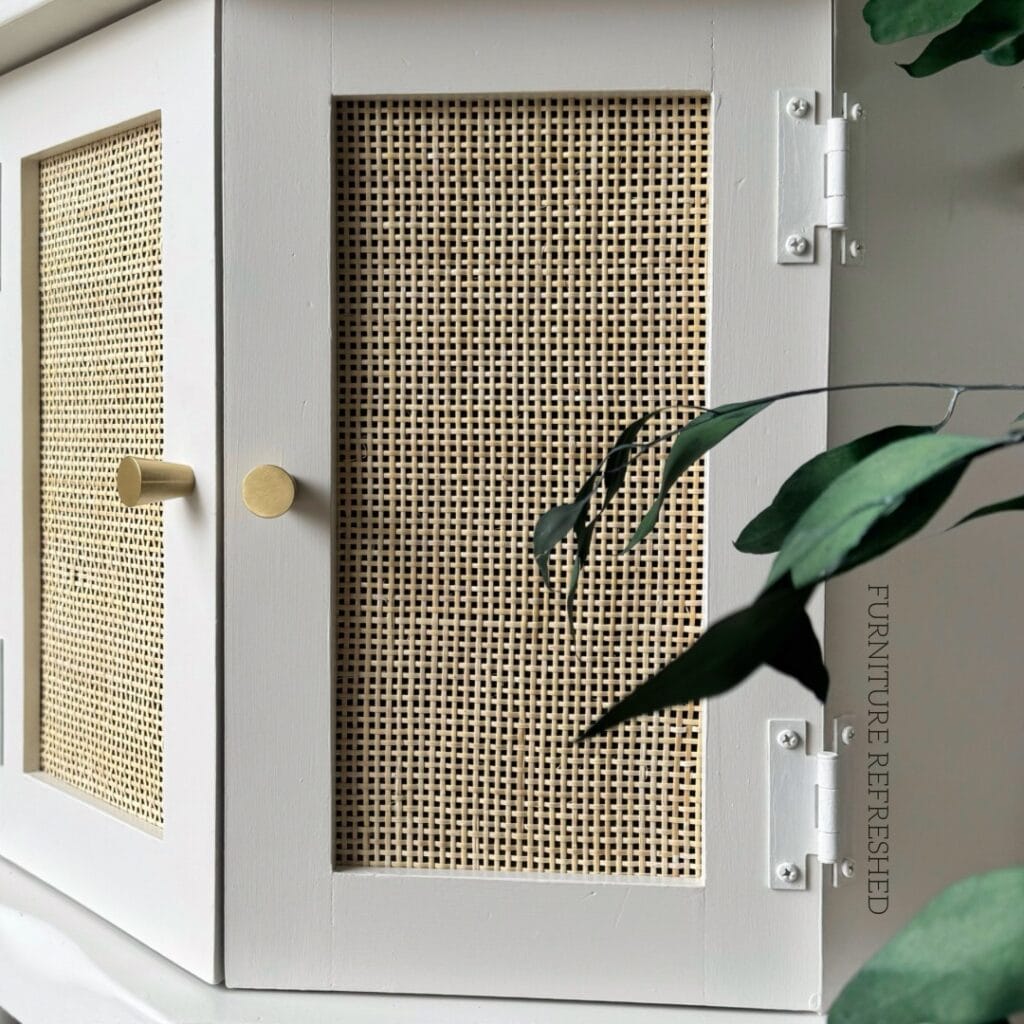
- Small Side Table Makeover: The first project, the small side table, was primed with a white stain-blocking primer and painted in the color Paperie White by Melange Paints. I think color is the perfect light-toned neutral to complement the natural look of the cane.
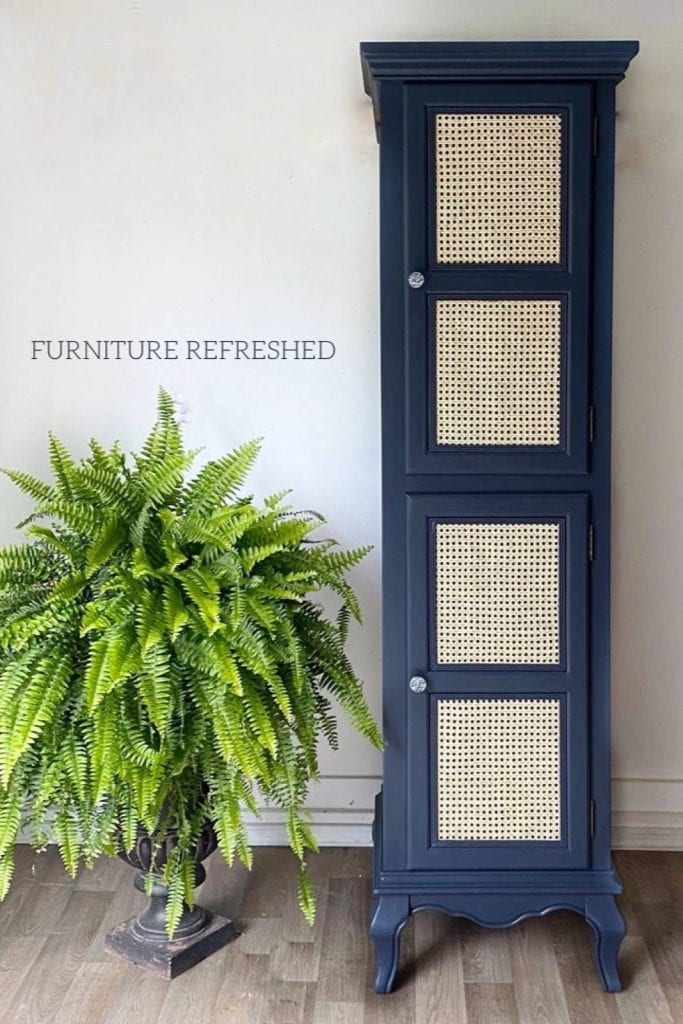
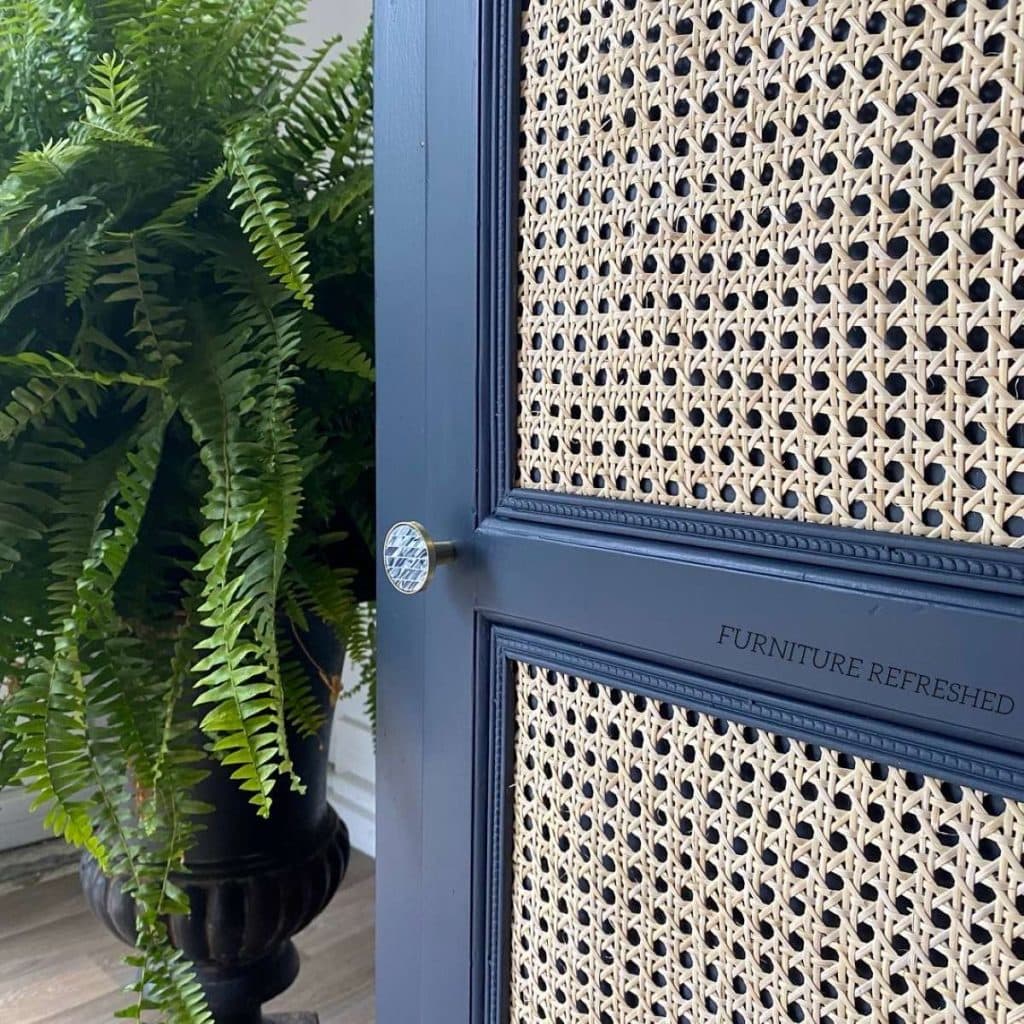
- Tall Cabinet Makeover: The second project, the tall cabinet, was primed with a clear bonding primer and painted in Fathom Blue by Melange Paints. This navy contrasts beautifully with the cane and really makes it pop!
Want to give Melange a try?
Melange Paints has been gracious enough to offer an affiliate discount code for my readers! Simply use the code FRESH10 at checkout for a 10% discount sitewide.
Would you like to save this?
Step 4: Cut the cane webbing
Next, I measured the cane and using scissors, cut it to size.
Step 5: Install the cane into cabinet doors
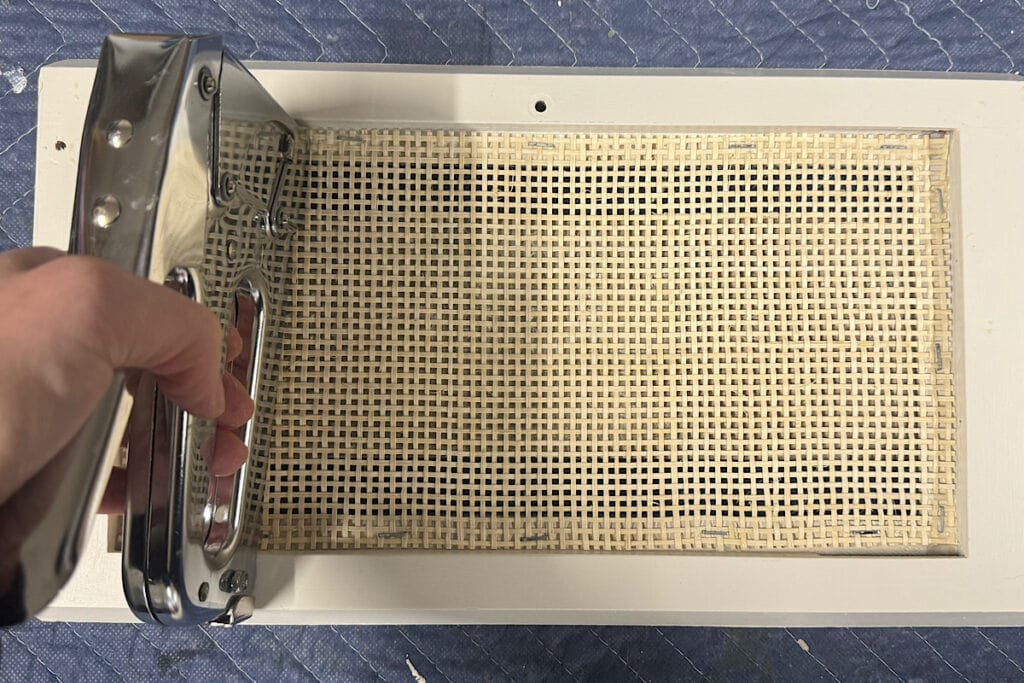
- Small Side Table Makeover: To install the caning, simply add a thin line of wood glue to the inside of the back of the frame, lay the caning inside, and then secure it with a staple gun. After the glue dried, I added the trim work back on top and secured it with small nails. Touch up the trim as necessary.
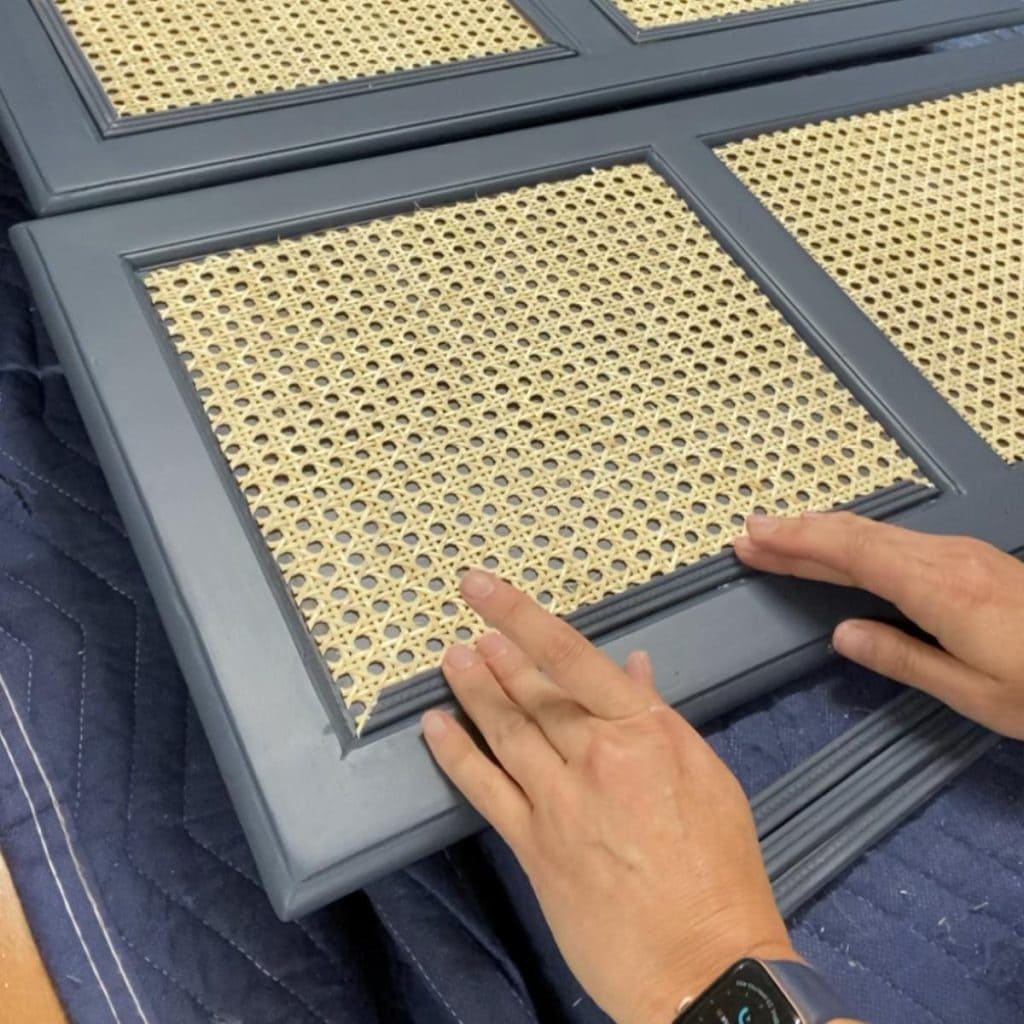
- Tall Cabinet Makeover: To install the caning, I used a chip brush to apply wood glue to the back of the caning. Then I added some additional glue around the paneled edge of the door. I placed the cane into the paneled area and weighted it down with tiles until it dried. Then I replaced the trim pieces and touched up the paint as necessary.
Other makeover details
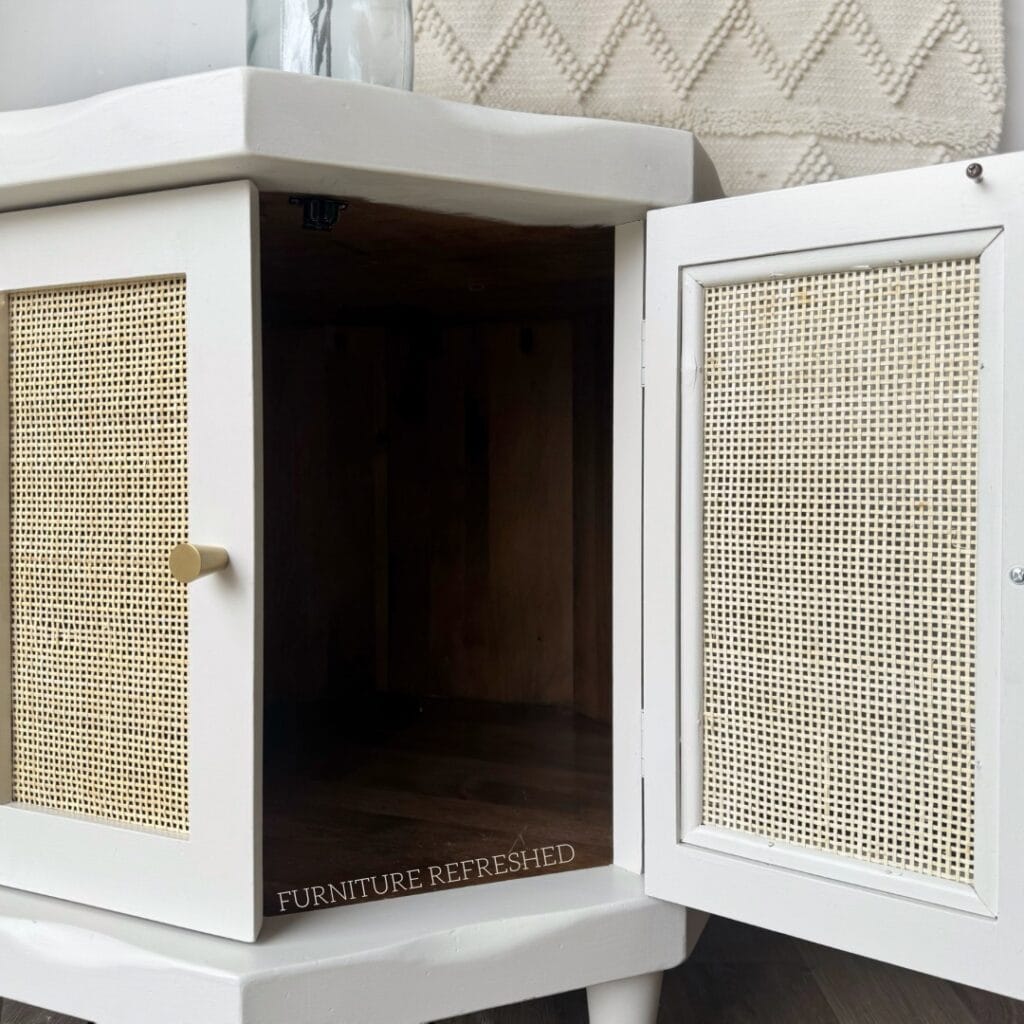
- Small Side Table Makeover: To complete this makeover, there were two more details that I changed from the dated original – feet and hardware. In this case, I was able to remove the existing feet and replace them with these (which I painted to match the table). And I found this hardware to complement the feet. And that’s it! A whole new look for the dated cabinet.
- Tall Cabinet Makeover: The only additional thing I changed on the cabinet was the hardware. I used some knobs that I had in my stash (I think I purchased them from HomeGoods years ago).
Summary
Adding cane webbing to cabinet doors is a great way to refresh old furniture and add beautiful texture to your space. With a few basic tools and a little patience, this is a project most DIYers can tackle in a weekend. I hope these examples give you the confidence to try it yourself! As always, if you have questions or need help deciding which method to use, feel free to drop them in the comments. I’m happy to help!
You might also like:
- How to Paint Furniture
- Using Paintable Wallpaper on Furniture
- Furniture Painting Ideas: How to Add Character
As always, please let me know if you have any questions. Want to learn more about all things furniture? Make sure to sign up for my newsletter to get the latest updates and exclusive content.
New to furniture painting?
Get my FREE Beginner’s Guide to Painting Furniture! This guide walks through the steps of a furniture painting makeover and includes a downloadable project planner and supply checklist.